
Simple Inexpensive DIY Air Return Cover
The best solution for reducing airborne particles and allergens in your home + how to make a pretty air vent cover.
There are two huge lessons I’ve learned about living in a house that’s older than I am:
1. The most random things will break from wear and tear when you least expect it (and often on holidays).
2. Dust and funky old smells operate at a whole different level.
We might as well start naming our dust bunnies and calling them our pets.

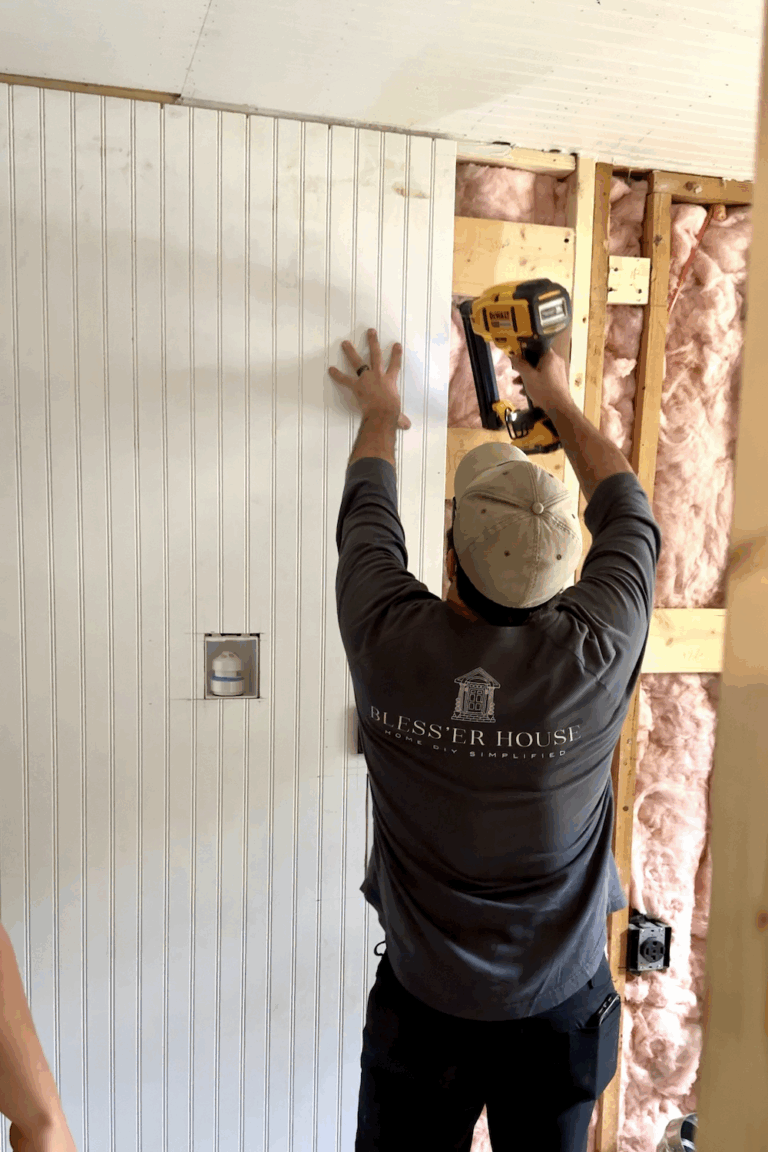
This one air return vent in particular has been the ultimate dust collector, and yesterday, I’d finally had enough. We ripped that sucker off the wall and decided to make a pretty vent cover in its place. (And re-do the command center and replace the air filter while we were at it too because if you give a mouse a cookie… you know the drill.)

The good news is that what is behind that vent cover can be prettied up just as easily.
Making the air return cover was so inexpensive and the perfect project for a beginner DIYer…
DIY Air Return Cover
Supplies
- 1×2 board(s)
- Miter saw
- Primer and paint of your choice
- Finishing nails
- Nailer or hammer
- Wood filler
- Medium grit sandpaper
- Decorative metal sheet
- Manual staple gun and staples
- Metal snips
- Command strips
Steps
1. Measure your existing air return cover to base the measurements for your new cover’s frame.
2. Mark the measurements on your 1×2 board and cut at 45 degree angles on the miter saw.

3. Join together the ends of the boards with finishing nails for the corners.
4. Fill the cracks at the corners with wood filler and let dry. Then sand smooth.
5. Prime and paint the wood frame.

6. Using the vent frame as a guide, mark on the decorative metal sheet where to cut with wire snips.

7. Attach the metal sheet to the back of the frame with staples.

8. And attach your new air return cover to the wall with Command velcro strips so you can still access your filter later as needed.

So much better!

Command Center Wall Decorating Tips
As for this command center wall, what do you think?! Better than before?
You can see more family Command Center decorating ideas here. Our family’s entire life revolves around this spot in the house to help us organize to-do lists, schedules, mail, everything.
Do you remember when it looked like this 3 years ago?

Our kitchen still needs a lot of love until a big reno can happen, but this one spot is already improving our lives so much.


If you want more ideas for ways to “pretty up” the eyesores in your home, you can see a big list here.
And if you want to save this post for later, you can pin it here:


I have a very large (22.5” x 43”). I’ve looked on Amazon but can’t find a large enough size of sheet metal. Any other ideas of where to look?
Hi, Leah. You may want to try HomeDepot, Lowe’s or your local hardware store.
Thank you! I have everything else needed in my garage (leftovers from other projects) so this cost me $48 instead of $300+ I saw online for a decorative cover in the size I need.
Perfect!!
Perfect! I’m so glad it worked out!
Will you tell us more about where to get the items in your new command center? LOVE the planter hanger and the acrylic calendar!
Hi!! I have a post just on the command center. 🙂 https://www.blesserhouse.com/organized-command-center/
Hello, could you please tell me where the acrylic calendar is from? I read your other post but it was an older white board. Thanks!
Hi!! Is this the calendar you are looking for?
https://rstyle.me/cz-n/ekz2qfb5ky7
Looks amazing!! I live in a house that was built in 1905 that we have remodeled from top to bottom. I know about these smells you talk about!! Can you tell me where you got the hanging planters? It adds so much to that space! Thanks!