

Faux Rusted Vintage Scale Makeover
On today’s episode of fake it ’til you make it…
this cast off busted up thrift store kitchen scale.

And not the busted up that is charming in a vintage sort of way. It was straight up sad looking.
But since I’d been searching high and low for a reasonably priced vintage kitchen scale, I figured $5 was worth my while to try to turn it into something amazing. In the process, I figured out my new favorite way to give pretty much anything a faux rust finish. Woot woot!

This one came along just in time for our monthly Trash to Treasure Transformation Tuesday too. (You can check out all of my past T2T projects here.)

Supplies Used: (Affiliate links are provided below for convenience. For more information, see my full disclosure here.)
- Rustoleum Hammered Copper Spray Paint
- Folk Art Bark Brown Matte Acrylic Paint
- Waverly Chalk Paint in Elephant (Or any other paint color you’d prefer)
- Large craft brush
- And a stainless steel scale (Bonus if you find one for cheap at the thrift store)
In the end, my madeover scale cost me a total of about $16 as opposed to the $90+ vintage looking ones online. Um…wow. Even in antique stores, I somehow could never find one cheaper than $45.
I covered the face of it first with some tin foil and gave the entire thing a coat of the copper spray paint.

To add some dimension to the “rusty” layer, I dabbed on a coat of the Bark Brown.

I pounced my brush to give it some extra texture.

Once the brown layer was dry, I repeated the brush pouncing process with the Waverly Elephant gray paint. I left some of the brown showing to make it look like rust peeking through.

And that was pretty much it! It was actually a really quick and easy process except for waiting for the paint to dry in between.

I ended up removing the plastic face on the scale too and dry brushed it with a little of the brown to give it some age. And I painted the red dial with a bit of black acrylic paint.
Since the scale was missing the bowl piece when I bought it at the thrift store, I just used a plastic one I already had and used the same faux rust paint process on it. So this even works on plastic!
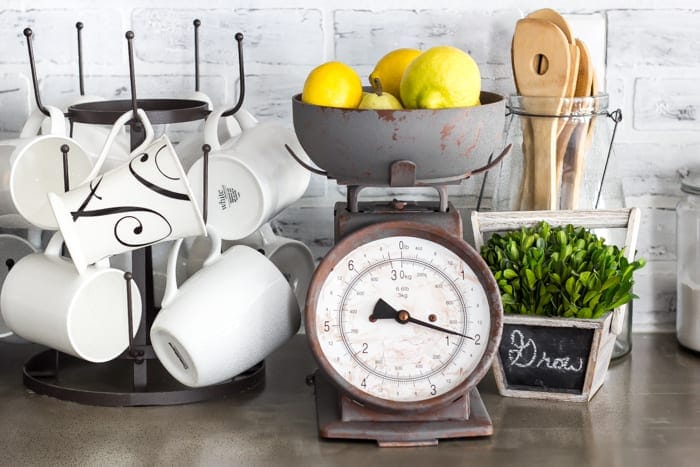
I’m so amazed how much it looks like the real rusted deal!

And now, even though it still looks shabby, at least it’s the good kind of shabby.

I’m way way too giddy about finally having one of these for our new kitchen (that is soooo close to being finished I can barely stand it)!

Pretty crazy, right? This little guy doesn’t even look like the same scale.

You can check out all of the other thrifty makeovers from my Trash to Treasure Transformation friends as well:

(Clockwise from top left): Artsy Chicks Rule | Confessions of a Serial DIYer
Prodigal Pieces | Girl in the Garage
If you ever feel like getting your fake on too, you can pin this post here:






I used to have an antique set of ceramic scales that I cherished but,alas, they are gone. Somehow, in their place, a vintage scale almost identical to yours showed up in my art room. I have no idea where it came from or how it ended up in my house but I like it. I’ve been struggling to come up with an idea of what I can do with it since it’s also missing the bowl. You have fixed that for me! Now I know how I want it to look, how to achieve that look and what to do about the missing bowl! Thank you! One question – did you apply a topcoat/sealant of any sort? Beautiful job!
I love your scale transformation! I let one go many years ago and have been looking for one again. It does look old and rusty. You have at least shown me what I can do if I find one like yours while out thrifting!! Thank you.
Oh my goodness, what a GREAT FIND! Seriously, 5 dollars?!
Right?! I couldn’t believe it either!
Wow, that is a great finish. I have an old military trunk that I can’t wait to try it on. Thanks for all the great ideas that you keep sharing.
Yay! Glad it could inspire you a little bit. Thank you, Pattie!
How did you get the plastic face off the front? I bought one at Walmart with the intention of using your technique, but I can’t figure out how to remove the front.
Oh you’re going to laugh. I just whacked that sucker with a blunt end of a screw driver and broke it off. Then I discovered that are two clips on the bottom of the the metal face part that holds the plastic face on. Too late for mine, but you could try taking it off that way.