

DIY Book Page Botanical Art
From the minute we finished our foyer shiplap wall, I was determined to smack some giant wall art up there. (That makes total sense, right? To cover part of the pretty wall you just put up, I know.)

But the usual problem came along. I’m not down with spending the going rate for oversized art. Even large picture frames alone cost a pretty penny. So it was the usual scene around here…the Shaver Three skipping off to Walmart.
And then we frolicked home with these happy finds:

I found these huge wooden poster frames for $25 each, knowing I wanted to give them the usual weathered treatment.
Supplies used: (Affiliate links are included below noted with asterisks. For more information, see my disclosure policy here.)
- 24″x36″ wood poster frame*
- White craft paint*
- Fiddes & Sons clear wax*
- A paint brush, chip brush, or wax brush
- A dry, clean lint-free rag
- A cup and spoon/stirer for mixing wax
- Spray adhesive – I used E6000*
- Scissors
- Audubon book- These are very similar to mine* (Update: Since this date’s original posting, this link has been corrected to the Birds of America edition. I’m so sorry for any inconvenience if any of you purchased the Audubon’s America one. All fixed now.)
- Jute burlap ribbon*
- School glue or Mod Podge*
The Steps:
I still wanted some of the wood finish peaking through on the frames, so I whipped up a batch of homemade liming wax. I just mixed 1 tablespoon of white paint with 3 tablespoons of clear soft wax in a cup for a minute or two until smooth.

I brushed it on pretty thick with a paint brush and used a clean lint-free rag to rub off only a little. You can control how much wood you want showing depending on how well you rub off the liming wax.

The whole process was done in a matter of minutes. Here’s a little side-by-side action:

I love that lime/drybrush weathered finish!
Ever since I hung up our botanical print window in our master bathroom, I’ve wanted to find another place to use more of my botanical prints somewhere else in our house.
A few years ago, my mom gave me this old thrifted Audubon Birds of America book that I’ve pulled pages out of to frame around our house. The bird prints remind me so much of Robert’s and my wedding day, which had a bird theme (and one day I should probably show a recap of the big day here for y’all to see).

This sad book is falling apart but it is filled with gorgeous biology illustrations from the Victorian era that I just had to rescue.
I picked out 18 of my favorite prints, nine for each frame, to fit on the cardboard backing of the frame. I had to trim some of the edges of the pages to fit onto the cardboard piece.

Then, I sprayed each sheet down with some spray adhesive.

Once I had all of the book pages glued on, I realized I didn’t really like seeing the edges of the paper. It looked homemade. And I wasn’t a fan.

So I hid the edges of the paper with jute burlap ribbon to make a grid. (My mom’s and mother’s-in-law idea actually.)

I lined up my ribbon first and glued it down with a line of simple school glue. Mod Podge could work too, but I was out.

I placed my ribbon vertically first.
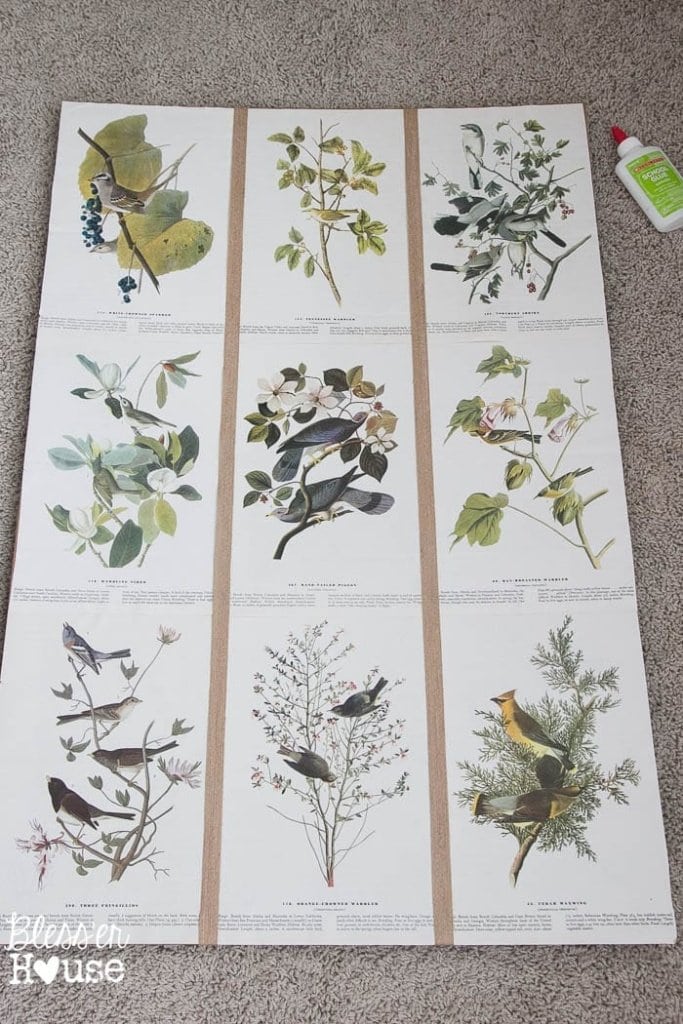
Then horizontally.

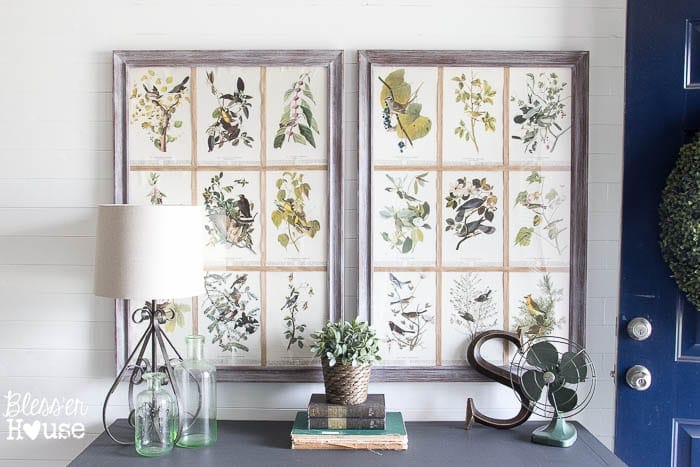
Once the ribbon was dry, I placed the whole cardboard piece back in the frame, and that was it!

They turned out so much better than I originally planned! I love all of the textures with the burlap ribbon and lime waxed frames.


They’re perfect with our shiplap wall too.

It seems right at home with all of the thrifted pieces on our foyer table too. I found that cute scroll lamp at Goodwill for $2.00!

Our foyer has just about come together, and I’m putting some final touches on it this week.
I cannot wait to show off this happy little space! It’s so much brighter in here than it was just a couple of weeks ago. It’s amazing how art can make a room feel so much more complete.
Have y’all been working on any room makeovers lately that are so close to being finished? Or any fancy schmancy thrifty wall art that you’re super proud of? Or maybe sing and dance in the aisles of Walmart like we do? I’d love to hear all about it!

Follow:
Facebook | Pinterest | Instagram | Twitter | Google+ | Bloglovin | Hometalk


These are so beautiful. I love how you weathered the frames……I never would have thought that was possible! I have a coffee table that I bought to refinish and I ran into problems when I found out after stripping the ugly black paint off that it wasn’t all wood, but a mix of wood, resin legs, and a laminate top. Do you think this simple liming treatment would work over the laminate? My husband doesn’t think wax will work on laminate, but I want to show off the wood grain I worked so hard to free. Any advice you have would be awesome…………if I don’t do this I may try your method of painting it coco and then going over it with a dark wax 🙂
Oh no! You could try, but if you use wax on table tops just be sure to use coasters since it doesn’t stand up to wear and tear quite as easily. Maybe try a test spot on the laminate and rough it up with some fine grit sandpaper first before applying the wax.
I absolutely love what you have done with these prints!! My kids and I are actually studying Audubon’s prints in our little homeschool and I had purchased the book from Amazon for $5.00. I can’t wait to display these beautiful prints instead of storing them in the closet when we are done.
How cool, Sara! What a neat thing to study! Hope yours turns out well. 🙂
I love these! I had to come back to this post because I just have to try the liming wax technique. Thanks for all of your wonderful ideas!
Thank you, Barbara! I love how they turned out!