
DIY Lime Washed Brick Fireplace – Easy Tutorial

A dirty and tired orange brick fireplace gets a brightened up, weathered lime washed brick makeover, plus a full tutorial to do it yourself.
Welp… I worked up the nerve and faced my fears.
The dirty orange brick fireplace is GONE! I mean, I didn’t go all destructive on it, the fireplace is still there and all, but it’s looking waaaaay different.

See that sooty brick action? I wanted to love it. I really did. And I tried my best to accept it the way it was.

How to Limewash a Brick Fireplace
Brick Cleaning With Vinegar
I sat out with good intentions thinking I’d just scrub it down like crazy and see how I felt about it after.

All it takes is a spray bottle, some white vinegar, a heavy duty scrub brush, and lots and lots of elbow grease.
Just mix 1 part white vinegar with 1 part water in a spray bottle, saturate the dirty brick with it, and scrub scrub scrub. Good as new brick!


But then I still wasn’t totally in love.
For years, I’ve been pinning German smeared and white washed and lime washed brick left and right on Pinterest telling myself that one day I was actually going to find the perfect brick project to try out one of them.
German Smear vs Limewash vs Whitewash
German Smear and limewash use similar techniques with different materials. The method of using German Smear requires applying wet mortar to brick with heavy coverage.
Limewash is a mixture of slaked lime stone and water to create a soft, opaque, calcified finish that you can distress in sections. It’s a coarse, chalky weathered look that was used for centuries in Europe before paint was invented.
Whitewash is a mixture of white paint and water applied on top of brick to create a translucent look muting the natural color of the brick.
German smear seemed a tad more complicated than I was willing to attempt. And white washing ran the risk of turning pink while losing the brick texture.
As much as I didn’t really love the brick, I still wanted a little of it showing. (If you are up to the German smear challenge though, here’s a great DIY German smear brick fireplace tutorial)
So lime wash was the happy in-between.
DIY Limewash Fireplace Tutorial
Supplies Used
- Romabio Classico Limewash in Avorio White
- 2 spray bottles (one for cleaning with 1:1 vinegar solution, one filled with plain water for limewashing)
- White vinegar
- Heavy duty scrub brush
- Mixing bucket
- Power drill with paddle drill bit (or stir stick will work too)
- Masonry brush
- Plenty of clean cotton rags
- Frog Tape (or whatever painter’s tape you prefer)
- Plastic drop cloth

Step 1 – Mix the Limewash
I found this lime wash called Romabio at Home Depot when looking around for the best way to tackle the job, and they had a website with a gallery full of gorgeous fireplace and house exterior makeovers and some helpful video tutorials to ease me into it. (This is in no way sponsored. The Romabio people have no idea I exist. I just really liked how this whole project went down.)
This is what the lime looked like straight out of the plastic bucket, just this goopy putty-like stuff… ya know, very technical terms. 😉

I dumped the entire liter into a mixing bucket and followed the instructions on the back of the Romabio container, adding equal parts water.
I didn’t have a paddle drill bit to attach to my drill, so I went old school mixing it up with a paint stir stick for quite a while. The drill bit would work a whole lot faster though.

Step 2 – Tape Off Surround
I taped around our fireplace mantel surround and hardwood floor with Frog Tape and put down plastic drop cloth for extra protection first. (And starting with clean brick is a must, so make sure you go through those steps I shared above to remove any soot.)
Step 3 – Dampen Brick
Then, using a spray bottle filled with just water, I sprayed down all of the brick to keep it damp.

Step 4 – Apply Limewash Paint
I then brush brush brushed the lime wash all over the brick, making sure the brick stayed damp as I worked.
Once it was all brushed, I let the lime wash sit for about 30 minutes until it was mostly dry to the touch. And then the real action could start.

Step 5 – Distress Lime Surface
Using the spray bottle of water again, I distressed one brick at a time, spritzing it with 1-2 squirts of water, and blotting and rubbing with the rags to remove as much of the lime wash as I wanted. (This video is very helpful to show the whole process.)

It was a long process of spraying and blotting and rubbing, and there’s really no science to it other than just work away at it until you get the look you want.

Then voila! Lime washed brick.
I’m sure it would have been an entirely different look if I had only brushed the lime wash on the mortar or only on some of the bricks instead of all of them. Part of me wishes I had tried that first just out of curiosity.
But I still love how it turned out.

UPDATE: I repeated the same process on our playroom fireplace dabbing the limewash with a paint brush on the bricks in an uneven pattern to get a more distressed look without the need to spray water and remove with a rag. I think I love how this method turned out even better!


It’s taken me a while to get used to, like catching yourself in the mirror after getting a super duper short haircut. But it has brightened up our living room so much and finally feels like it fits.
DIY Living Room Ideas
(Update) Over the years, we have made lots of small changes to completely transform our living room decor.
- Best Rated Fandeliers
- DIY Window Seat from a Kitchen Cabinet
- Coffee Table Decor Essentials
- How to Style End Tables
- Audubon Bird Art Gallery Wall & Free Printable Set
- How to Clean a Fabric Couch

Living Room Decor Sources
We’ve made a few big purchasing decisions over the years in our living room too, which I shared our full reviews with pros/cons about them all to make your decision making process easier than mine.
- Pottery Barn Sofa Review: What You Should Know
- Our Brutally Honest Review of the Samsung Frame TV
- Our Brutally Honest Review of the Pottery Barn Tyler Recliner


And if you want to know about any of the sources we’ve used in this space, here’s the full list so far:
- Wall color: Benjamin Moore Swiss Coffee in eggshell
- Trim color: Benjamin Moore Simply White in semigloss
- Door/window color: Benjamin Moore Wrought Iron in semigloss
- Sofas
- Recliners
- Coffee Table
- Frame TV
- Fandelier
- Curtains
- Curtain Rod
- Floor Lamp
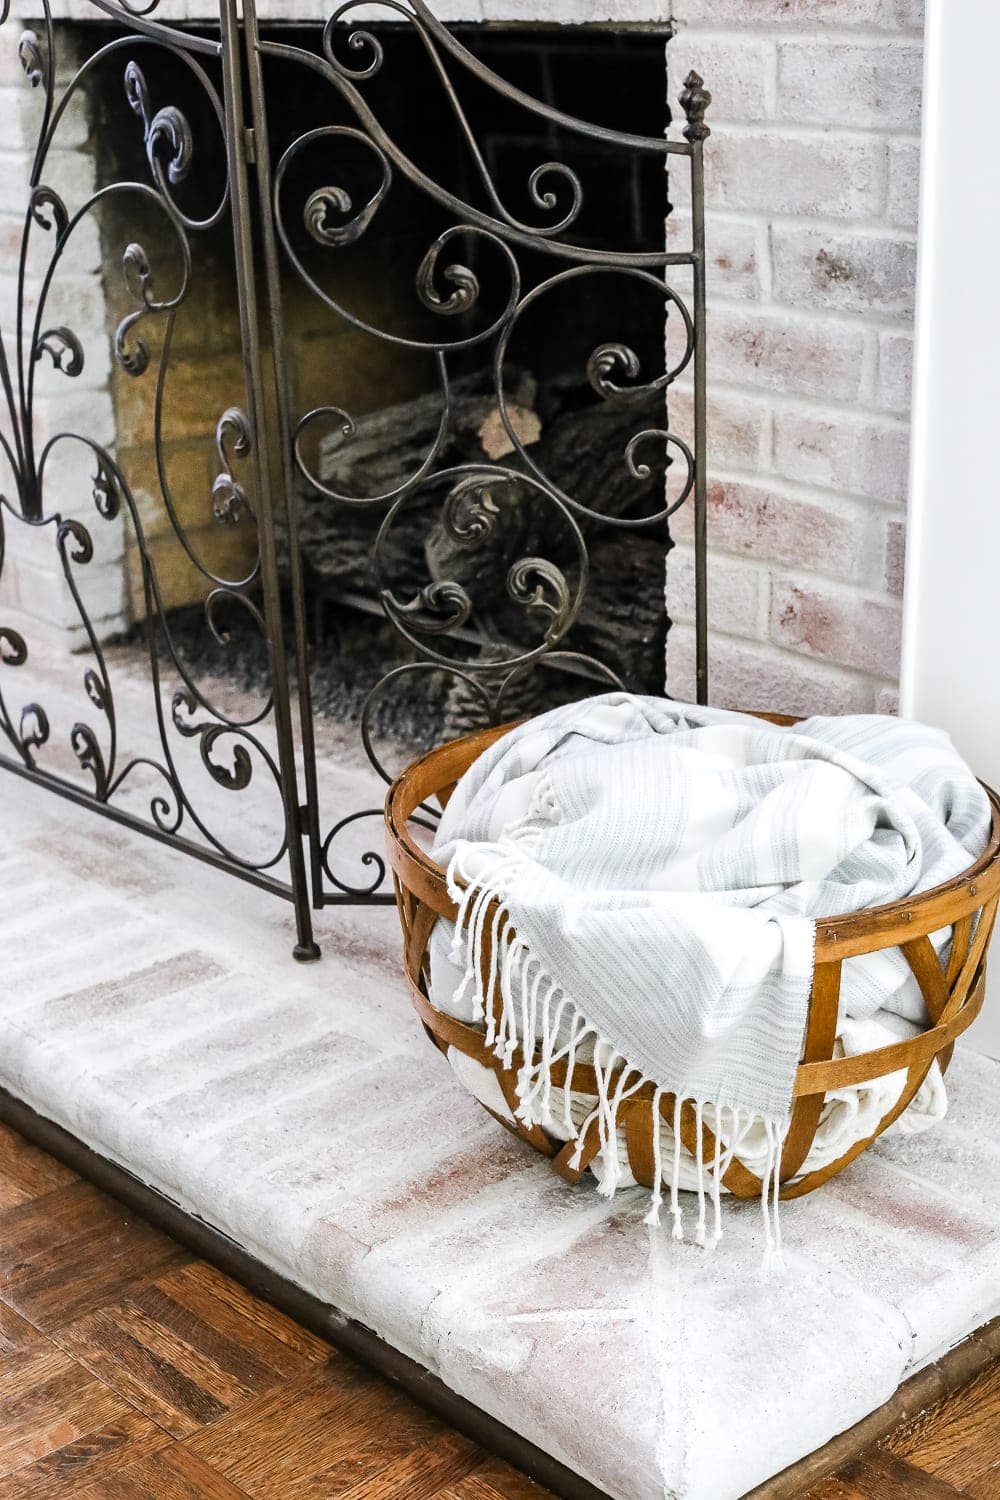
- Fireplace Screen
- Plaid Blanket
- Sconces
- Table Lamp
Can you believe this before and after? I mean…

So all of this begs the question… are you Team Orange Brick? Or Team Lime Wash Fireplace? Or are you somewhere in the white wash / German smear camp?
Seriously, who knew there were so many opinions to be had about brick?
More Limewash Advice
- Limewashed Brick Exterior Before and After
- FAQs About Our Limewashed Brick
- How to Clean and Maintain Brick Limewash


Lime wach for sure ???
It looks great, Lauren! What are your fave cotton rags to use for misc projects?
Lauren, the transformation in your living room is unbelievable. I am all the heart eyes over everything you have done in your new house! Loving this new style you have switched too. You do it so well!!
Limewash!!!!
Wow, Lauren. That fireplace looks amazing!
I love it.
Good luck with your photo shoot.