
Budget Master Bathroom Refresh Reveal
A dated master bathroom gets a budget-friendly refresh using paint, organizing tricks, and DIY solutions for modernizing a space.
How in the world it took us nearly two years to refresh the room we see first thing every morning is beyond me.
We’ve had BIG plans to fully gut and renovate our master bathroom to the tune of around $10,000, but considering that massive project is still way down the road, Robert and I decided we couldn’t take this bathroom as-is for one more day…

This was definitely one of those classic work-with-what-you-have situations that we’ve become so accustomed to around this place. And thankfully, paint can do a whole lot for very little.
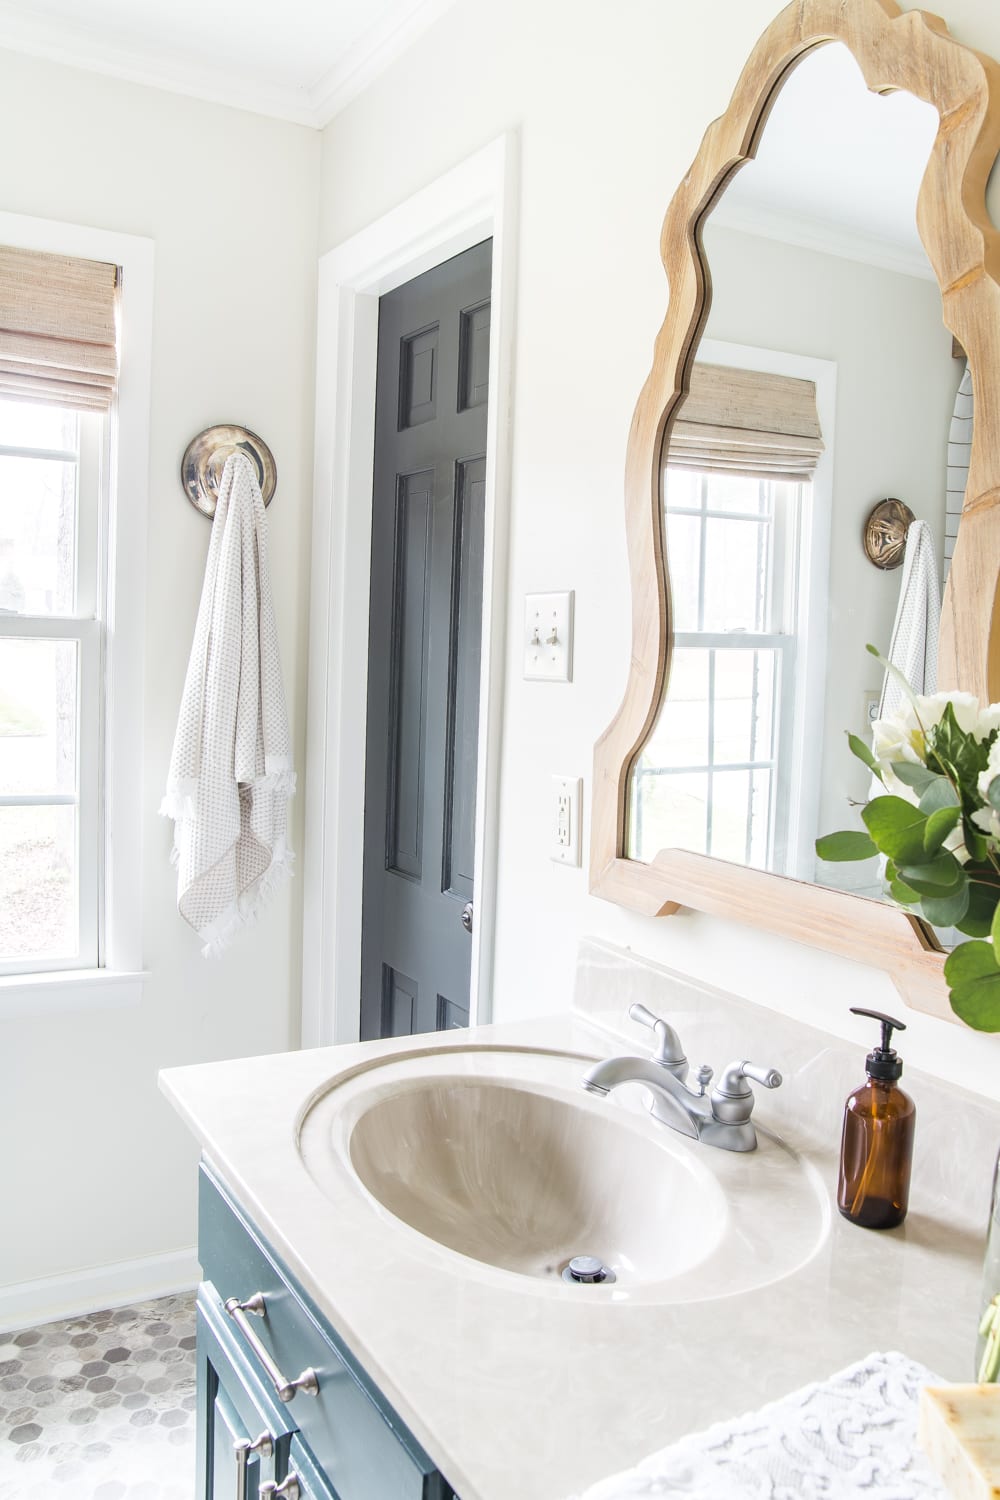
After as many DIY tricks as we could muster, it now looks like this! Woop woop!

(Some affiliate links are provided below. Full disclosure here.)
The Vanity
We definitely wanted to remedy the rough wood finish on the cabinets, so we painted them using our good ol’ DIY go-to method with a custom paint color we had matched to our linen cabinet. And since the hardware-less drawers were so difficult to open before, we added these brushed nickel pulls to match our existing faucets.

Paint Color
We had to stick with the existing beige countertop (with baby Regan in the house, we didn’t want to subject her little lungs to fumes with the painted countertop project that we did in our last bathroom refresh), so we painted the walls with Benjamin Moore White Dove to add some warmth to the space so that the beige would make more sense.

Mirrors
Robert and one of his buddies wrestled the old damaged mirror off of the wall and replaced it with a pair of these arched wooden mirrors. I’m always AMAZED what a difference just swapping out the mirrors can do for a bathroom. (BTW, if you need tips for removing your mirror, you can try this tutorial for one hung with clips or this tutorial for one hung with adhesive.)
Light Fixture
Since the old vanity light was busted, we swapped it for this smaller 2 light sconce to modernize the space a bit and match with the old faucets.

Organization
The inside of our vanity was a mess too, so I took out everything, purged most of it, and organized it all in these clear plastic drawer organizers.


I did a major overhaul under the sinks too using these stackable basket drawers and white contact paper to clean it up.


Shower Door
A bunch of y’all suggested covering up the existing shower door, so we took the plunge by hanging up this semi-sheer curtain to still allow in some natural light and hid the tension rod at the top with a cornice we made from a wooden board stained and sealed with polyurethane to protect it from humidity.


Wall Art
This big blank corner completely stumped me in the beginning, but I gathered up some thrifted frames, made mats from cheap poster board, and displayed free public domain coastal art to tie in the blue/green in the space for around $50.


It adds so much personality in here and ties in with the cabinet color perfectly!


Linen Cabinet
To give us some vertical storage that we desperately needed, we picked up this linen cabinet on sale, which inspired the color throughout the room.

It’s where we can keep a few essentials and towels rolled up to feel all spa-like along with Q-tips, exfoliating sponges, and Robert’s shaving kit in easy reach.

We were able to utilize the drawer to hold wash cloths too.

And I rigged up a hamper in the cabinet with a laundry bag.


Window Treatment
We had to splurge more than usual on our window shade since we needed one with a good privacy liner. This window is at the very front of our house, and if we didn’t spend a little extra on a thickly lined shade, the whole neighborhood might get to know us a little too well. Haha!

Wall Hooks
Just for a fun repurpose, I found these old chaffing dish lids and decided to utilize them as towel hooks. Aren’t they cute?!


Floor
One of the biggest hurdles was definitely this floor! Not even grout pens would fix it this time.
Since this whole refresh was a temporary solution, we found this hexagon tile looking vinyl floor to place on top of the old beige ceramic tile.
Seriously still can’t believe it’s vinyl! It looks so real. And it was a great, mess-free solution until we can do a true tile replace.

Door
All of our doors in our house are painted Benjamin Moore Wrought Iron, so this one finally caught up with the rest of the pack. It always adds the punch of contrast every room needs.
That’s it! I’m totally amazed at this space, but I know I say that every time we complete a room makeover. This space finally feels like an oasis when we’re getting ready in the morning instead of a stressed out mess.
And now we won’t be so anxiously awaiting the major demo and makeover when we get to that point.
If you want to know about any of the sources we used, here they are:
- Vanity / linen cabinet color (custom – click here in this post for the color formula)
- Wall color – Benjamin Moore White Dove
- Trim color – Benjamin Moore Simply White
- Door color – Benjamin Moore Wrought Iron
- Mirrors
- Light fixture
- Linen cabinet
- Vinyl floor
- Drawer pulls
- Wall art (free printables in this post w/ tutorial)
- Semi-sheer curtain
- Window shade in Bonaire Flaxen
- Drawer organizers
- Stackable basket drawers
- Towels
- Hand towels
- White towels
- Artificial plant
- Large basket
- Small basket
- Vintage style shaving kit
- Soap dispensers
- Large glass jar
- Small white jar
Moral of the story: Don’t live with a room that causes you stress as you wait for years on end to fully renovate it. Paint and imagination and a little bit of sweat equity can do SO much using what you already have.
We’re working on something HUGE on another part of our house right now too, and I can’t wait to share it with y’all. But more on that later… 😉
If you want to save this post for later, you can pin it here:


My mom has started buying all the chafing dish lids because she loves the towel hook idea so much!
The bathroom looks great!
Awesome!! Thank you, Caroline!!
Girl your bathroom looks SO good!! We are coming up on two years in our house and we still have yet to touch our master bath either! You make me want to go get started! XO
Thanks, Christy! It has made such a HUGE difference on our day-to-day living already.
Wow! It looks amazing and not “budget” at all! Beautiful space!
Win! Win!! Thank you!!
What a lovely way to start your morning. This does not look like a budget makeover. You are “blessed” to be so creative and talented.
Thank you, Nancy!
This is so amazing! And it’s my very favorite kind of post (a makeover done on a real budget). Great job!
Thank you, Corrie!
Beautiful! Can you share here where the soap dispensers are from? I cannot get the link to load no matter how often I try. Thx!!
Hi! So sorry. The link is at the very bottom in a list of items. Here is a link for your convenience. https://rstyle.me/+Nfnc83Ia4TDDIkGighXwjg . I hope this works for you. Please let me know if you have anymore trouble.