
Easy DIY: How to Install Sheet Vinyl Flooring Over Tile
All of the supplies and steps you need for installing sheet vinyl flooring over old tile yourself for a temporary fix.
Favorite project EVER! Okay, I say that about probably 50% of every project we do around here, but this one is definitely up there on the charts of most-transformative-for-least-amount-of-money.
Even though this looks like tile, it’s actually sheet vinyl flooring installed over old ceramic tile.

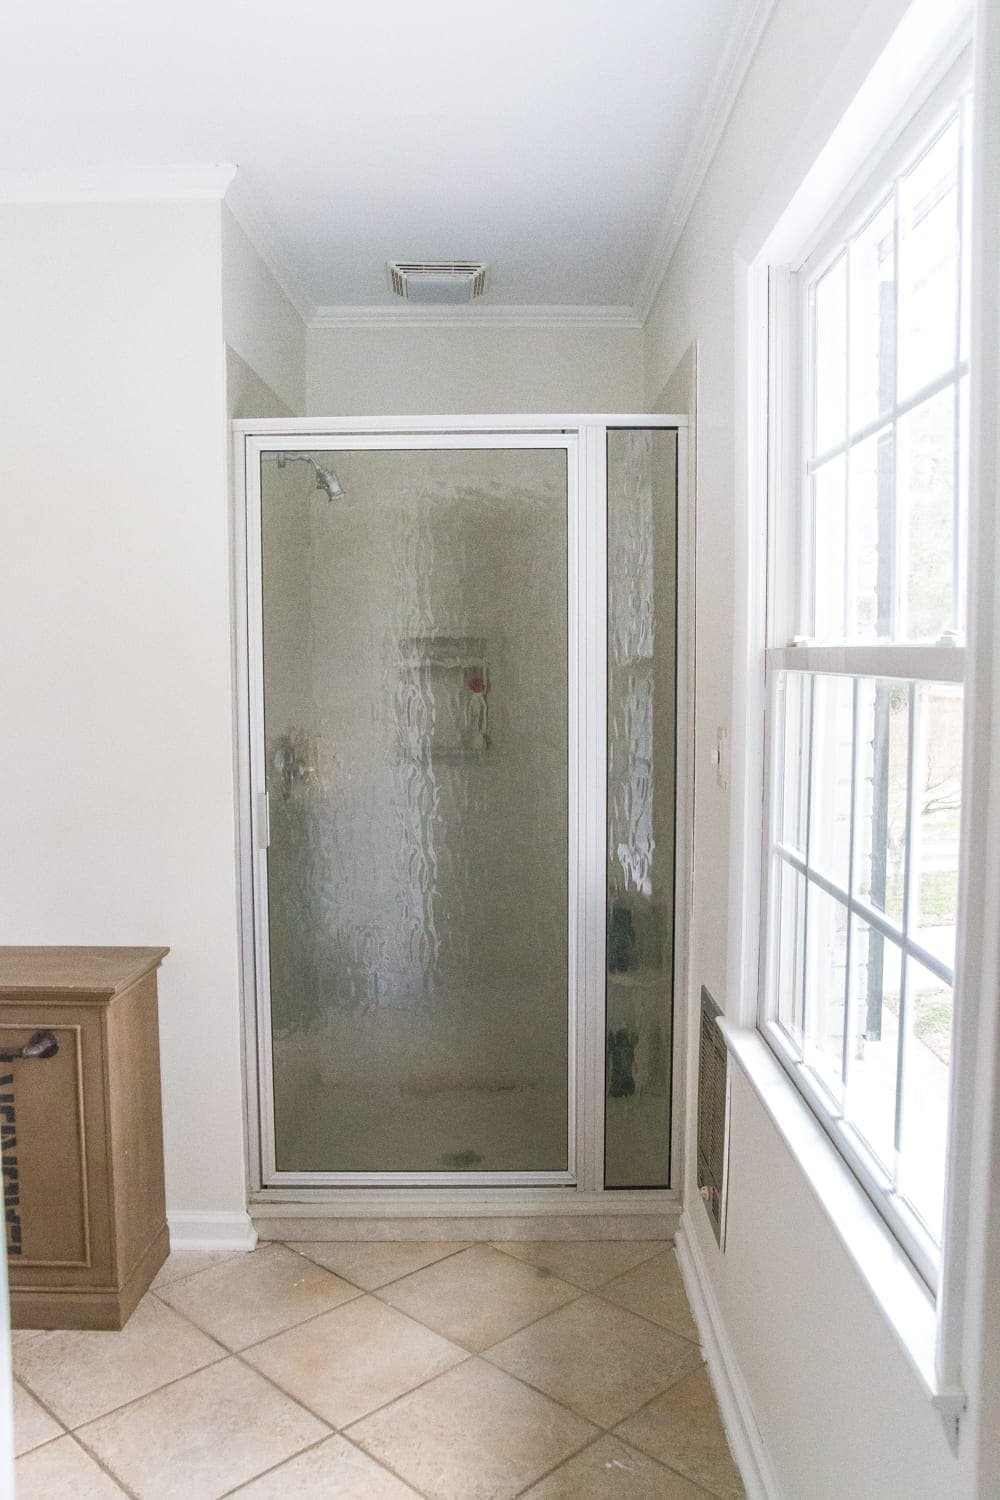
When we bought our house, the ceramic tile floor looked like this. (Besides the paint, but we knew we were going to cover it so we didn’t bother taping.)

If you have a tile floor that desperately needs to be replaced but you don’t yet have the budget, time, or know-how to tackle it, this DIY project is the perfect quick fix.
Even though we had rescued the ceramic tile in our kitchen and hallway bathroom using grout pen in the past, this floor seemed a little farther gone.
And since we were sticking with the existing countertop and shower for now (until a real gut/renovation down the road), I wanted a floor that would modernize the 80s beige a little better.
Except I wanted to steer clear of tile paint and the stenciling route like so many DIYers have done. With a 3 month old in the house, I wasn’t loving the idea of fumes. I wanted this job to be quick and the install done in a matter of an hour or two.

Can you put vinyl flooring over tile?
Normally, if you were doing a major renovation, it is NOT a good idea to put vinyl floor on top of tile. For a permanent floor, it should be done the “right” way.
But for a quick Phase 1 fix, it’s a great DIY-able solution to carry you through until you’re ready for a messy contractor job.
You Can Install Vinyl Over These Floors
You can choose to put sheet vinyl, vinyl tiles, or put luxury vinyl planks over many different types of flooring.
- Hardwood flooring
- Engineered wood flooring
- Concrete flooring
- Linoleum flooring
- Vinyl flooring
- Stone tile
- Ceramic tile
Related: How to Install Luxury Vinyl Plank Flooring Over Tile

Vinyl is not well suited for installation on top of carpet however.
Before you decide to install any sort of floor cover, inspect your existing floor for loose tiles or large cracks. If your existing floor is too badly damaged to create a smooth underlayment, you most likely shouldn’t install vinyl on top.
If your old floor is still in decent enough shape, here’s how to quickly change the look with vinyl.
How to Install Sheet Vinyl Flooring Over Tile
Supplies
- Thin-Set Mortar
- Putty knife
- Medium grit sandpaper
- Broom and dust pan
- Pry bar and mallet or hammer
- Sheet vinyl floor of your choice (We used this one.)
- Vinyl flooring adhesive (Optional: Our floor’s manufacturer did not recommend adhesive for ours, so this will vary depending on what sheet vinyl you choose.)
- Tape measure
- Pencil/pen & paper
- Sharp scissors or utility knife
- Chalk line
- White silicone caulk and caulk gun
- Brad nailer gun (We LOVE this one.)

Step 1 – Fill Large Grout Lines
Because you don’t want your sheet vinyl to settle into cracks and grooves in your subfloor over time, patch everything in your tile to create a smooth surface.
Our tile was in great shape, so I just had to fill the grout lines with thin-set mortar using a putty knife.

Try to apply it as smoothly as possible.

Step 2 – Sand Dried Mortar
Once the mortar is dry in about 24-48 hours, you can sand any rough spots with medium grit sandpaper.
Step 3 – Remove Debris
Sweep the floor and remove any debris with a dust pan since you don’t want to trap anything under your sheet vinyl floor.

Step 4 – Remove Baseboards
Remove shoe molding and baseboards with a crowbar and mallet or hammer. Here’s a post to help you with it, if you’ve never done it before.
Set the shoe molding and baseboards aside to reinstall after the sheet vinyl is in (assuming they’re in good condition).

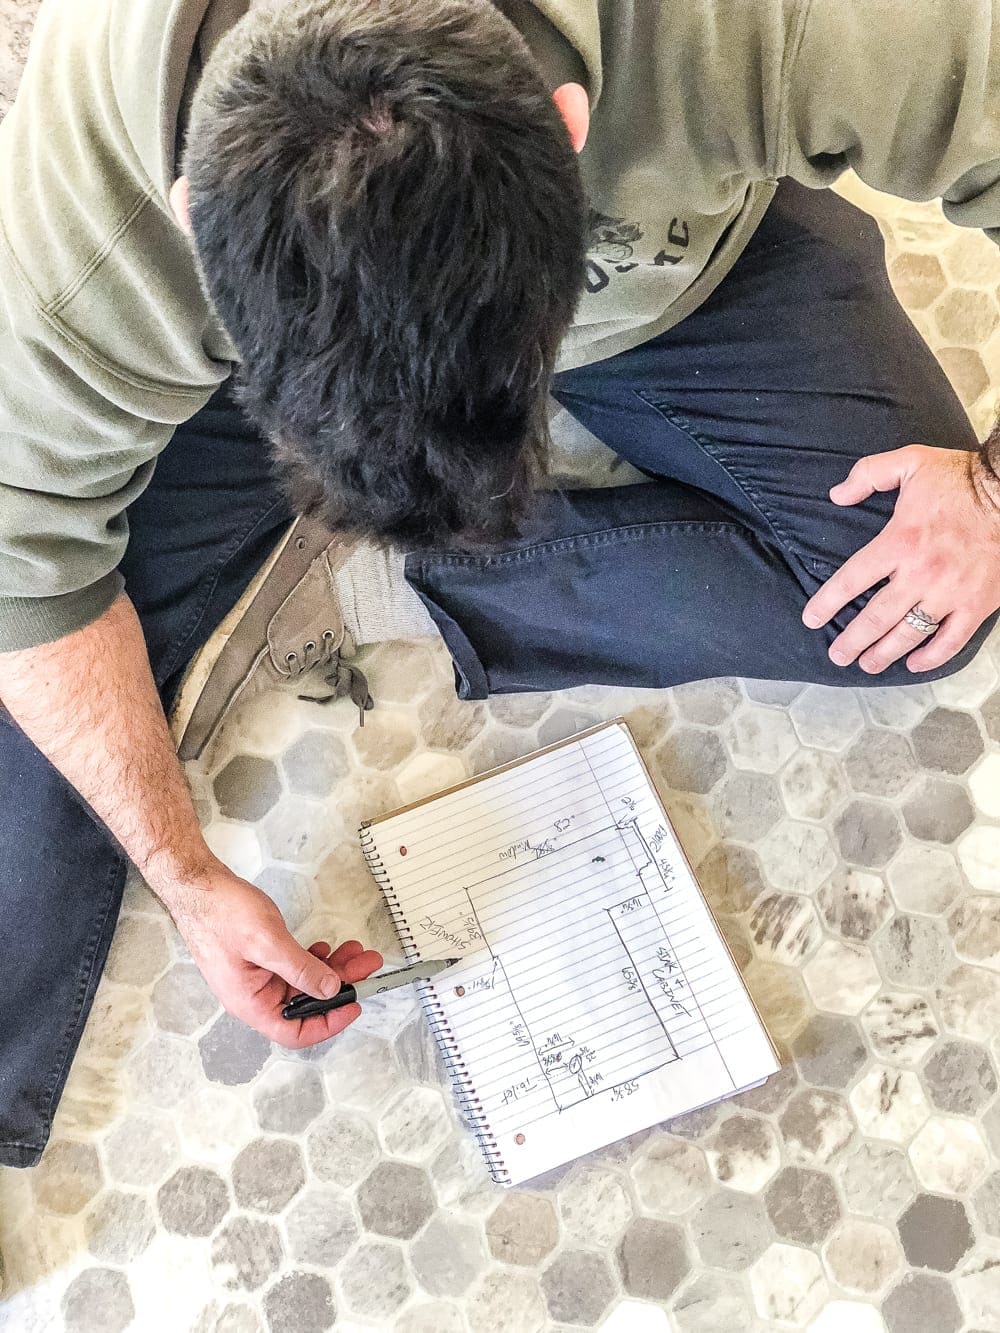
Step 5 – Measure & Draw a Diagram
Measure all of the edges around the room and draw a diagram of your room on a piece of paper using those measurements.
Never a dull moment with this guy around, even with mundane measuring jobs. 😉
Include measurements of any obstacles in the room as well.
We removed our old toilet beforehand (this is a great video for toilet removal with a good tip to prevent water dripping everywhere), so we measured where to cut a hole in our sheet vinyl for that as well.

Step 6 – Double Check Measurements
Measure twice and double check that all of your measurements are correct on your diagram.
Step 7 – Unroll Sheet Vinyl
Roll out your sheet vinyl and take a nap. Just kidding. 😉 Well… if you do, we won’t blame you.
But at least roll out the sheet vinyl (do NOT flip it upside-down for measuring/cutting in the next step).

Step 8 – Mark Measurements on Sheet Vinyl
Use your diagram as a reference to mark your measurements using the tape measure onto the edges of the sheet vinyl to create a template.

Step 9 – Mark Lines with Chalk
Mark your lines between your measurements for the perimeter of your room with a chalk line.

Step 10 – Cut Vinyl Sheet
And cut the sheet vinyl with sharp scissors or a utility knife. After your floor is cut, wipe up any remaining chalk line (Mr. Clean Magic Erasers work great).

Step 11 – Roll Out Sheet Vinyl on Top of Old Floor
Haul your cut sheet vinyl into the room and roll it out. Check the fit.
Step 12 – Position & Trim
Trim any remaining spots with a utility knife as needed as you position it into the room.
Step 13 – Reinstall Baseboards
Reinstall your baseboards and quarter round trim with a nail gun to hold your floor’s edges in place. This was per our manufacturer’s instructions for our specific vinyl floor, but your floor’s manufacturer may require you to apply an adhesive first.
Check your manufacturer’s specifications for installation.

Step 14 – Caulk Baseboards & Edges
Then, apply white silicone caulk to fill cracks on the reinstalled trim. And attach sheet vinyl edging to where it meets up at a shower/tub/door threshold too.

Would you like to save this?
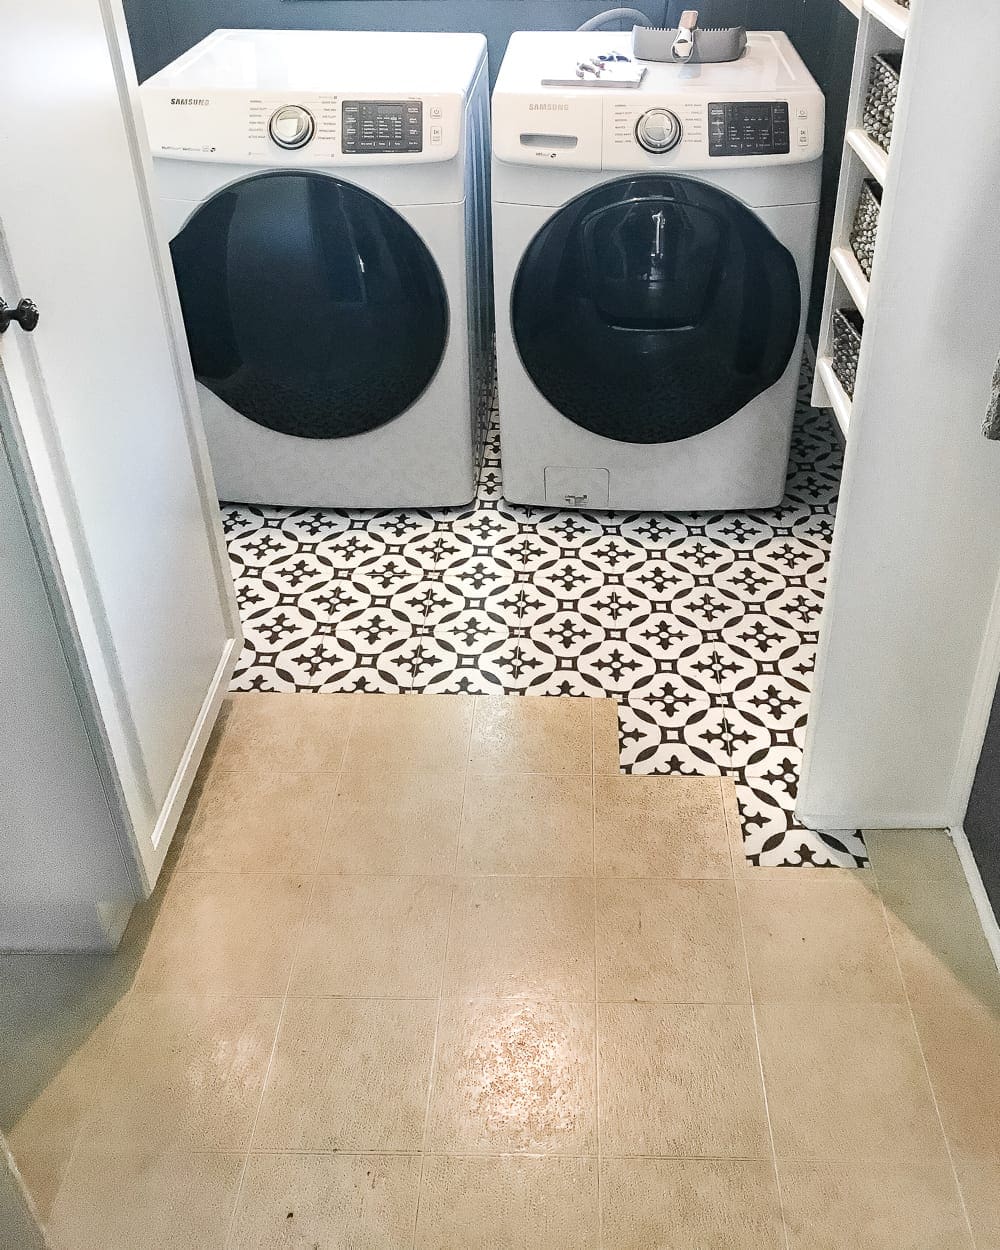
Vinyl Floor Before and After
It looks SO much better in here now! And that beige countertop almost looks intentional… almost. 😉
But with the mix of warm and cool tones in this floor, it makes the blue and the beige more cohesive.
Here is how the sheet vinyl flooring looked once we finished the rest of the bathroom.

It’s far from perfect, but it’s definitely an improvement from the grungy beige ceramic tile before.

How to Install Luxury Vinyl Flooring Over Tile
You can see how to install luxury vinyl plank flooring over tile here. We installed this herringbone vinyl floor in our kitchen, and it turned out beautifully!

How to Install Vinyl Tiles Over Tile Flooring
Here is how to install peel and stick vinyl tiles over an existing tile floor. Even though it’s slightly more expensive than sheet vinyl, it’s much easier to install with many more style options.
Frequently Asked Questions
You can put many different types of flooring over tile. Just keep in mind that it will raise the flooring height a bit and is not an ideal permanent solution.
These flooring options can be installed over tile:
– Laminate
– Engineered wood
– Vinyl
– Ceramic tile (Yes, you can put tile on top of tile if it’s in good shape, but it’s not ideal.)
– Cork
– Carpet
Sheet vinyl is usually the cheapest type of flooring you can install as a DIY project.
More Flooring Ideas
- My Unbiased, Brutally Honest Review of Ruggable
- Everything You Need to Know to Refinish Hardwood Floors
- Favorite Traditional Rugs from Loloi
- Marble Tile vs Marble Effect Tile: Which Is Best?
If you want to save this post for later, you can pin it here:


