
Painted Weathered Wood Bed Makeover
A couple of weeks ago, I promised more details about the painted “weathered wood” bed that so many of you asked about in our last guest bedroom makeover update at my parents’ house.
I’ve done the math now (I know, former English teacher doing math… be afraid), and at this point, we’ve spent a grand total of $290 to fully furnish this bedroom with a dresser, armoire, pair of nightstands, and a queen-sized bed. Wowza!
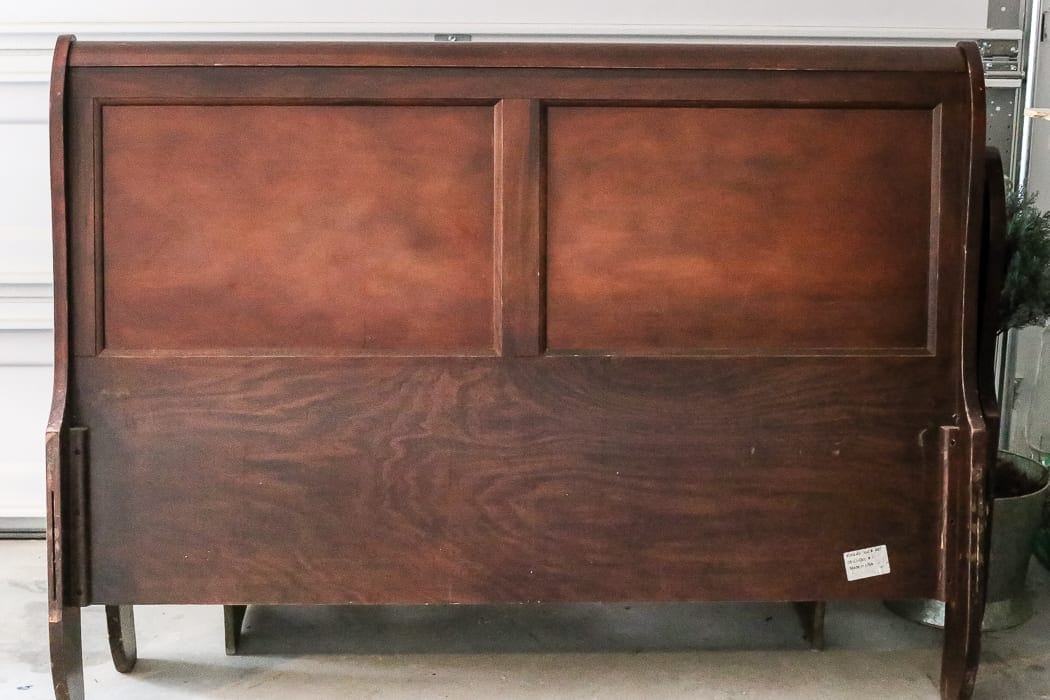
This sleigh bed my parents found on Craigslist for $110 was already in good condition. But it had a lot of dings and scratches that needed a facelift.

How to Paint Furniture to Look Like Wood
I wanted to tone down the cherry red stain, but sanding it down completely to refinish wasn’t an option since it was partially veneer. So I busted out my tried and true “weathered wood” paint method again.
Hey, if it ain’t broke… you know the rest.
Supplies
(Affiliate links are provided below for convenience.)
- Annie Sloan Chalk Paint in French Linen
- Fusion Mineral Paint in Raw Silk
- Homestead House Wax in Espresso
- 1.5″ angled paint brush
- Chip brush
- Wax brush
- Clean, dry lint-free rag
- Paper towels
I pretty much was able to use paint supplies I already had lying around from previous projects (don’t you love it when that happens?).
Step 1 – Clean the Surface
Sometimes you guys ask if I prep my furniture, but it usually depends on the piece. If I’m working with a piece that has noticeable wood oil or a residue on it, I wipe it down with Krud Kutter or liquid deglosser (way faster and just as effective as sanding, in my experience).
This bed seemed to have a great surface to work with from the very beginning, so it did just fine without any prep work. But to be on the safe side, I do recommend a quick cleaning.
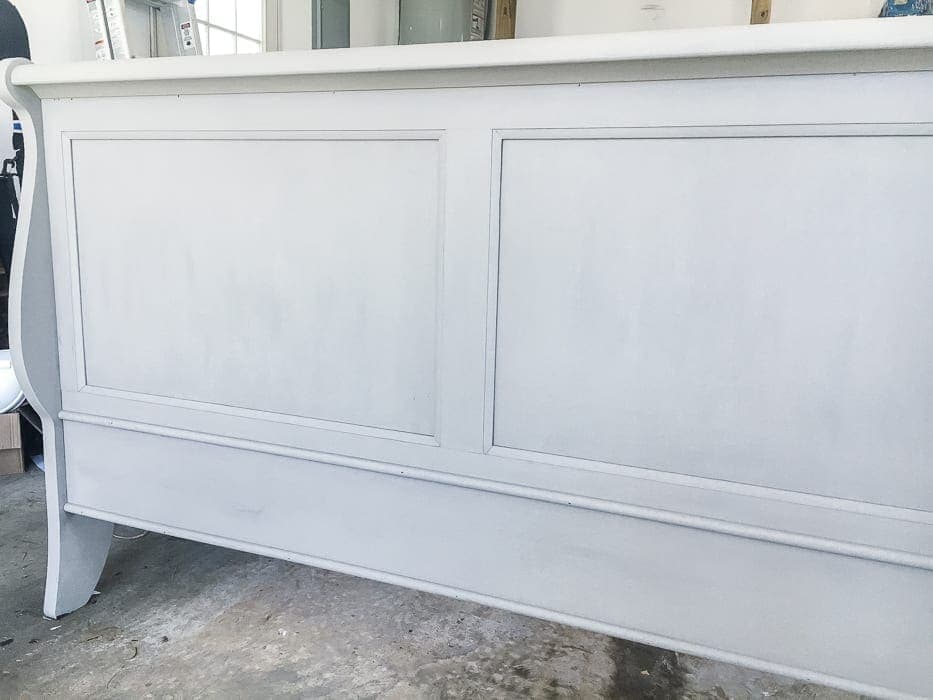
Step 2 – Paint Base Color of Light Beige
I gave the entire bed two coats of the ASCP French Linen first, letting dry between each coat. (Pardon my icky cell phone shots. I was painting in my parents’ garage without my camera this day.)
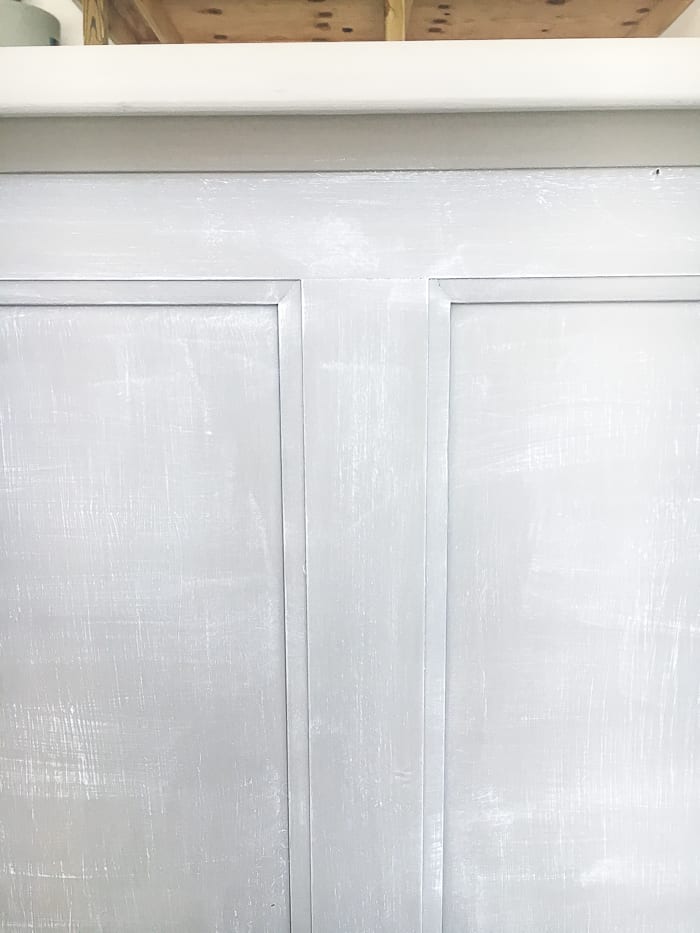
Step 3 – Dry Brush With White Paint
To add some depth, I gave everything a quick dry-brushing with the Fusion Raw Silk.
If you’ve never dry-brushed before, you just dip the tip of your paint brush into the paint, wipe it on a cloth or paper towel until it feels dry and start brushing onto your piece. I like using a chip brush because the bristles give it a natural weathered look and the strokes aren’t as rigid as a high quality brush.

It’s very subtle, but it’s a great technique for layering.
Step 4 – Apply Brown Furniture Wax
After dry-brushing, you can jump right into waxing with the Espresso wax. I like working my wax brush into the grooves and brushing in the direction that the “grain” of the wood would normally go. After about 5 minutes, I buff with a clean cloth.
I shot this before buffing, so the wax isn’t really perfect yet. Make sure to keep it to just one very light coat. You do not want a thick coat of wax on your furniture or else it will end up sticky long term.

Step 5 – Let Cure
I let the wax cure for 24 hours, and then my dad and brother hauled it up to the guest room so we could all stare at it in wonder for a few hours. Okay, not really.
But it did give me some major heart-eyes.

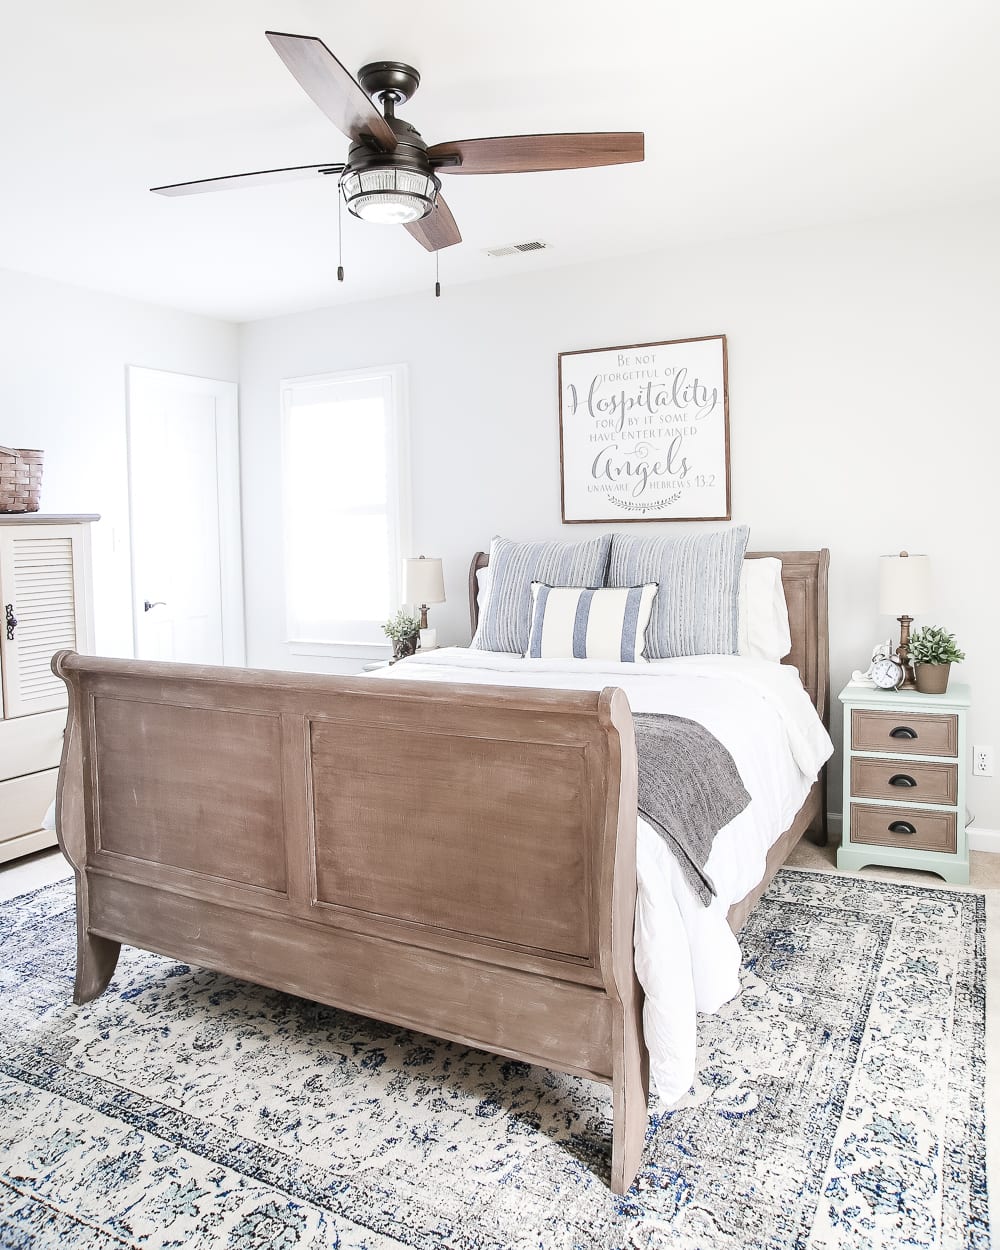
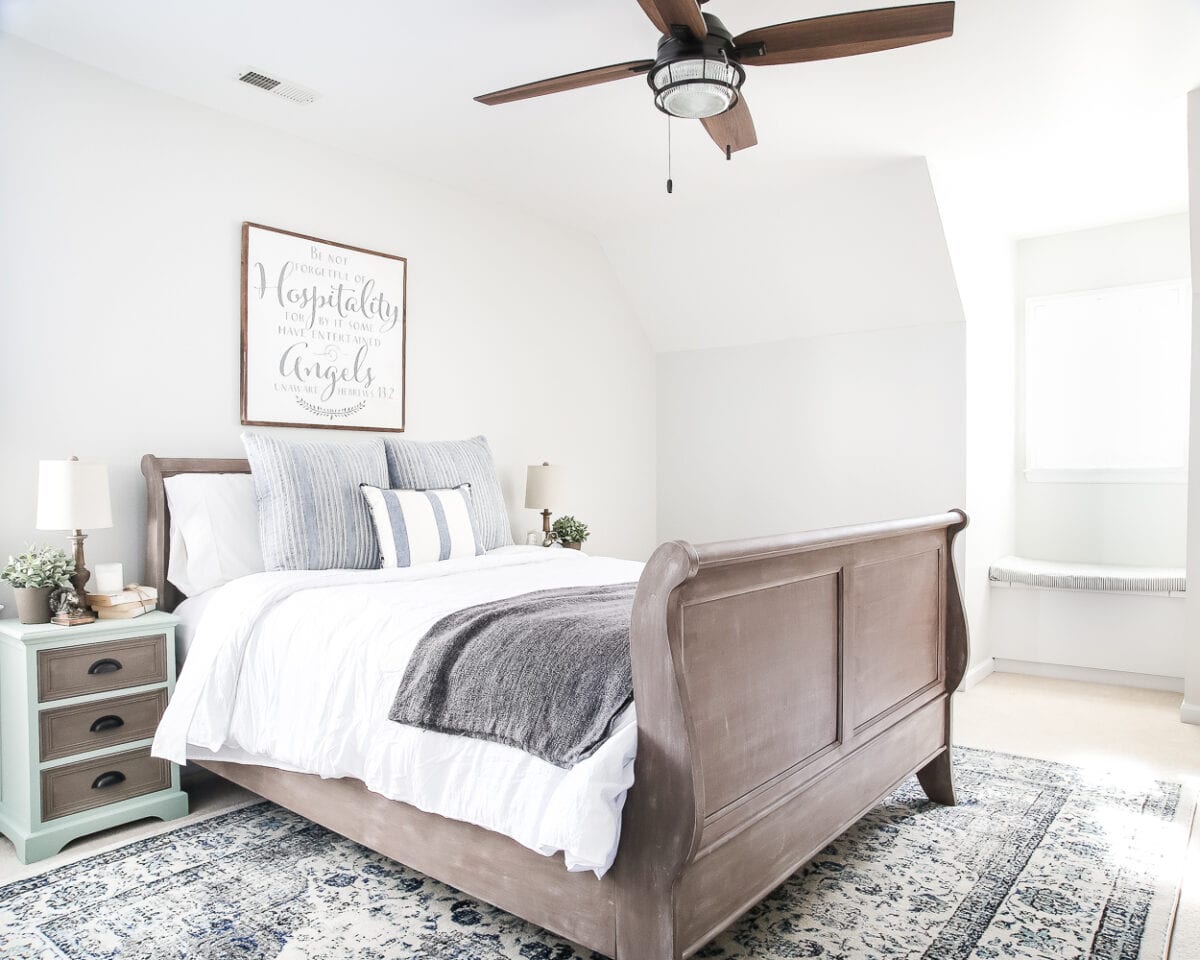
The bed isn’t “perfect” but that’s part of the charm, I think. After I photographed this, I noticed some waxing strokes that needed fixing, so I’ll be going back and touching that up.

The bed coordinates so well with the two-tone nightstands I painted the other week without being too matchy-matchy. (Does matching furniture drive you bonkers? It does me.)

I discovered this sign perfect for a guest bedroom on an Etsy shop called Salted Words the other week too. It couldn’t be any more fitting than this.

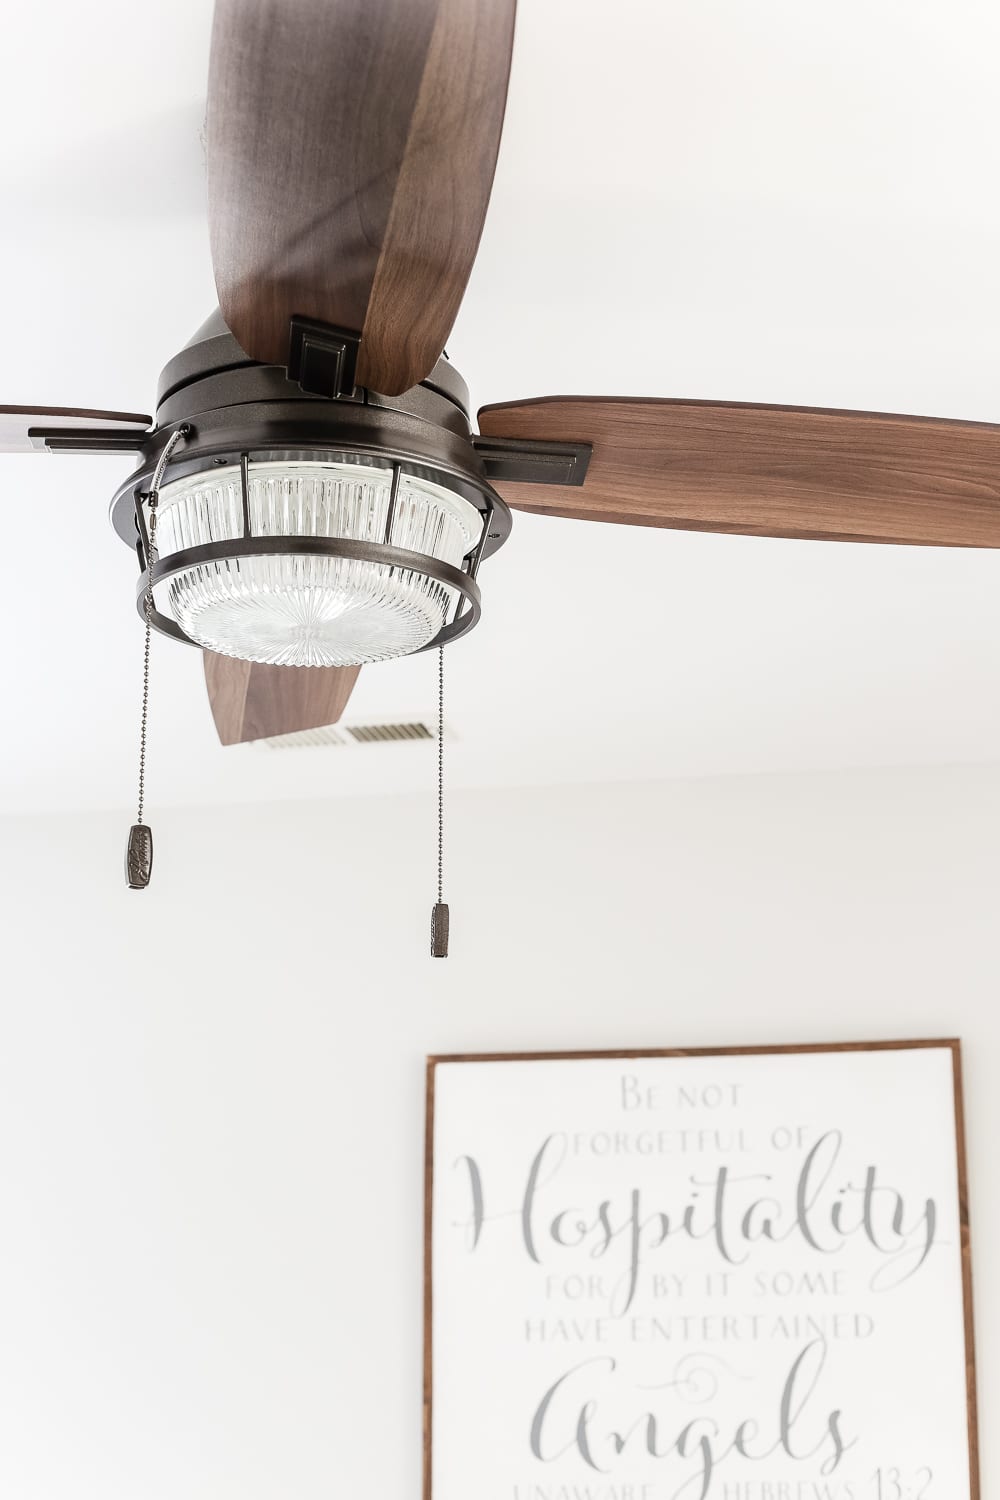
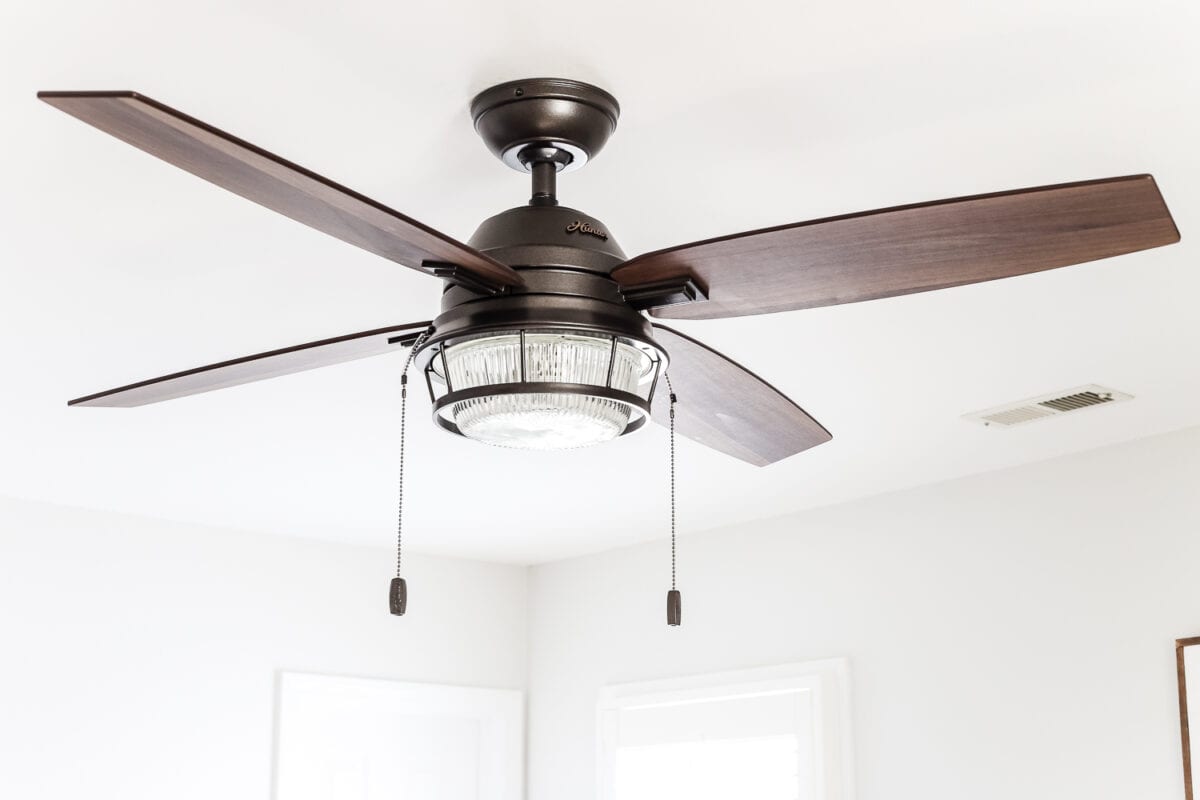
And this ceiling fan from Hunter Fan Co. works so well in here. When I ordered it, I had no idea what color of wood the blades were going to be since it’s usually so hard to tell online, but it has the perfect vintage look to it.
This guest bedroom has already come such a long way! I keep debating on whether or not to hang curtains in here since the window already has plantation shutters. I think I’m liking the clean and simple look though. What do you think?
If you want to know about any of the other sources I’ve used in here so far, you can find them all here:
- Rug
- Euro pillows
- Blue stripe pillow
- Hospitality scripture sign
- Nightstands
- Armoire
- Lamps
- Ceiling fan

We still have this other side of the room to tackle, but it’ll be coming along soon. A little art, some pillows on the window seat, and we’ll be lookin’ good.
I had no idea when I first started giving this space a makeover that it would end up being my and Robert’s bedroom while we crash at my parents’ house before closing on the new place. Funny how things work out like that.
If you want to save this post for later, you can pin it here:


The room is coming together and it looks great!! I think curtains would add interest, brighten up the stark white around the windows and plantation shutters. And you always pick out the perfect complement…..
Thanks, Lanita! I’m thinking I might play around with the windows a little bit in Photoshop just to see how it would look before I commit. Thanks for the feedback. 🙂
This looks like my bed I wanted to get rid of the cherry wood on my slay bed I want to go with a white grey wash. What would you recommend? or maybe a grey instead of white and the brown showing through? Do you have to sand down the furniture? My furniture is in great shape or problems with them.
Hi! It is totally up to your preference. The great thing about it is that you do not have to sand down the furniture with this technique.
Looks great, but for someone who has bever painted a piece of furniture before, how much paint should I purchase of Annie Sloan Chalk Paint in French Linen? Thank you.
Hi! Great question.This is the answer from the Annie Sloan website.
As a rough guide, one quart of Annie Sloan Chalk Paint covers approximately 150 square feet. For most purposes, one or two coats of paint are enough. Chalk Paint adheres to almost any surface, and there is rarely any need to sand or prime before painting.
https://reclaimrenew.com › annie-sl…
ANNIE SLOAN TIPS – Chalk Paint – Reclaim Renew
Looks great, or should I say you really “sleighed” it, lol. I’m in the middle of doing this technique on a side table I scored yesterday at Gordon’s for $12! I’ve never painted a new piece before, but for 12 bucks, I have zero heartburn over it! I’m using Waverly brand chalk paint and wax I found at Walmart. I’ve used it on a few items now and it does a pretty good job and is very economical.
Haha! Best pun award, right here. 😉 Good luck with the table, Colleen! I’ve used the Waverly brand before too. It definitely does the job in a pinch.
It looks beautiful Lauren. The whole room is so calm and relaxing. Just what a bedroom should be!
Thanks, Mary!
Your timing for this post is perfect for me to try this on some furniture we’re moving into our new home. Thanks!
Yay! Glad it could help, Denise!
Love how the bed turned out. Your guest room is looking so cozy and welcoming.
Thanks, Dianne!
I am wanting to do this to our current bedroom furniture. I am having trouble finding the Homestead House Wax in Espresso. It is sold out on the link attached to this post. Would the Fusion Furniture Wax in the color Espresso work ok?
Yes! Annie Sloan Dark Wax would work too. 🙂
Would this work with a honey colored wood as well?
Absolutely! It can work on so many things since it’s really paint and wax that only looks like stain.
Beautiful job! Your creativity is amazing! I can’t wait to see what you do with the new place. I love old brick. Please don’t power wash it. The charm will go down the drain! You are an inspiration.