
Painted Tile Grout Refresh
For the first time in years, we have a baby in the house again; a baby that is in the form of a 2 month old puppy. (If you follow me on Instagram, you’ve probably already seen her. I promise I’ll introduce her more formally here on the blog later.)
In the time it took me to type those three sentences just now, she’s attacked my hair, chewed on a table leg, peed on the living room rug, and licked an electrical socket. Suffice it to say the home improvement projects have been at a bit of a slow down lately with a fluffy 8 pound rascal calling the shots.
But the very last home improvement project in Olivia’s bathroom makeover took less than 45 minutes! And that’s even on mischievous puppy time.

Remember this floor? The brown-grout-that-had-seen-better-days floor? I was really feeling stuck on this one.
Part of me wanted to paint the whole floor; I toyed with stenciling some times, thought about laying down some vinyl plank wood flooring on top, or just leaving it and scrubbing it like a mad woman.
So after getting some input from y’all in this last update post, the vast majority of you guys said to just clean it up and add a rug. (I usually have to be talked off of my cliff since I seldom can leave well enough alone.)
The whole point of this bathroom though has been to make a big change for as little money and as little effort as possible since it’s all going to be gutted (hopefully) in a couple of years anyway after we tackle some larger projects.
But that grout… I just couldn’t live with it.

So for around $15, I made it look freshy fresh.
Supplies Used: (Some affiliate links are provided below for convenience.)
- Old toothbrush
- Totally Awesome All Purpose Cleaner (or whatever cleaner you prefer- that’s just what I used)
- Dry towel/rags
- Grout Pen
That might be the shortest supplies list this blog has ever seen.
I sprayed all of the grout lines first with the Totally Awesome spray, let it sit for about 5 minutes to penetrate all of the dirt and grime, and then scrubbed with an old toothbrush. That cleaner really does live up to its name.

Then dry.

I have no idea where I’d heard of grout pens before, but since our master bathroom, kitchen, and breakfast nook all have this brownish grout, I thought this room would be the perfect spot to test them out.

I’ve gotta tell ya, they are so satisfying. I bought three to be on the safe side, in case the grout paint ran out, but I only needed one for our entire bathroom floor. (Whatever company makes this grout pen, they have no idea who I am. I’m just sharing this because it worked well for me, and I thought it’d be helpful to pass along to some of y’all needing a quick refresh.)
Let the grout dry completely and then just trace the lines with the grout pen.

SO eeeaaaaasy! The tiles themselves even look brighter because of the grout change.

Pretty soon, I’ll put a bath rug on top of it, so the floor will hardly be noticeable. But I feel so much better about it now.
Now, the final step on the to-do list is mainly to decorate. The fun part!

So far, I’ve hung just 1 shelf to start playing with styling things, but it’ll get there. I’m still thinking some art, a new shower curtain, a window shade, that kind of stuff.
Here are all of the projects and sources that have gone into this space so far + our little to-do list left:
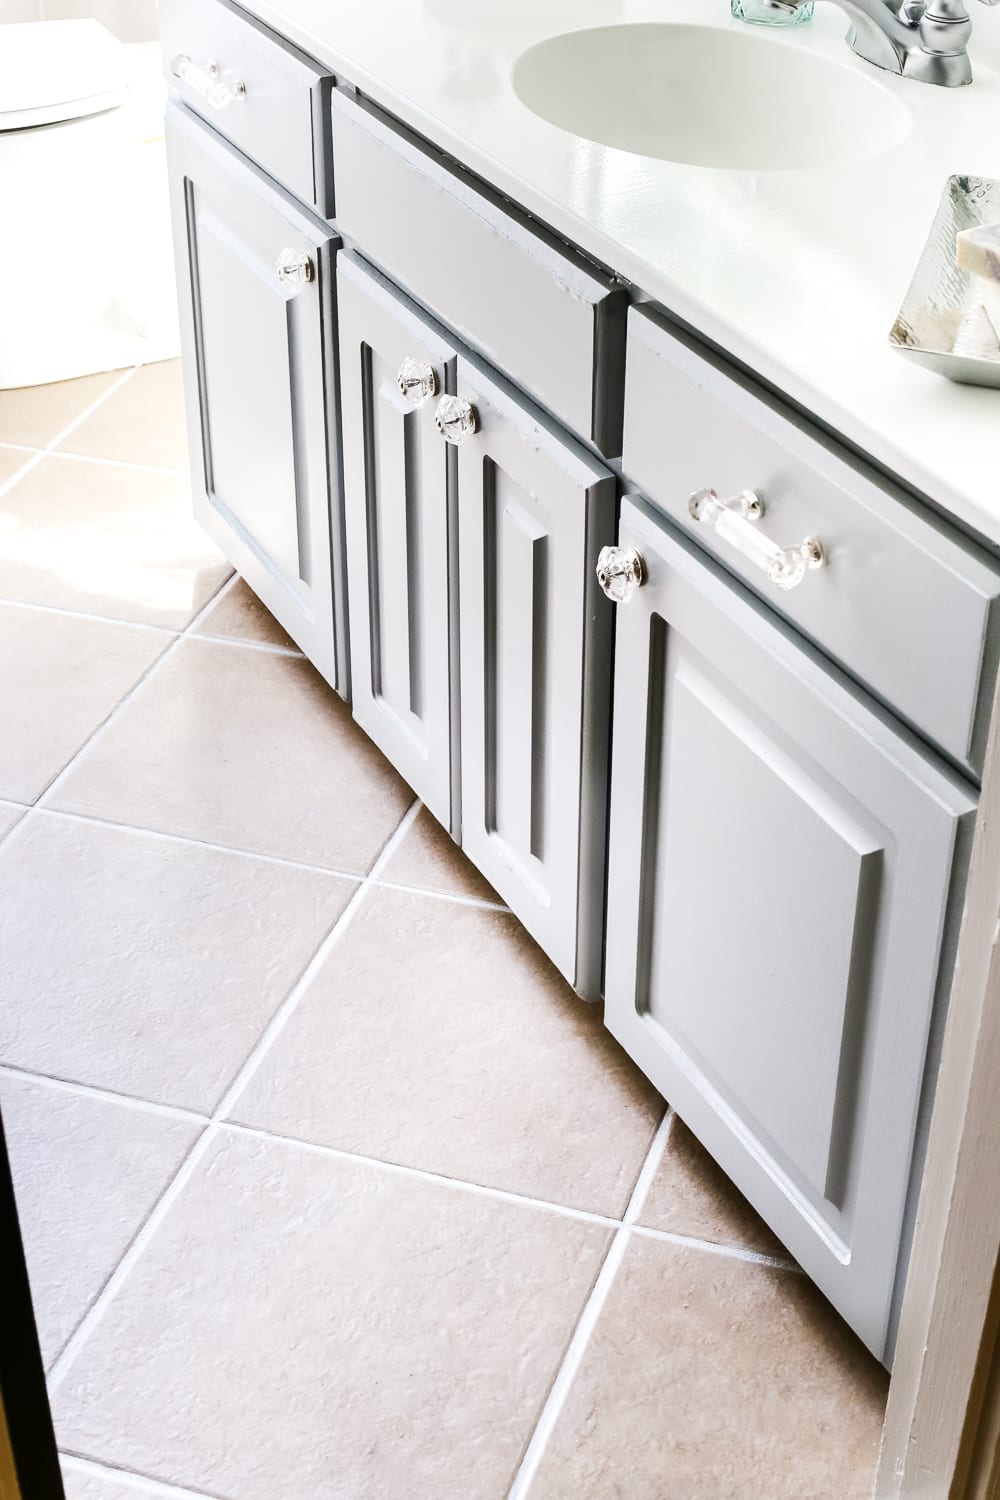
Paint walls Magnolia Home WeekendPaint trim Benjamin Moore Simply WhitePaint doors Benjamin Moore Wrought IronPaint sink and tub/shower with Rustoleum Tub & Tile Refinishing KitRefresh light fixturePaint vanity cabinetPaint tile / grout- Hang wall decor (halfway finished)
- Decorate final touches

If you want more ideas for jazzing up your floors, you can check out some of these past posts too:
- DIY Moroccan Vinyl Tile Floor
- Faux Marble Tile Floor
- 18 Favorite Peel and Stick Vinyl Tiles
- The Best Tile for a Small Budget
- What to Know Before Buying Jute Rugs
Got any other quick floor refreshing ideas? Or puppy struggles at your house like we do? #SendCoffeeAndChewToys
If you want to save this post for later, you can pin it here:


Your floor looks incredible. I’m a newish ? follower to your blog and wanted you to know how much I enjoy your blog. You are a very talented decorator and writer. Thanks for sharing!
I’ve heard of these great grout pens before but never used them since I don’t have any tile. My what a terrific change. Your floor looks great!
As to puppy woes– The thing to remember is that when you have a puppy he/she pretty much has to become your main job until she’s housetrained. Every moment of every day sorta revolves around their need to go out for potty breaks. 😉 If you can’t be that attentive, then put them in their crate. Dogs do not like to soil their bedding area. But do remember, a puppy can only wait to potty for so long–regardless of your schedule. Example: a 1 month old puppy can wait about an hour between breaks; 4 month old about 3-4 hours. Some breeds are truly more difficult to housebreak than others.
As to chewing….Of course give them appropriate chew toys instead of your furniture. 😉 I had a puppy who started to chew on the door stop while I was getting ready for work. I happened to have some spray cologne in my hand and just spritzed a tiny bit on the door stop while I gave her a demonstrative “No!”. She tried it once more (got a teeny lick of apparently an awful taste!) and that was that. No more chewing ever again.
Best of luck with your puppy. I love dogs. 🙂
I love this easy update! And as far as the puppy goes…. it’s been years since we’ve had a puppy in the house, but we currently have a newborn so I feel ya a little bit!
Wow, I had no idea there was such a thing! Thanks for sharing. I need to do this somethin’ awful!
Wow! This is amazing! It looks like a new floor. Thanks for sharing.