
DIY Built In Cabinets and Window Seat
A step-by-step tutorial to build DIY built in cabinets and a window seat using inexpensive stock kitchen cabinets.
Whew! We survived! The most hardcore project of the Carney rec room makeover is finally over… at least we hope anyway.
2 weeks ago, the room looked like this:

This was by far the most challenging built-in project we’ve ever done, and there have been a couple over the years.
- See our IKEA built-ins at our last house
- And our IKEA bookcase built-ins in our current playroom
- And our built-in window seat using a refrigerator cabinet
But this time, IKEA was completely out of stock of everything.
It’s all good though. You know what I remembered? Hardware stores exist and they have stock kitchen cabinets. Problem solved! I did once survive without IKEA as hard as that is to believe.

After about a week, they are starting to look official! Just minus the cabinet doors and flooring and paint and all that.

(Sorry for the flooring boxes in the middle of the room… that’s around the corner.)
I documented the process as much as possible while Robert and I knocked this out in a week.
DIY Built-In Cabinets
(Some affiliate links are provided below. Full disclosure here.)
Supplies Used:
- Stock Pantry Cabinets (We used 7 total)
- Stock Refrigerator Cabinets (We used 4 total as the window seat portion)
- Stock Base Cabinets (We used 3 total)
- Stock Cabinet Side Panels (We used 4 total for the cabinets with exposed sides)
- 15- 2×4 boards
- 2- 1x12x8 boards in poplar
- 1x10x10 pine board
- 1x12x10 pine board
- 4- 1x4x8 pine boards
- 3- 1x8x10 pine boards
- #8 1 1/2″ cabinet screws
- #8 1 5/8″ deck screws
- Wood shims
- Toe ductors
- Wood filler
- Paintable caulk
Tools Used:
- 4 Clamps
- Speed Square
- Tape Measure
- Chalk Line
- Drill and bit set
- Cordless finish nailer
- Cordless crown nailer
- Level
- Utility Knife
- Miter Saw
- Jigsaw
- Oscillating Multi-Tool
- Orbital Sander

Here was the obstacle though… on the wall where we planned to place the built-ins were baseboard wall vents. And there was definitely no easy or cheap way to reroute them somewhere else in the room.

The Base
1. We installed these toe ductors that allowed us to route the air vents underneath. We definitely wouldn’t want vents trapped under permanent cabinets.

2. Using a tape measure, we marked on the subfloor the depth we needed for the cabinets to sit against the wall.
3. Then, we marked the entire length of the wall at that depth using a chalk line.
4. We used that line to build the entire base using 2x4s, screwing the boards together and to the walls and floor with #8 deck screws.
5. We placed 2x4s on either side of the toe ductors so that they would vent through the front of the base.

The Window Seat
6. Then, we started on the window seat, building support for behind the cabinets with 2x4s.

We wanted that extra space behind these cabinets since they weren’t deep enough to create a comfortable seat and so they would end up being the same depth as the high cabinets, once they were installed later on either side.

7. We set the backs of the cabinets with 1 #8 cabinet screw per cabinet into the 2x4s behind.

We only used 1 screw per cabinet at this step so that we could still have wiggle room to line up the front of the cabinet frames.


8. Using shims between the bottom of the cabinets and the base, we set each one level.


9. Then, using clamps on the fronts of the cabinet frames, we adjusted them until they were flush with each other.

10. To attach the sides of the cabinets together, we pre-drilled pilot holes and screwed them together with cabinet screws.
11. Once these four cabinets were set, we drilled two more screws into the backs so they wouldn’t budge.

Would you like to save this?
12. For the top of the window seat, we double checked one more time to make sure all of the cabinets were level.

13. Then we cut a 1×10 and 1×12 pine board to the length we needed and screwed them into the top of the cabinets to make the window seat.

The High Cabinets
14. Then we repeated steps 7-11 on both sides of the window seat for the high cabinets, screwing them straight to the back wall into the studs.

15. Whenever we encountered wall outlets, we just cut out those places in the back of the cabinets with an oscillating multi-tool and used outlet spacers to bring the outlet forward to attach the face plate to be accessible inside of the cabinet.

16. We repeated steps 7-11 again on the right side of the window seat for the 5 high cabinets.

These were a little trickier to line up, but using a square and clamps helped to get them perfectly level with each other.

Clamps are magic… see that gap?

Gap be gone!

Once they were lined up, we pre-drilled and screwed them together.


Trimming Them Out
17. I’m the worst blogger ever and completely spaced on photographing this step for the gaps on the sides. So forgive this terrible photo…
We screwed 2x4s on the side of the cabinet and the wall then screwed a 1x12x8 poplar board in front to make the cabinets officially “built in” to the walls on the sides.

18. Then we attached 1×4 boards at the top of the cabinet frames, using the miter saw to cut the boards at 45 degree angles for the corners.
19. For the bottom of the built-ins, we attached 1×8 boards in front of the 2×4 base as the toe kick.

19. Then we wood filled nail holes and caulked gaps like crazy.
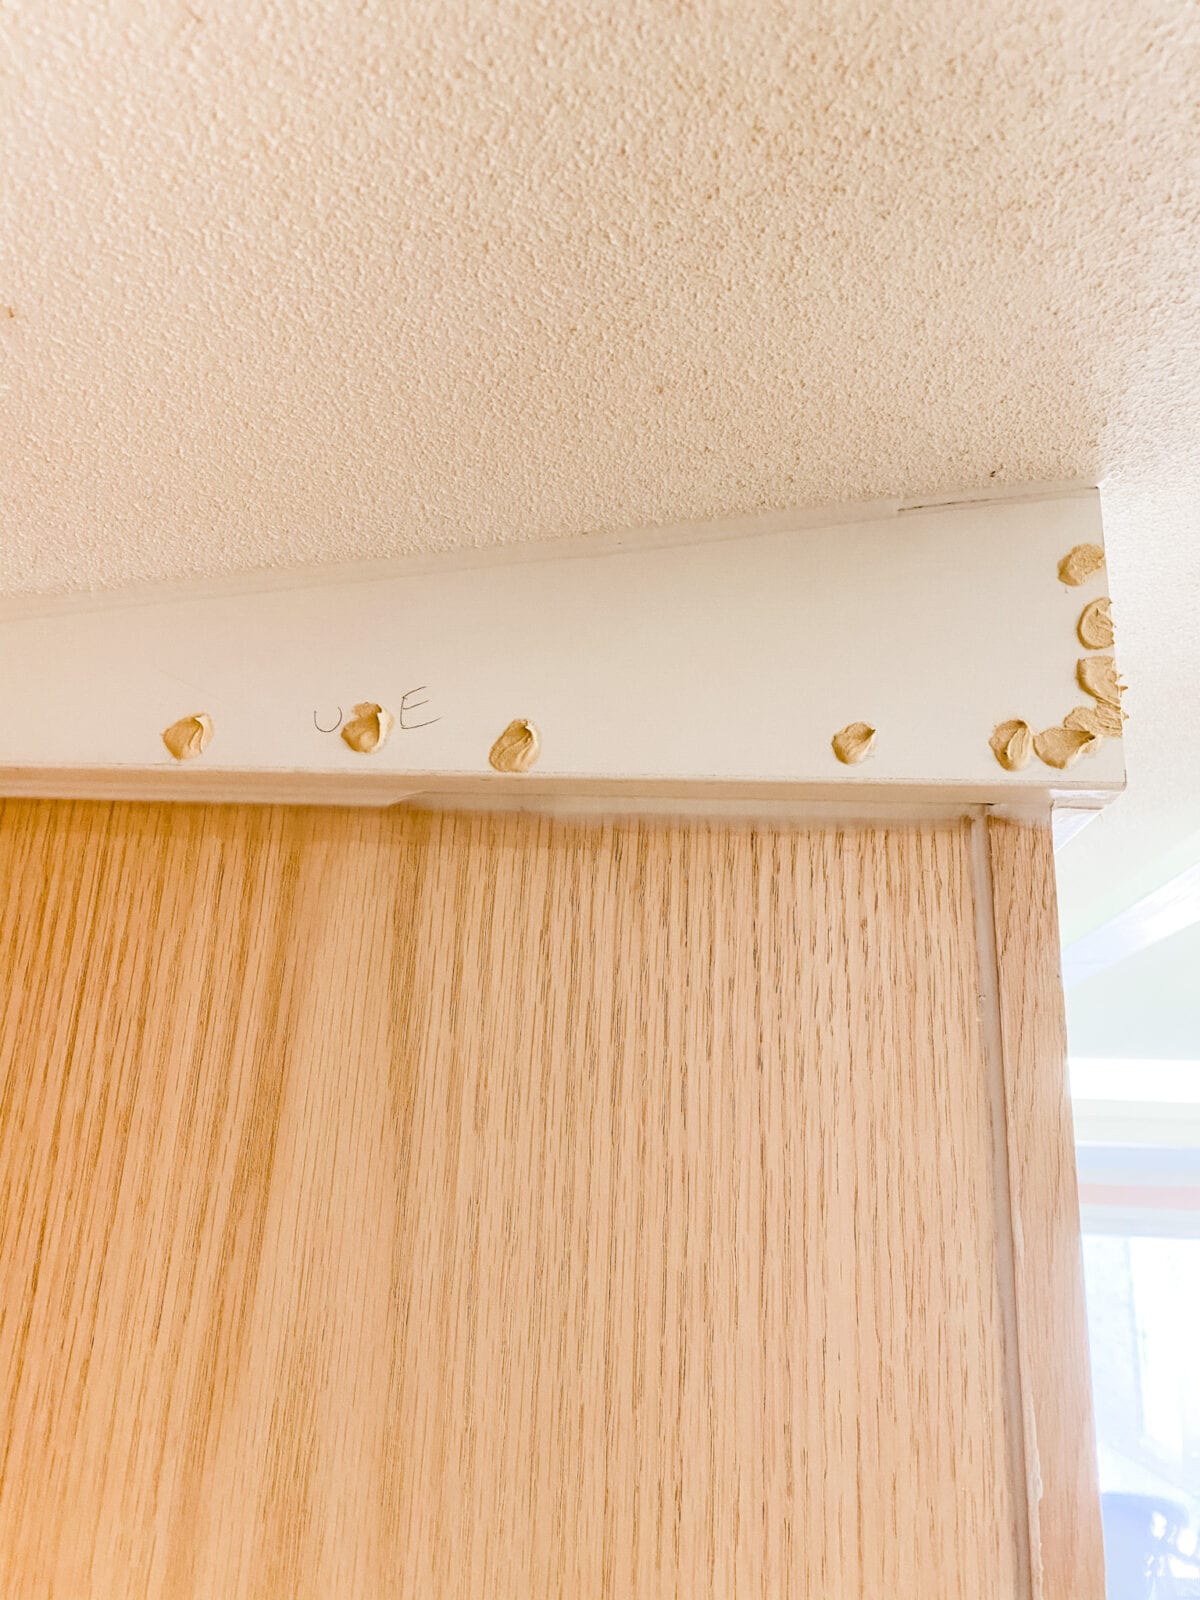

20. Once the wood filler was dry, we sanded it smooth.

21. For the last little step, we attached the vent covers where we had left space for the Toe Ductors.


The Finished Built-Ins!
Check! Done! My gosh this one kicked our butts.
But look how massive this room looks now! And all of that glorious storage. We’re leaving the cabinet doors off for now because all of it will be getting painted soon.

Before that happens though, new floors are going in next.
This room will finally start to look pretty! We’ll be sharing the whole messy process over on our Instagram Stories in the meantime.


