
DIY Faux Fireplace for Under $600 – The Big Reveal
A step-by-step tutorial to inexpensively build a DIY faux fireplace using faux stone, shiplap, a stacked log fire insert door, and repurposed antique mantel.
Once upon a time there was a girl who longed for something more.
Something that would be worth the wait, worth the anticipation, worth the hard work.
Until one day, she finally got that special something that made her heart go aflutter and kept her warm her all over. And she knew nothing worth having is ever easy.

Okay, reality check. It doesn’t actually keep me warm. It’s faux after all. And, I love my hubby way more than the melodramatic romance I’m creating here. But y’all.
I finally have my fireplace!
UPDATE: See the new and improved after of our diy faux fireplace here.

I feel like this needs a drumroll, Christmas Vacation style. (Please tell me you get that reference.)
I’m not even exaggerating when I tell you Robert and I busted out the Christmas stockings and admired them on our new mantel simply because we can dang it!
And then we stuffed them back in the closet and counted down the days until we could admire them again in 3 months.
The best part, we might actually be able to afford presents this year since we cranked out this massive project for less than $600! Okay, it’s way too early to be talking about the holidays, so I’ll break down our great big how-to.
I can’t even believe we had this going on in our living room a little over a month ago.

We moved into this house with hardly anything except a couple of sad pieces of furniture from our newlywed apartment days. The tiny bookshelves we had as our entertainment center on this wall really weren’t doing it for us.

And a fireplace upgrade starting at the basic builder price of $5,000 wasn’t going to work for us either.
After prowling Craigslist for several months and looking at every single DIY faux fireplace I could find on Pinterest, we devised our plan to build a statement making fireplace for as little as we could.
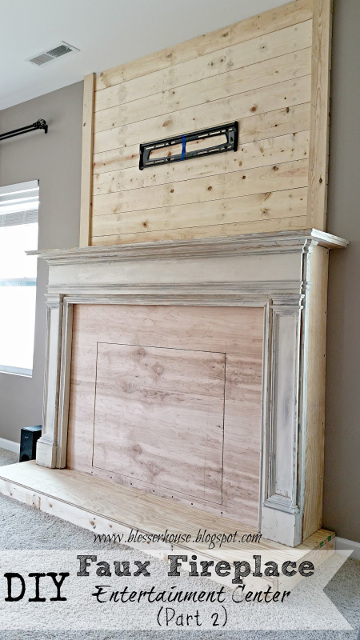
How to Build a Faux Fireplace Part 1
To check out how we built the hearth, mantel, and firebox door, check out Part One.

How to Build a Faux Fireplace Part 2
To see how we built the plank wall above the mantel and wired our TV behind the fireplace, check out Part Two.
How to Build a Faux Fireplace Part 3
You can find how we added whitewashed Air Stone, the concrete hearth, and painted the firebox door in Part Three.

So here’s the big shabang for Part 4 to finish up this big guy. I got the idea to make a door for the faux firebox from Pepper Design Blog.
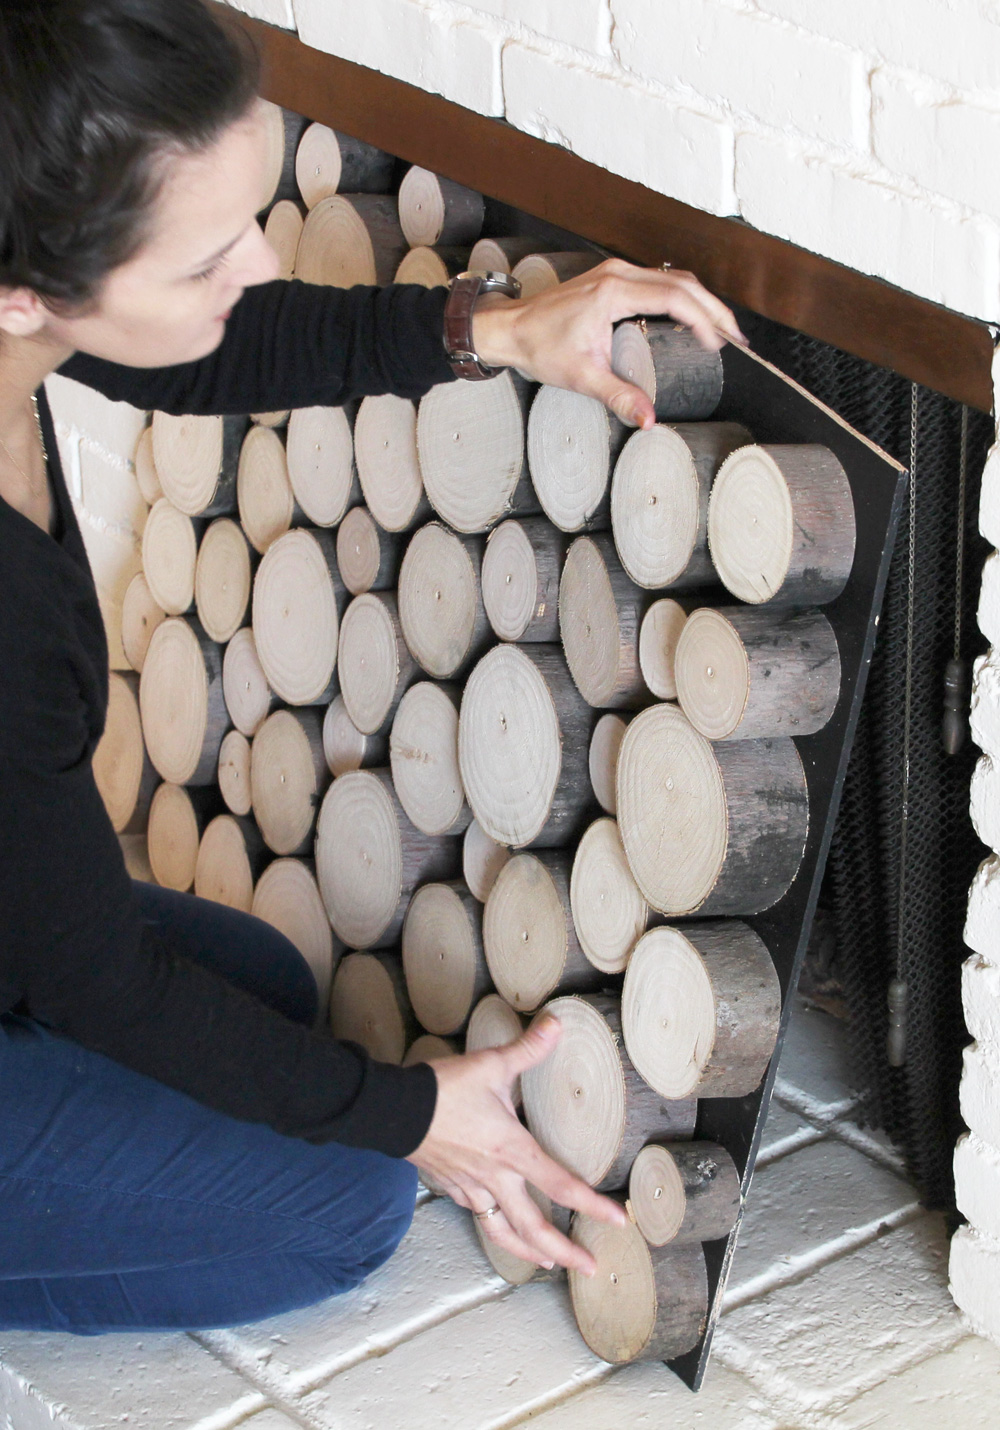
DIY Faux Fireplace – Log Stacked Door
Supplies
- Already cut wood slices or small tree/logs
- 3/4″ plywood
- Circular saw or miter saw (if your wood slices aren’t already cut for you)
- Matte black paint (I just used chalkboard paint since I already had it in my stash.)
- Paint brush
- Gorilla glue
- Piano hinge
Steps
1. Cut your plywood piece to your desired dimensions of the fire box door using a circular saw.
2. Paint the plywood piece with matte black paint or chalkboard paint and let dry.
3. Cut log ends using a circular saw, miter saw, or band saw. (For the log ends on our fireplace, my father-in-law cut them for me on his band saw.)
The log itself even has an interesting story. My in-laws were walking on their trail in the woods behind their house when they discovered a beech tree that had been cut down by a beaver. The little guy apparently rejected it for the dam he was building because it stayed in that same spot in the woods for a while, so they snagged it for me. Yay! Free craft supplies! And eco-friendly!
My father-in-law cut them to be two inches long so they would look deep enough to be more convincing of a real log stack.

4. After the paint was dry, I laid the plywood piece on a flat surface to start arranging the logs. Working with the log pieces was actually fun! It was like a giant puzzle and only took me about an hour tops to get it the way I wanted it.

5. I glued down all of the pieces with Gorilla Glue.
Definitely put down all of the pieces first before you start gluing so you can move them around as you go. Good for us indecisive gals.

6. After the glue is completely dry (I gave it 24 hours just to be sure), we hung the door up on the fireplace box opening using a piano hinge.
(See Part 1, Part 2, and Part 3 for all of the previous steps. This was a massive project that collectively took a week.)
While the glued pieces dried, I started painting the Air Stone.
I know. I went through that whole process of whitewashing it in Part 3, which I really liked. But I felt like the whitewash plus the log stack firebox, plus the architecture of the mantel all competed with each other.
I warned you, didn’t I? Totally indecisive.
Thankfully, I had plenty of Sherwin Williams Pure White leftover and it didn’t take very long to achieve the all white fireplace. I didn’t snap a photo of me painting it, but honestly, you’re not missing much there.

(Excuse the fall decor if you’re reading this mid-spring.)
Now, I’ve still been struggling with working around the electronics on our mantel.
I had hoped to keep them in the space hidden inside the firebox, but since the door is so heavy with the log ends, we decided it would be best to keep them on the mantel and just access the outlet inside the firebox on the rare occassion we need to get to it.

A leafy vine from Michael’s is my solution for now. It disguises the speakers, Bluray player, and Playstation. Can you see them? (If you can, just pretend you don’t.)
If it were up to me, I would have no TV on our mantel at all but life happens and no other wall would really work for that. (Hi, welcome to our home. Excuse the mess but we live here.)
Sometimes it’s better to keep the hubby happy than turn our house upside-down for the sake of appearances.

UPDATE:
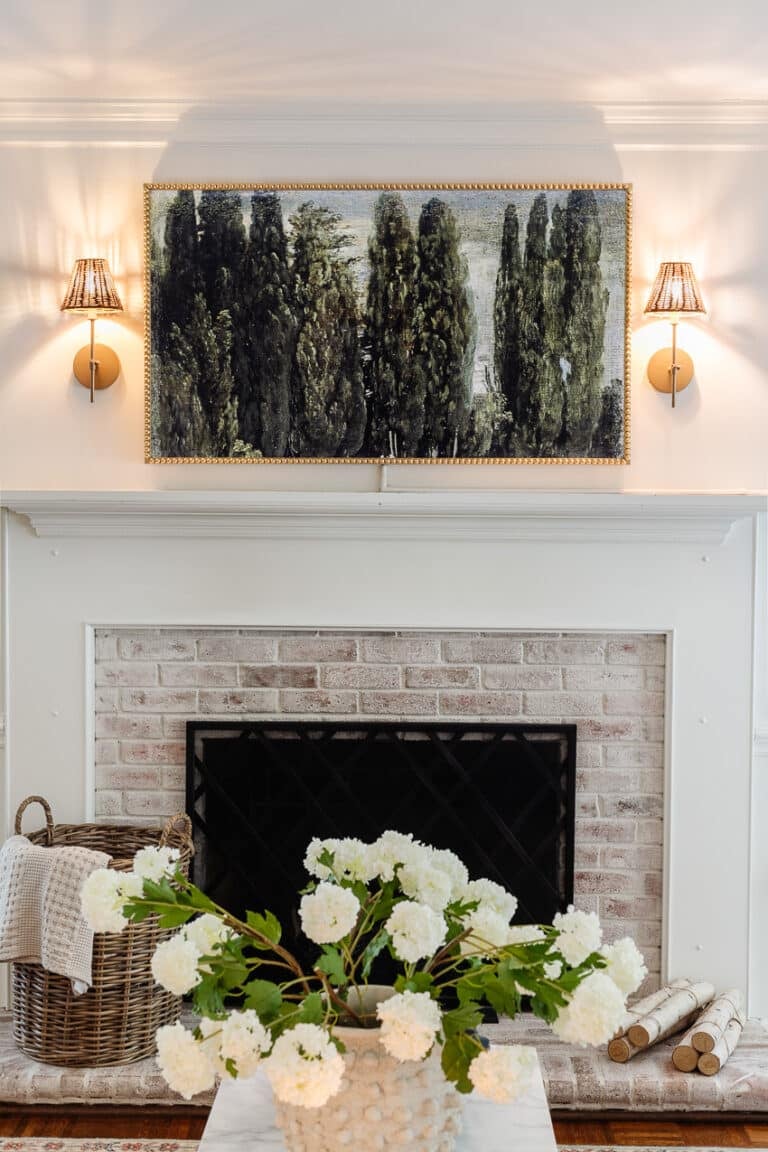
How to Build a Faux Fireplace Part 5
If the faux stacked log fire box look isn’t what you’re going for, you can see how we built a faux fire box using faux brick paneling in Part 5.

The supplies breakdown is provided in the links too.
I am so ecstatic to have this huge project knocked off our always growing to-do list.
Our living room is coming together little by little and I already have our coffee table that I’m getting ready to tackle next. I’m hoping to do a big reveal of the entire room soon. I’m not quiiite there yet.

Frequently Asked Questions
Did you seal the cut ends of the logs for the faux stacked fire box door?
I let the wood dry out first, but if I could do it over, I would seal the cut log ends with spray polyurethane.
How do you run TV cords from above the fireplace?
We later cut a hole in the top of the mantel with a hole saw bit on a power drill to access the outlet behind the fire box door. You can also hide cords by using cord covers.
Can I follow this DIY faux fireplace tutorial but put in an electric fireplace insert?
Absolutely! You will have to adapt the dimensions to fit the insert, but the steps should be the same. I recommend this electric fireplace insert.


Simply stunning! I love that you broke out your stockings just for the occasion, haha! Too cute! (And yes, I get the Christmas Vacation reference!)
Haha If you build a mantel, it’s a rite of passage to break out the stockings. It’s like the equivalent of breaking a champagne bottle on the bow of a new boat. That’s my excuse anyway. 🙂 So glad someone gets the Christmas Vacation reference.
it really is gorgeous xx
Thank you! 🙂
LOoooove it Lauren! I was obsessing last year over the faux logs and wanted to do something similar on our bench/”log holder” No luck finding anything that was cheap or local. Awesome that your in-laws snatched that up for you. I agree with the TV over the Mantle I had the same thing here but though the house is for me to decorate…its also there for my family to live in ; ) You did a great job and I really love the books for now…I am sure you’ll figure out another solution. P.S. when am I coming over for coffee? lol
Girrrl, you can come over for coffee any time you want. Haha I was definitely lucky with my in-laws finding the wood. I was in Michael’s last week and their wood slices the same sizes as mine were $6-$10 each…um WHAT? It’s definitely not cheap if you don’t have access to a tree. Since it will be getting cold soon, you never know. You might be able to find cheap or free firewood on Craigslist. I love your fireplace though. The gray you chose is gorgeous!
I am floored! This is incredible! I can’t believe it was just a plain wall and now it is a gorgeous showpiece! I’d love for you to link this up to my Creative Ways Link Party that’s about to go live. Hope to see you there!
Blessings,
Nici
Thanks, Nici! I appreciate the invite! I just checked it out and linked up. 🙂
Absolutely stunning and you totally fooled me with the wood!
Yay! Thanks! I’m hoping to fool everyone. 🙂