Front Yard Makeover: How We Revived Our Lawn in a Year
How to revive your patchy, weed filled front yard into a green plush lawn in a year or less using these simplified lawn care steps.

Not all makeovers happen overnight. But this one felt like it was as slow as watching grass grow… literally. (har har)
After a few years of frustration with our front lawn, we finally have the plush green grass of our dreams. I’ll share the steps we used to revive our lawn, if your own front yard needs a little curb appeal love.
See the difference?!

Front Yard Before and After
I say before and “after” loosely because is a house really ever “finished”? But this is the massive progress we made on our front flower beds and lawn.
Our front yard went through some years of abuse thanks to foundation repairs, heavy equipment from our backyard makeover, and sheer neglect as we worked on a lot of interior projects.
The result was a total mess of weeds and patches.

Steps to Better Curb Appeal
For reference, we live in the piedmont of South Carolina in planting zone 8a with clay soil and tall fescue grass.
Here is a quick rundown of the steps we took to improve our front yard’s curb appeal:
- Added stone edging to create our DIY front flower beds
- Cleaned and sealed our limewashed brick
- Tested soil
- Determined a care routine based on our grass type
- Applied weed killer and aerated in the fall
- Overseeded and fertilized in the fall and spring
- Watered on a new grass seed schedule
- Watered on a lawn maintenance schedule and mowed high to prevent weeds
None of those lawn care steps were quite that straightforward, but that’s the simplified version. I’ll go into more detail below.

What We Hired Out and What We Did Ourselves
Adding stone edging, the initial planting of the flower beds, and periods of the aerating, overseeding, and fertilizing were DIY jobs we did on our own.
But we’ve been able to hand off a lot of work lately to our 19 year-old neighbor Tanner who is a total grass guru and owner of his own lawn care company, Palmetto Lawn Services. He has totally brought our lawn back from the dead this year.
DeHaan Painting handled our limewashed brick cleaning and sealing. Robert and I climbing 2 stories on ladders to do that job was a hard pass for us, safety-wise.
Last fall, we fixed our damaged existing irrigation system, which did wonders for our grass once we finally got our sprinklers up and running.
All of those tasks combined have made a world of difference in our home’s curb appeal.
I’ll jump into a run-through of the more detailed lawn makeover process. The first step required a little research since every lawn is different.

Step 1 – How to Test Soil
You can pick up a DIY soil test kit here or from your local home & garden store. This will give you a complete pH analysis and recommendations for the nutrients your lawn needs to help you determine your next steps.
How to Find the Right Grass Type for Your Climate
If you’re trying to identify the type of grass in your lawn or you plan to start from scratch, here is a guide to choose the right grass seed for your region.
Use the guide to help you choose the right grass type as you consider the climate in your planting zone. Take into account the amount of sun or shade your front yard gets.
We chose Pennington Smart Seed Southern Sun and Shade Grass Seed and Fertilizer Mix for ours.
Step 2 – When and How to Kill Weeds
Spring or fall are the best times to apply weed killer. We watered the grass prior application so the weed killer could be activated in the damp soil. (High humidity improves results.)
Make sure not to water your lawn AFTER applying weed killer. And check the weather to make sure it won’t rain immediately after your application since rain can wash away all of your hard work.
Keep pets and children off the lawn until 24 hours after application, for their safety.
Let the weed killer work its magic for at least 30 days and up to 4 months before planting grass seed.
We applied weed killer in September so that by October, our lawn was ready for grass seed. (The recommended weeding and seeding time frame for your area may be different from ours, depending on your climate.)
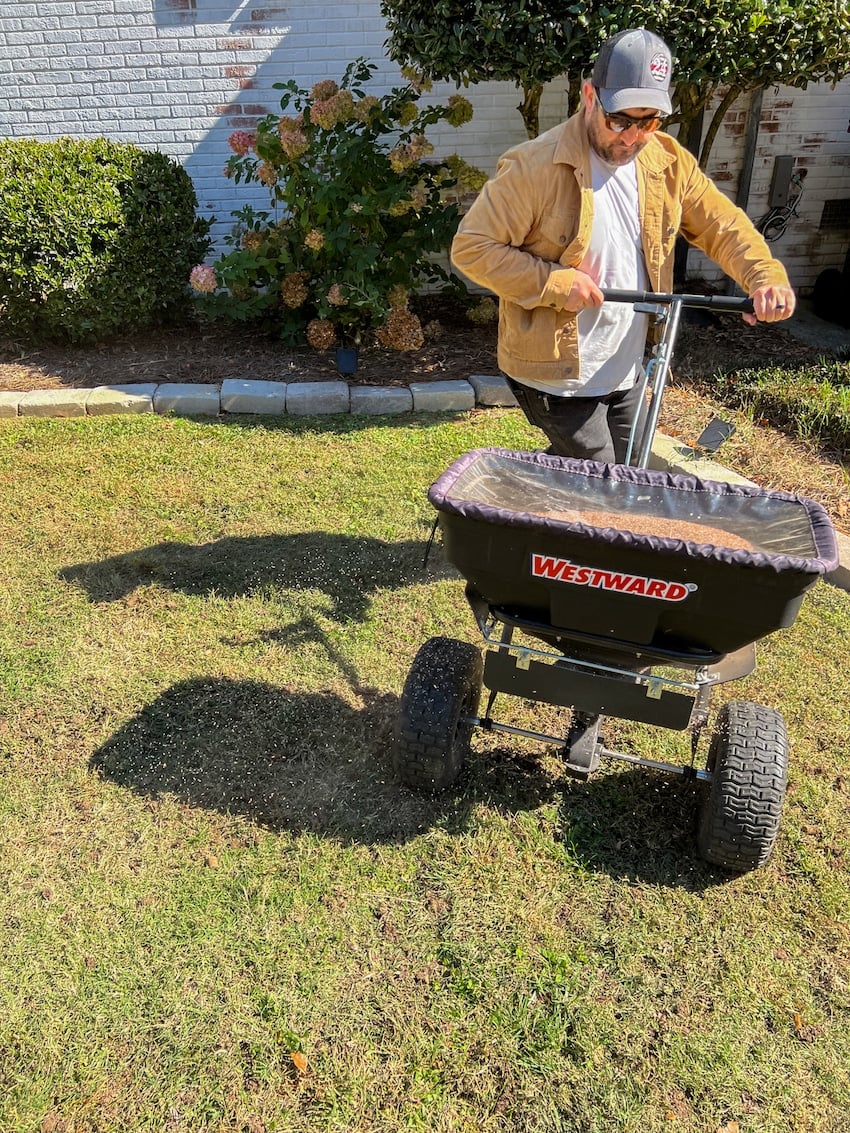
Step 3 – Aerating, Overseeding, and Fertilizing
After the weed killer did its job, our lawn looked dead as a doornail… even more so than it did before this whole grass revival endeavor. It always looks worse before it looks better. 😉
It’s a good idea to water your grass prior to aerating so the soil can be more easily penetrated. You can rent an aerator for a day from your local hardware store. We used Sunbelt Rentals. (We’ve even split the cost with neighbors to share an aerator rental before so that together we can knock out multiple lawns in a day for less.)
Grass thrives when water, air, and nutrients can flow through the soil, so aerating encourages that process and improves root health.
Here is a guide to show you how to dethatch or aerate your lawn, depending on your grass’s needs.
You can use this grass seed calculator to determine how many bags of grass seed and fertilizer you’ll need to buy for the size of your yard.
Tips for Applying Grass Seed
- Mow your lawn short, cut down to an inch or less. (This helps new seed reach the soil.)
- Rake and remove debris like leaves, twigs, and grass clippings.
- Spread grass seed and fertilizer in a fertilizer spreader. (Walk in rows across your lawn for even application.)
- Scatter hay to protect new seed in bare places. (You should still be able to see a little soil through the hay so as not to interfere with the new grass seed growth.)

Would you like to save this?
Step 4 – Watering Schedule
Your climate, soil type, and amount of shade in your yard will ultimately determine how often and how long you should water your new grass. So take these as general guidelines rather than hard and fast rules.
New Grass Seed
A good place to start, when you have new grass seed, plan to water your lawn 2-3 times per day for about 10 minutes. If you’re moving a sprinkler manually or watering by hand with a hose, try to water as evenly as possible throughout the area.
Germination Stage
Once your new grass seeds germinate, change the schedule to water for a longer period once per day. As new grass continues to grow to maturity, gradually transition to a long soak of about 40 minutes on alternate days.
Maintenance
Once grass is fully grown, cut down your watering schedule to 2-3 days per week.
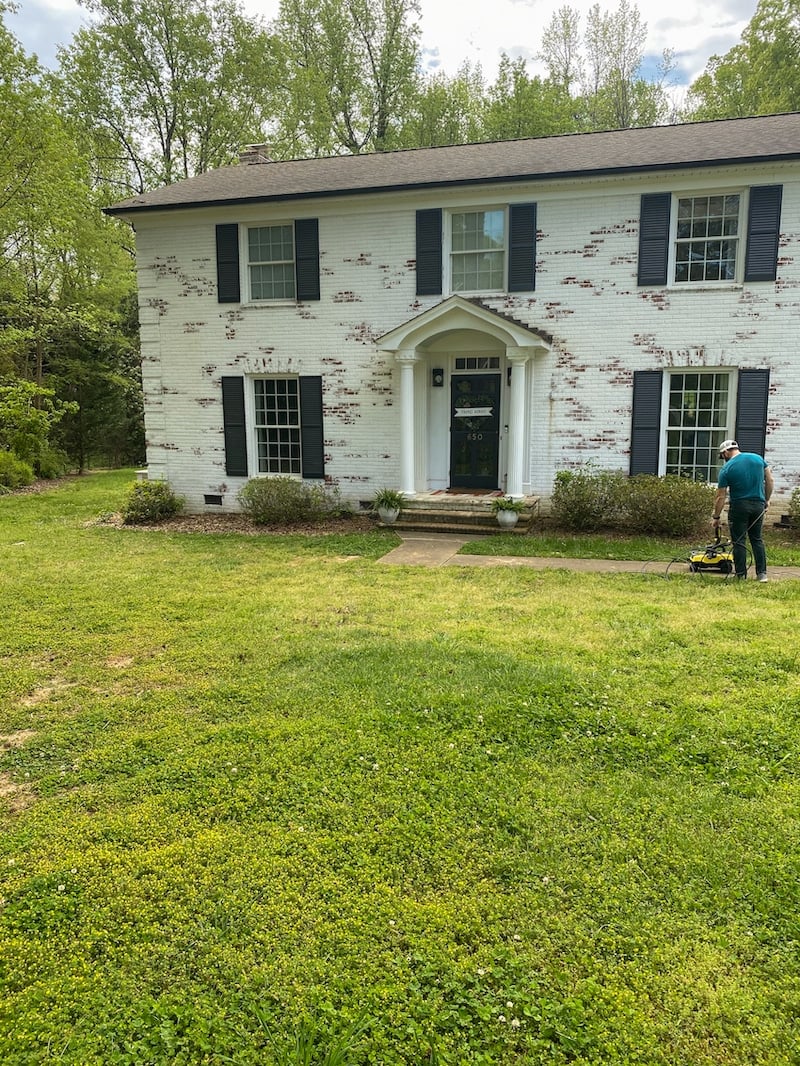
This shot of our front yard (directly below) is what our lawn looked like in Spring 2023.

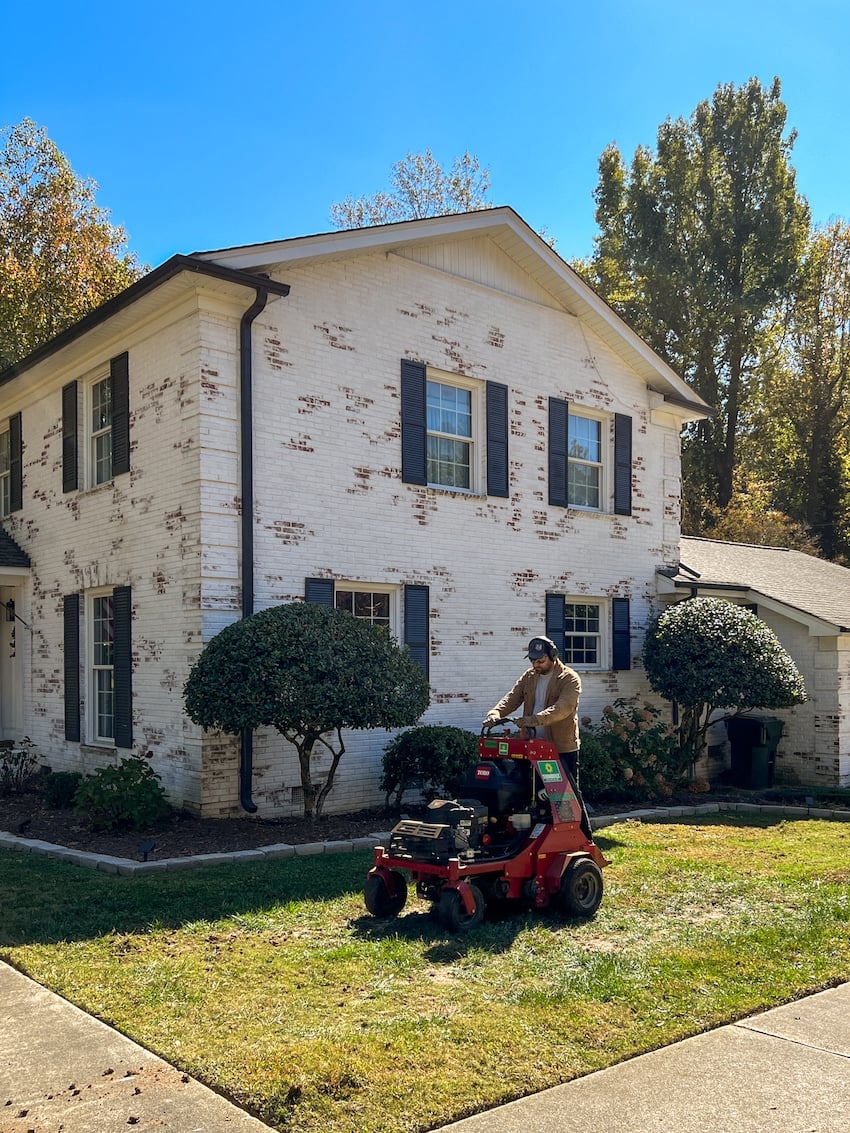
A year later, this is the dramatic progress. Check out those lines!

It does still have a little ways to go and a few stubborn patches that will continue to improve, but I can’t get over the difference!
Last summer, we couldn’t even walk barefoot through our grass because of painful stickers and thorny weeds. Now, it’s like walking across plush green carpet.
The kids have a blast running around and lying in the grass now, which is honestly the best part, regardless of how this lawn now looks. Playing barefoot in my parents’ plush green yard is one of my favorite memories as a kid, so being able to do that now with our girls is truly a gift I had taken for granted before.

In a few weeks, we have a big project happening that will boost the curb appeal factor even more! If you’ve followed on our Instagram Stories lately, you might already know what it is.
If you want to know about any other projects we’ve tackled to improve our home’s curb appeal, you can find our favorites below.
- DIY Front Flower Bed Makeover
- 6 Small Front Porch Ideas on a Budget to Add Curb Appeal
- 40 Best Faux Outdoor Plants for Planters on a Porch
- Stencil Painted Porch Floor Makeover
- Limewashed Brick Exterior Makeover
- How to Clean and Maintain Limewashed Brick