

Modern Farmhouse Kitchen Makeover Reveal
A dark and boring builder grade kitchen gets a budget-friendly makeover with modern farmhouse style using 100% doable DIY projects.
I can’t believe it. 2.5 years, 2 gallons of paint, countless buckets of concrete, and a ton of sweat equity later… kitchen reveal day is HERE!
I know you can’t see me behind your computer screen but I’m dancing and doing cartwheels like a maniac.
In case you need a refresher, this is what our kitchen looked like the day we moved in in December 2013 (along with my mother-in-law, Barb, there).

Really, even our “before” wasn’t much to complain about. Robert and I have been very thankful that we were able to build a new house and only have to focus on personalizing our house’s stock builder features.
This was definitely not a labor-intensive renovation or pricey update on an old kitchen like many homeowners typically face, so that alone helped tremendously.
Within the first few months we were here, we painted the walls, changed the lighting, painted a chalkboard wall, and then everything stopped.

We were okay with waiting a couple of years to tackle this one because we knew it would be the most expensive if we wanted it done the way we wanted. It also gave us enough time to really envision the look we were going for. (You can see my original plans and mood board here.)
And here it is all finished!

Since we have no windows in our kitchen, painting the cabinets white was sort of a no-brainer. Our dark wood cabinets before made this space look very cave-like and the red undertones clashed with the rest of our decor in the house.
Maybe I’m weird, but I actually like being able to see if there is a smudge of dirt or bits of cooking grease on our cabinets so I know with a glance what needs a quick wipe down. But really since we painted them a month ago, they’ve stayed very clean so far despite our love of frying bacon.
One thing that was always impossible to keep clean before was our stainless steel sink. And washing pots and pans underneath that squatty faucet was a big ol’ pain.

Originally, I’d planned on a white drop-in sink, but so many of you gave me the courage I needed to cut into our countertop and cabinet (so scary but we did it!) and install our huge farmhouse sink that we picked up at IKEA for only a little more than the standard white drop-in.
Robert and his dad got major brownie points for pulling this one off.

I actually enjoy washing dishes now. Well, maybe not enjoy, but it’s not as big of a chore now. 😉
We originally had beige formica countertops and a beige tile backsplash that I was never in love with either, but it was the standard option from our builder.

After wrestling with several layers of concrete for the countertops and placing white washed faux brick paneling over our existing tile, I’m absolutely thrilled with how they both turned out.

We eventually swapped out our black gas range for a stainless steel one too thanks to one I scored during a 30% off appliance sale at Lowe’s.

And even though we weren’t financially ready to change our vinyl flooring, we’re totally okay with it right now. This striped jute rug I got for 40% off helped a little bit too.
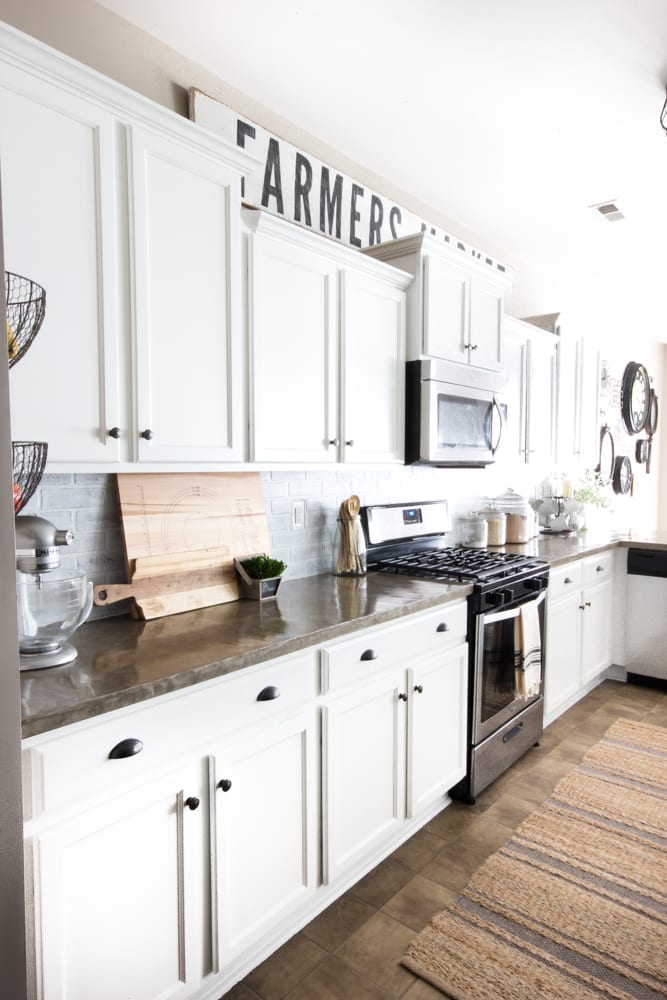
Don’t tell anyone… but I just walk in here and stare at this kitchen now. 😉
It really is like night and day. I could not handle the darkness anymore. Painting those cabinets has definitely been the biggest transformation in here.

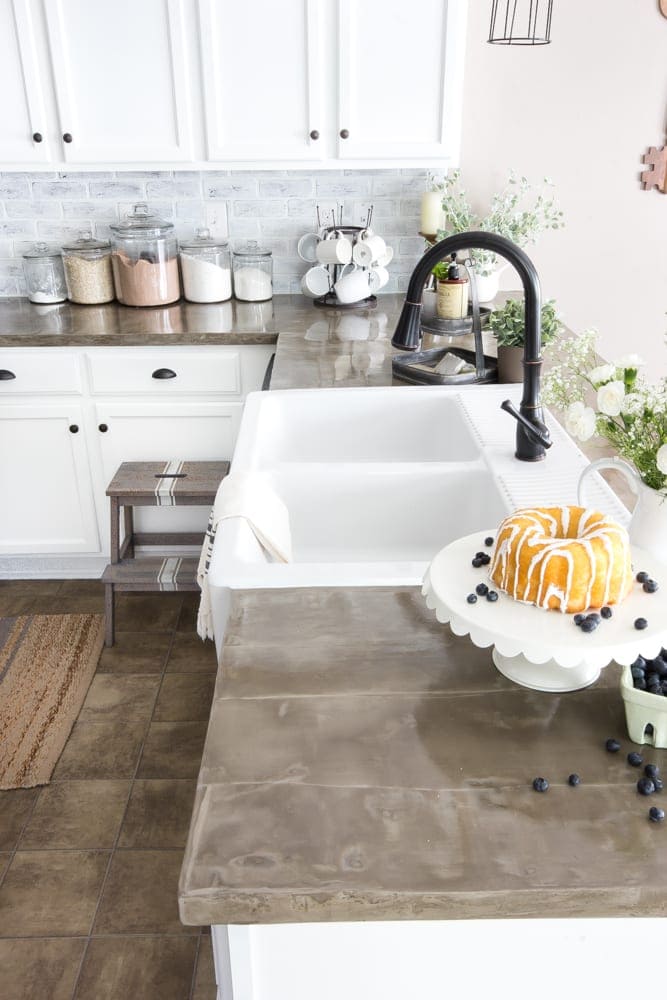
Baking parties with Olivia are way more fun in here now… even though I totally cheated and bought this one at the grocery store.

She loves climbing up on one of those barstools to eat her lunch every day, and I don’t have to worry about cleaning up behind those little swinging feet of hers since the Stikwood we installed protects our bar.

Last week, on a whim, I dug into our scrap wood pile and made that Farmers Market sign using paint I already had in my stash. Best free decor ever! I love how it turned out and how it fills that awkward space above the cabinets.
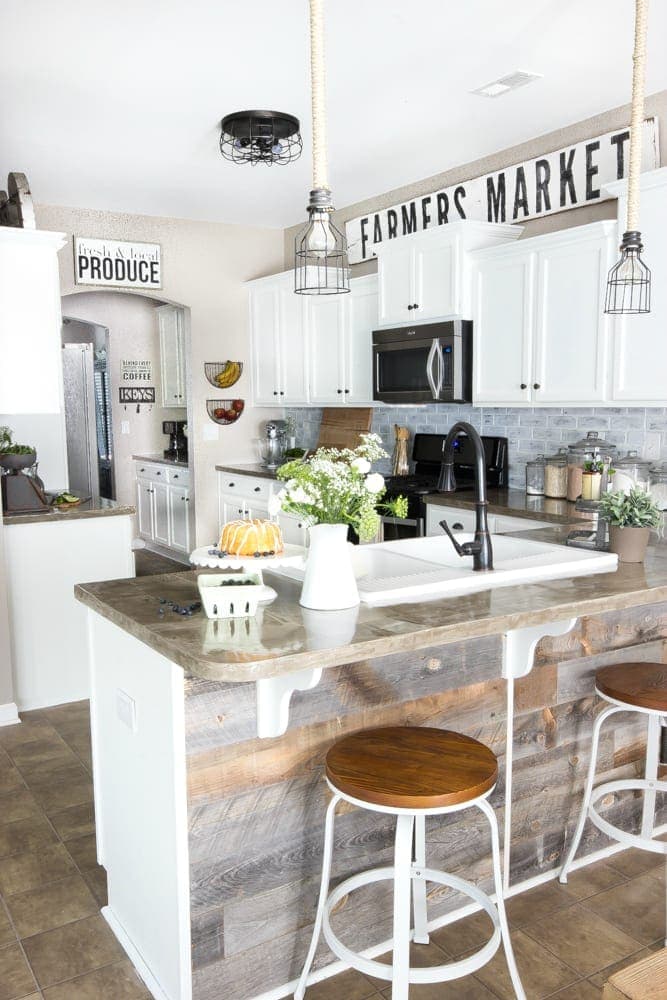
I didn’t really count our DIY wood beam in our kitchen makeover since it connects our living room, but it makes a big impact in here too.

And it ties in well with our chalkboard that we also framed using reclaimed wood from our scrap pile. Robert’s parents cleaned out some of their barn and gave us all kinds of pretty reclaimed wood pieces that we’re so excited to hopefully build some furniture with in the near future.

For some of the small decor items, I was lucky enough to find some great thrifted pieces like this food scale that actually works! I gave it a painted vintage look though since it was a beaten up stainless steel before.
Whatever veggies we bring in from my parents’ garden or our backyard garden box, I like to display them in the bowl on our scale until I get a chance to cook ’em up.

I’ve been tiptoeing out into our backyard to snip mint leaves for mojitos lately too since summertime is always a big entertaining season for us. This spot beside our fridge is great for setting up our drink station.

On our chalkboard, I still make it a habit of planning our meals for the week and there’s a little space at the bottom where I can jot down items I need to pick up at the store or where Olivia can draw while I’m making dinner.

A couple of years ago, we hung up these wall planters to repurpose as storage for our fruit and veggies and I liked them so much, I just left them there.

And this little tiered tray comes in handy for storing dish sponges and soaps and things next to the sink.

That’s pretty much it! It’s hard to believe we really only have 2 rooms to go before our entire house is finished. (You can see the rest of our room reveals here.) The playroom and laundry room our the last two spots on my hit list… and maybe a couple of closets sprinkled in there too.

If you missed any of the posts or projects for our kitchen makeover, you can check out all of them from the very beginning:
- Kitchen Makeover Plans and Mood Board
- DIY Industrial Pendant Lights
- Installing an IKEA Farmhouse Sink
- DIY Feather Finish Concrete Countertops
- How to Paint Kitchen Cabinets Like a Pro
- Faux Rusted Vintage Scale Makeover
- DIY Reclaimed Wood Bar
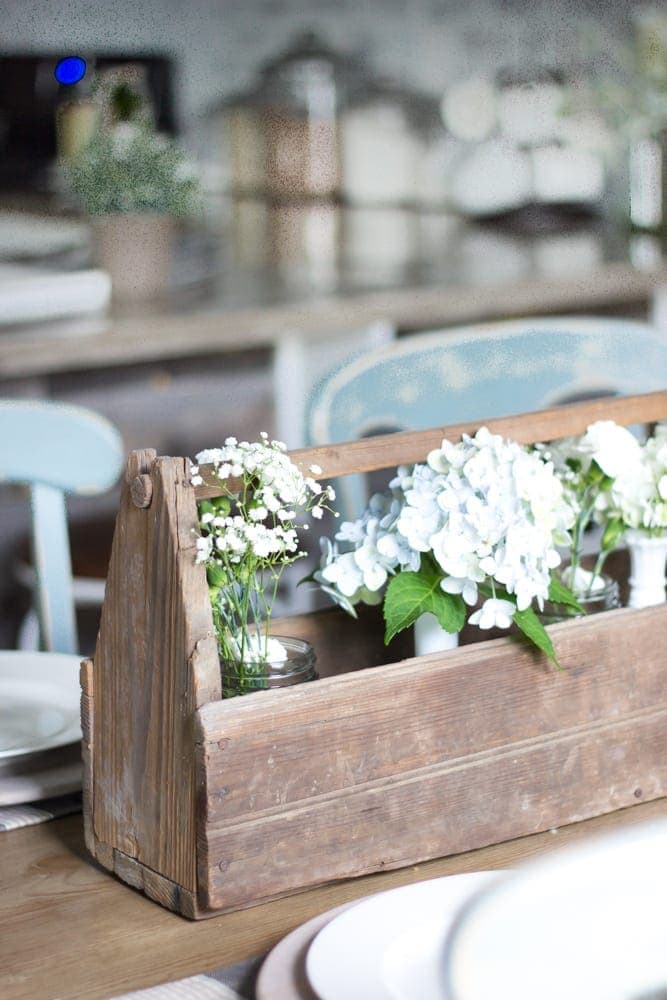
And now for the final tally…
Source List / Budget Breakdown: (Affiliate links are provided below for convenience. For more information, see my full disclosure here.)
- Wall Color– Sherwin Williams Perfect Greige
- Cabinet Color– Benjamin Moore Simply White
- Painted Cabinets – DIY – $152
- Cabinet Knobs / Pulls – D Lawless Hardware – $105.59
- Concrete Countertops – DIY – $250
- Faux Brick Backsplash – $75 (tutorial coming July 16th on Remodelaholic)
- Farmers Market Sign – DIY – Free using supplies from scrap pile
- Framed Chalkboard – DIY – Free using supplies from scrap pile
- Produce Sign – $0 gifted
- Cage Pendant Lights – DIY from original builder grade fixtures – $20
- Flush Mount Light – Amazon – $113.42
- Stainless Steel Range – Lowe’s – $419.00 (30% off sale)
- Bar Reclaimed Wood – Stikwood – $560
- Farmhouse Sink – IKEA – $312.98
- Sink Faucet – Amazon – $187.20
- Barstools – Target – $143.97 for all three (40% off sale)
- Striped Jute Runner – Target – $43.24 (30% off sale + 10% off coupon)
- Cake Stand – World Market – $0 using loyalty rewards points
- Storage Jars – Walmart – $59.80 for all five
- “Antique” Kitchen Scale – Thrifted – $16
- Mug Drying Rack – World Market – $16.99
- Large Pastry Board – World Market – $34.99
- Small Cutting Board – World Market – $0 using loyalty rewards points
- Kitchen Aid Stand Mixer – $0 Christmas present
- Blue Striped Dish Towels – World Market – $0 using loyalty rewards points
- Gray Striped Dish Towels – World Market – $7.98 for both
- Wooden Spoon Holder – Kirkland’s – $0 gifted
- Galvanized Tiered Stand – Curtis Creations – $35
- Wall Planter Baskets – already owned (similar linked)
- Galvanized Tray – Walmart – $7.94
- White Pitchers – Thrifted – $6 for both
- Glass Pitcher – $0 wedding gift
(If I left anything out, please let me know because this is quite a list.)
TOTAL: $2,567.10
I went completely bug-eyed when I calculated our final cost of this makeover. This was definitely the most expensive room we’ve ever done. But considering we got a new stove, new sink/faucet, new countertops, backsplash, painted cabinets, stools, and lighting, plus all of the small decor items added in, that was a pretty tall order to begin with. Our kitchen is 20′ x 12′ so size played a major part in that too.
In the end, I think we spent nearly as much eating out during the 3 month process while this room was periodically out of commission for cooking meals.
Are you as excited as I am to stick a fork in this thing?! Feel free to join us for the virtual dance party. 😉
Have you ever tackled a huge kitchen makeover before? Or plan on one in the future? I’d love to hear any budget tips you’ve used in your own kitchen reno so we can all help each other out. And if you’ve ever felt intimidated to makeover a huge space, you can do this! Just take it one step at a time. It’s incredible what just paint alone can do.


Love, Love, Love the kitchen reveal….oh my goodness, what a transformation!! It looks wonderful and I know you are enjoying it…. There are so many great things, I can’t even begin to choose a favorite! Thanks for sharing……
Thank you so much, Lanita! It’s been quite a job but soooo worth it!
Wow! Your kitchen is beautiful! As I was scrolling through and saw the farmer’s market sign, I said to myself, “I’m going to ask if she made that…” Continued scrolling and got my answer! Don’t worry about the floor, everything about your kitchen draws the eyes upward to take in all the wonderful lightness, brightness, and details. Enjoy!
I’m about to start a kitchen remodel. It involves rearranging work areas to make the kitchen flow better and it is scary. It is such a pricey undertaking that you want to be sure to get it right! I’ve researched work triangles, islands, etc., etc. I’m considering a cook top in the island and double wall ovens I’ve always wanted. People ask what your plans are, you tell them, and then they start saying why they would NOT want a cooktop in an island……..Does anyone out there actually have experience with a cooktop in an island? That’s who I’d like to hear from! I’ve seen big ranges with full size double ovens in them, side by side, and that would be a whole different approach! Costly, too. I feel very confident about the new location for the dishwasher and change in dish storage location. Input welcome! Thanks.
Thank you, Karen! I’ll be sharing all about how I made that sign in another month or two on Remodelaholic, so I’ll post here know when the tutorial is live. It was pretty simple though. Just paint a plank of wood, stencil, sand with coarse grit, and hang. 🙂 My grandmother actually just had her kitchen remodeled a few years ago and she did the exact same thing putting a cooktop in her island. I think it works great that way! I’d just make sure you have good ventilation there, but I’ve definitely seen it done. I say if you love it, go for it!
Hi Karen, Just wanted to let you know my sister-in-law has that set-up in her kitchen, cook-top in island and oven/micro combo in wall next to fridge. When it comes to holiday cooking with our big family it makes it easy for many cooks to work on different things. Those who are baking are not interrupting those at the cook-top. The flow is easier. So I say if that’s how you want yours to be then go for it, you won’t be disappointed.
I love everything you did here. Your eye for detail is absolutely on target. Thanks for sharing.
Thank you so much, Ivory!
Lauren it turned out amazing!! I love all of it. Such a great use of texture and color!!
-Shonee
Thank you, friend!!!
I LOVE IT!! You did an amazing job. So many ideas I could use! I’m going to show this to my husband right now – He’s going to be soooo happy LOL!! ?
LOL! My husband says all the time after we finish a project, “I bet so many men absolutely hate me with all of these wives everywhere getting these DIY ideas.” It’s a love/hate thing, right? Haha!