How to DIY Concrete Countertops Over Old Laminate
A thorough step-by-step tutorial with useful tips and advice on what not to do when installing DIY Ardex feather finish concrete overlay on a laminate countertop surface.
There are days I wish DIY had an undo button. When we did this DIY concrete counters project, we had one of those days.
At the beginning stages of our kitchen makeover planning, when I showed my amazing I-don’t-even-deserve-him hubs my plans to put in DIY feather finish concrete countertops, he was just as excited as I was.
Maybe too excited. Because so often we have this “let’s jump in & kick this project’s butt” mentality and are ready to rock a DIY like nobody’s business. #HandyHusband4TheWin

What You Should Know Before Starting Concrete Kitchen Countertops
First things first: It’s not a good idea to jump into doing DIY new counters with a thin layer of concrete without a little research, if you’re a first timer. They take a lot of work, time, and a little bit of patience. Actually, lots and lots of patience.
Here are some things you should know first before starting this type of project:
- It’s dusty, very very dusty.
- You need to carve out a week for this project, easily. It will take a long time to get a smooth surface.
- Only work in small sections and mix small batches at a time for many square feet of countertop.
- Turn off your air vents and cover furniture and floors with drop cloths in the vicinity of your entire project so you don’t circulate lots of dust.
- Protect your kitchen cabinets and drawer fronts with plastic sheeting and painter’s tape if you don’t plan to paint them after apply the concrete products.
- If you want a new look in place of your existing laminate countertops for an industrial look, it’s worth it.

UPDATE: See our full kitchen makeover reveal here!
How Do Concrete Countertops Hold Up Over Time
UPDATE: See how they’ve been holding up in this post!
Before I tell you about our “oopsie” moment though, I’ll give you the low down on the supplies and steps that you DO need.

Step-By-Step to Make Your Own Concrete Countertops
There are a million and one DIY project tutorials out there for concrete countertops, some are poured and others are with a skim coat.
Since we already had laminate formica countertops in place, we went with the skim coat route. Henry Ardex Feather Finish Underlayment Patch & Skimcoat is available at most local hardware stores.
It’s one of the best concrete countertop solutions because it’s much cheaper and simpler than the poured kind concrete countertops requiring edge forms and cement board. Plus, they are still durable, require way less hard work, and cost much less than new countertops.
I looked all over the place to find as many of the best tips for this method as I could. (And if only I’d communicated all of them to my partner in crime, we probably wouldn’t have ended up in a pickle.)
Supplies
As an Amazon Associate, I earn from qualifying purchases via affiliate links. For more information, see my full disclosure here.
- Henry Feather Finish (We needed about 4 boxes to cover 60 square foot countertops, and I picked it up at Home Depot for about $20.)
- 3-4 disposable 2 quart sized buckets
- Concrete stick stir or concrete mixer paddle bit
- Orbital sander
- Mouse sander
- 50, 120, and 220 grit Mouse sanding pads and orbital sanding pads
- 50, 120, and 220 grit sanding sheets
- Mask
- Protective safety glasses
- Vacuum or ShopVac
- 12 inch taping knife
- 6 inch taping knife
- Putty knife
- 511 Impregnator Sealer (I was only able to find this on Amazon.)
- Safecoat Acrylacq
- Paint brush or roller
Step 1 – Rough Up Current Counters
For the first step, rough up the laminate flat surface. Our existing formica countertops had a very glossy finish to them, so I roughed them up as best as I could with the my sander using the 50 grit pads.
Then, I wiped away any residual dust with a wet cloth. It felt like I was barely making a dent at all in these things, but it gave them just a little “tooth”.

Step 2 – Mix the First Batch of Concrete
For mixing the concrete, we just followed the directions on the back of the Feather Finish box and measured using two of the buckets with a 1:1 ratio part concrete powder to part water. You want it to be about the consistency of toothpaste.
We only mixed a small batch at a time because this stuff dries fast. REALLY fast. I mixed about a quart at a time and that was the perfect amount for me to have about a 10-15 minute window to work with it before it set.

Step 3 – Apply a Thin Coat in a Small Work Area
But before I get any further, here’s where we messed up. We started this whole huge project on Mother’s Day weekend, which also fell on my birthday.
And my super sweet best-hubby-ever said, “I’ve got this. You go have a fun mani/pedi. I’ll take care of the kiddo and put on the first coat of these countertops.” Like straight out of a Ryan Gosling meme, I tell ya.
So then I went skipping out the door before he could wise up and change his mind because HALLELUJAH! TREAT YO SELF!
But when I got home, and it was time for the sanding step, here’s what we were faced with.

What Not To Do When Apply Concrete to Laminate Countertops
IMPORTANT TIP: Applying thin coats is the only way. Don’t try to rush to the final result with fewer thick coats of concrete.
It turned out, I didn’t inform Robert that we needed to apply the concrete in a thin even coat and follow it with another coat or two after that. He just slapped the stuff on there, spread it out, and laid it on really THICK. Oops.
And he used this trowel at first thinking it was the best tool for the job, but we later figured out that was a little part of the problem.

Step 4 – Sand First Coat Smooth
The whole countertop was crazily uneven and super rough to the point of no return, and I sanded for 2 days to try to fix it. Nope. It was bad. And I felt terrible for not communicating the whole process better to Robert.
Start with coarse sandpaper running the sander over the surface a couple of times. Then, go over the concrete surface again with medium grit sandpaper. Then, finally use smooth sandpaper.
Big important tip: Wear safety glasses and a mask as that sanding dust is not so fun to get in your eyes and lungs. Use a vacuum to remove the dust from the countertop after each sanding session too.

After the big sand-a-thon, it ended up looking like this. Ew.

Step 5 – Apply a Second Coat of Concrete
No bueno on the splotchy countertops. All of those dark spots were the humps in the concrete that my sander wore down over time.
So to fix the problem, I got the first humpy bumpy layer as smooth as I could manage and applied 3 MORE COATS in smaller amounts the right way over the course of the NEXT 3 DAYS, sanding each layer to help level the counters in between as I worked.
(And I’m type-screaming that because I was to the point of don’t-mess-with-momma-she’s-gonna-snap frustrated.)
We definitely added extra cost because we used too much concrete on the first coat, but we learned our lesson so that you don’t have to.
So as for the right way to do the concrete coat, here’s the skinny-

Would you like to save this?
I emptied the majority of the contents of my bucket (about 1 quart of concrete) into the middle of the space where I was working.
And this time, instead of a trowel, I used a 12″ taping knife to smooth it all out. It was so much faster and smoother that way. For any of the smaller areas, I used a 6″ wide putty knife.
Step 6 – Apply Concrete to Edge of Counter Tops
To apply a bit of concrete to the front edge and sides, I used a smaller putty knife. It was better to wait about an hour or two after the coat on the countertop was dry before applying it to the sides so that I wouldn’t remove any from the top that I’d already smoothed out.
This video from Young House Love was a big help in seeing the best way to apply it (and made me really wish I’d seen it before we’d created this big mess.)

Step 7 – Sand Second and Third Coats
I discovered it was best to start sanding about 3 hours after applying a coat of concrete since it wasn’t completely dried but still dry enough to make it easy to work with.
I started out after each concrete coat by sanding with the 50 grit and worked my way to the 120 grit and 220 grit to smooth things out. I went back over it by hand on a few places too that needed extra TLC.
For hard to reach places, use a sanding block.
Repeat Steps 5 and 6 for a third coat if needed, then sand the final layer to a smooth finish.
After applying the concrete, waiting for it to dry, and sanding, sanding, sanding for days, the whole room was nothing but a giant cloud of concrete dust. Behold, the final smooth concrete coat!

And this was the aftermath.

Everything in our house had a layer of concrete dust on it, so we had to take a day to recollect ourselves and get everything back to a dust-free zone.
Because seriously, I felt like this kid from The Sandlot when the vacuum exploded in “The Beast’s” backyard.

This was certainly the messiest projects we’ve ever done to date.
So then to seal this baby!

I attempted a sealer at first called Cheng Concrete Sealer, but after three coats and it still not finishing the job and being a big ordeal to apply, I wasn’t really a fan. Plus, it was on the pricey side. Maybe it would work for someone else, but I found a Plan B that worked out better for me.
The dynamic sealer duo.

Step 8 – Brush on Impregnator
For the final step, I brushed on 2 coats of the 511 Impregnator Sealer first, which penetrates the concrete and helps ward off stains. I just followed the directions on the back and waited 24 hours between each coat.

Step 9 – Apply Sealer
After the 511 Impregnator had set in for 24 hours, I brushed on 3 coats of the Safecoat Acrylacq 24 hours apart and followed the directions on the back for applying it.
I just brushed it on evenly, avoiding air bubbles for a cleaner look, and let it cure to a hard, glossy topcoat.
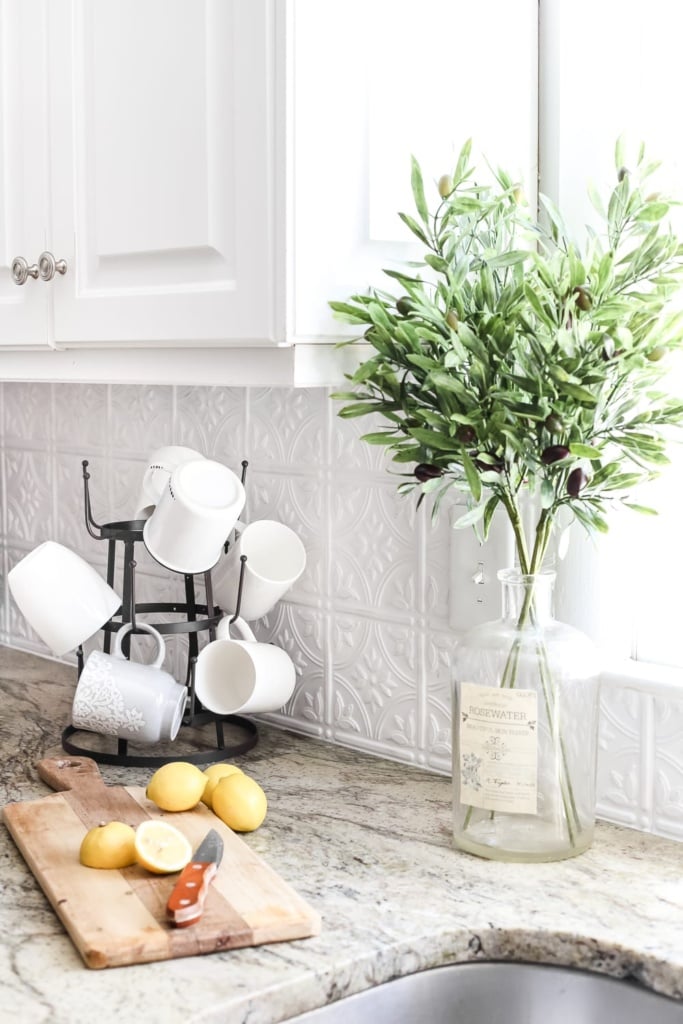
I didn’t think I would like a gloss finish originally creating the look of wet cement, but I absolutely love how this final coat turned out. Our countertops almost feel like granite after that last coat of sealer.

Normally, I’m all about the distressed look, but it really took me a day or two to get used to the character in the concrete.
Considering the week-long ordeal in getting the snafu straightened out, they came out amazing. All in all, the final cost was about $250 for all 60 square feet of our countertops.

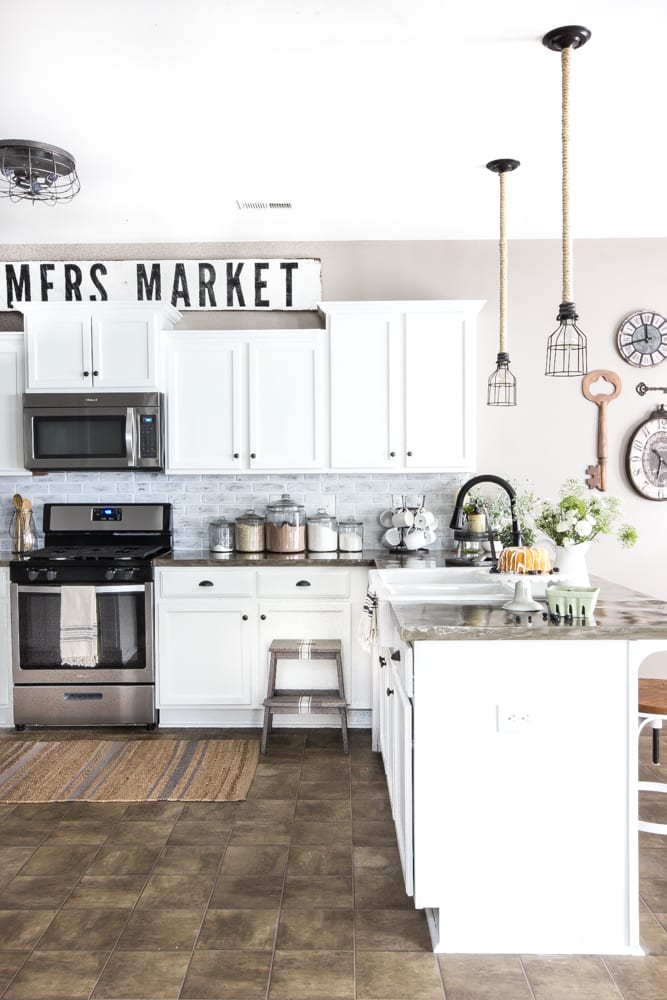
Finished Skim Coated Concrete Countertops
Now that this project is over, we are so happy with the end result.

We added a whitewashed brick backsplash!
Tutorial: DIY Whitewashed Faux Brick Backsplash
It’s really surprising to me since I’d wanted subway tile since Day 1, but the charm of the brick with the concrete countertops seems to be a great match without being too sterile.

This kitchen came a long way from the mess it was in before.

I’ve never been SO glad to be finished with a project! Whew!
Have you ever put concrete countertops in your house before? Or had your heart set on them? Think you’ll try your own DIY concrete countertops? Even though they are messy and exhausting, they’re completely worth it.
More DIY Kitchen Ideas
DIY Pressed Tin Kitchen Backsplash
Cottagecore Style Budget Kitchen Facelift Ideas
Simplified Decorating: How to Decorate Kitchen Countertops

How to Install a Herringbone LVP Floating Floor Over Tile