
How to Wallpaper Inside Picture Frame Molding
A step-by-step tutorial for how to hang wallpaper with an unpasted mural inside of picture frame molding for a whimsical, traditional look.
With Mission: Big Girl Room underway, it’s looking extra cute around here with this sweet chinoiserie wallpaper mural!
It turned out even BETTER than I imagined! (Don’t you love it when that happens?)
And so far, Regan approves of her bedroom makeover.

Back before she was born, when we were deep into prepping her nursery, we put up this picture frame molding and painted the entire room Magnolia Home True White knowing that one day, this baby girl would likely develop quite a personality when we could later add color and pattern to further express it.
So yesterday, we painted the ceiling Romabio Barefoot Dance from our color collection to amp up the color component. (You can see more blush paint colors I love here.)

And to add some pattern, a soft, elegant, whimsical chinoiserie wallpaper mural with lots of flowers, birds, and butterflies feels so fitting for her.
I’ve seen a huge increasing trend lately to add wallpaper and murals inside of picture frame molding. But even though it seems to be rising in trend, it still remains a classic.
So I wanted to try it here and had this one focal wall finished in about 2 hours. (Based on this wall’s measurements, our mural cost $385.)
How to Wallpaper Inside Picture Frame Molding
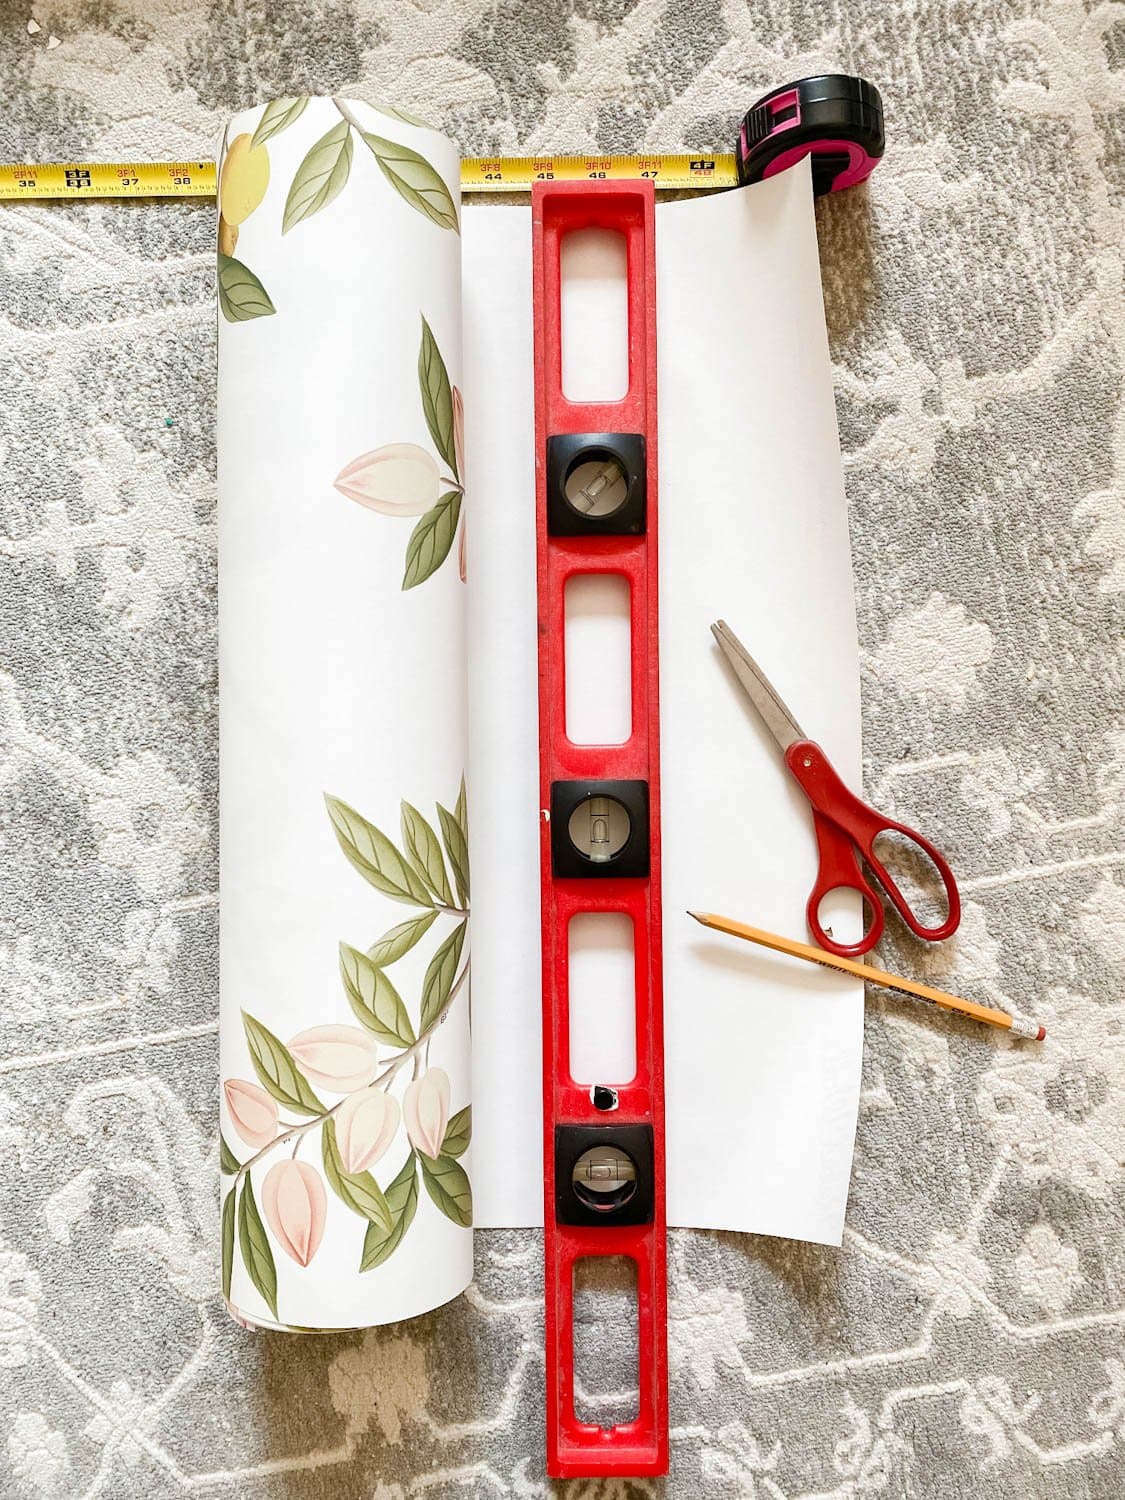
Supplies
*I used an unpasted mural, so this method will be slightly different in adhesion if you’re working with a pre-pasted or peel-and-stick wallpaper or mural. I find unpasted wallpaper to be the easiest to apply to walls but the process is more messy than peel-and-stick.
- Wallpaper or mural of your choice (I used this chinoiserie wallpaper mural)
- Cellulose sponge
- Scissors
- Pencil
- Level
- Plumb line (just string tied to your scissors can work for this)
- Utility knife with a pack of sharp blades
- Measuring tape
- Wallpaper smoother
- Empty bucket
- Wallpaper paste (my wallpaper came with a paste mix so check to see if yours already has it first)
- Whisk (to stir the paste)
- Large bowl of cold water (for cleaning off paste after application)
- Step stool
- Metal straight edge (I used a metal trowel – and metal ruler or yard stick works fine too)
- 1-2″ angled paint brush
- Mini paint roller
The Steps
1. Wipe down the wall you will be wallpapering first with a damp sponge to remove any residues or dust from the surface.

2. Mix your wallpaper paste in the bucket following the container’s instructions. (Mine called to be mixed with 4 liters of cold water and stirred briskly for a few minutes and left to set.)

3. While my wallpaper paste set, I started marking the wall for the first roll of wallpaper. Use the tape measure to measure the width of your wallpaper. Then, mark that measurement on the wall with pencil from your starting point at the top of the picture frame molding rectangle.
4. Position a plumb line at the pencil measurement from the top molding and mark the bottom molding where the plumb line touches.
5. Use a level between the points to mark the starting line for the first wallpaper roll. (These steps are very important to ensure your wallpaper design is completely straight.)

6. Measure the height of your first picture frame rectangle and add about 3 inches.
7. Measure, mark, and cut your first length of wallpaper using the measurement from Step 6.
8. Use the angled paint brush to begin applying wallpaper paste directly to the wall in the corners and edges.

Would you like to save this?
9. Then, roll the paste on the rest of the surface area where you will be applying your first wallpaper strip.

10. Line up the wallpaper strip on top of the pasted wall and press into place. The reason I like applying unpasted wallpaper vs peel-and-stick is it’s much more forgiving so that you can slide the wallpaper around on the wet wall until it’s in the position you like.
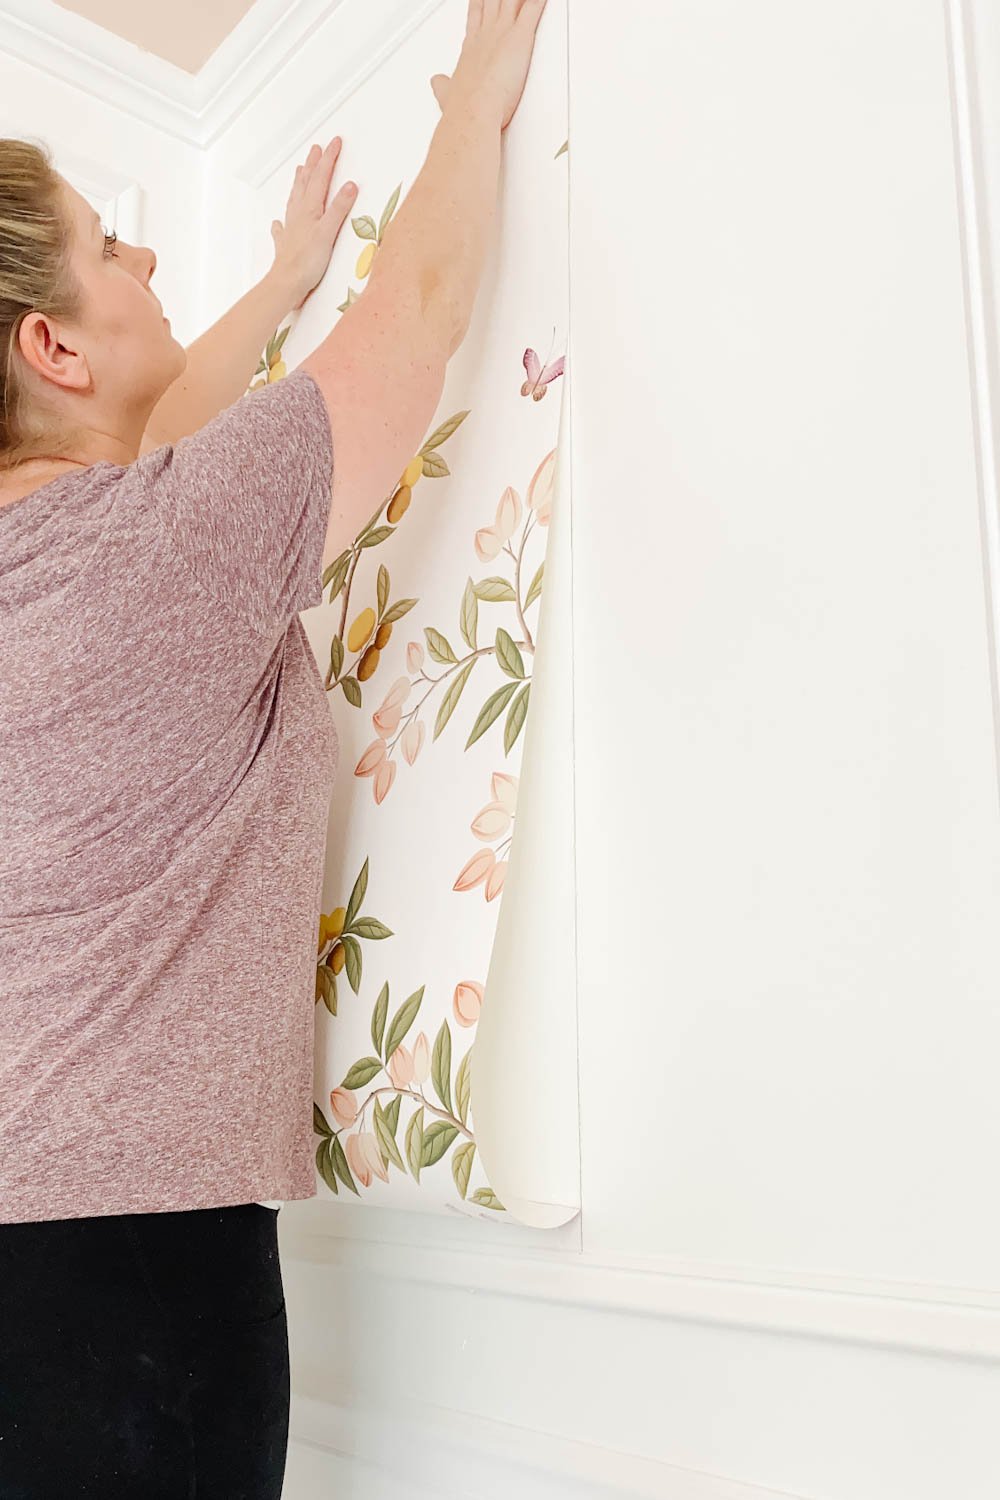
11. Smooth out any air bubbles to the edges with the wallpaper smoother.

12. After smoothing, you should be left with a 1-2 inch overhang of wallpaper at the top and bottom edges.
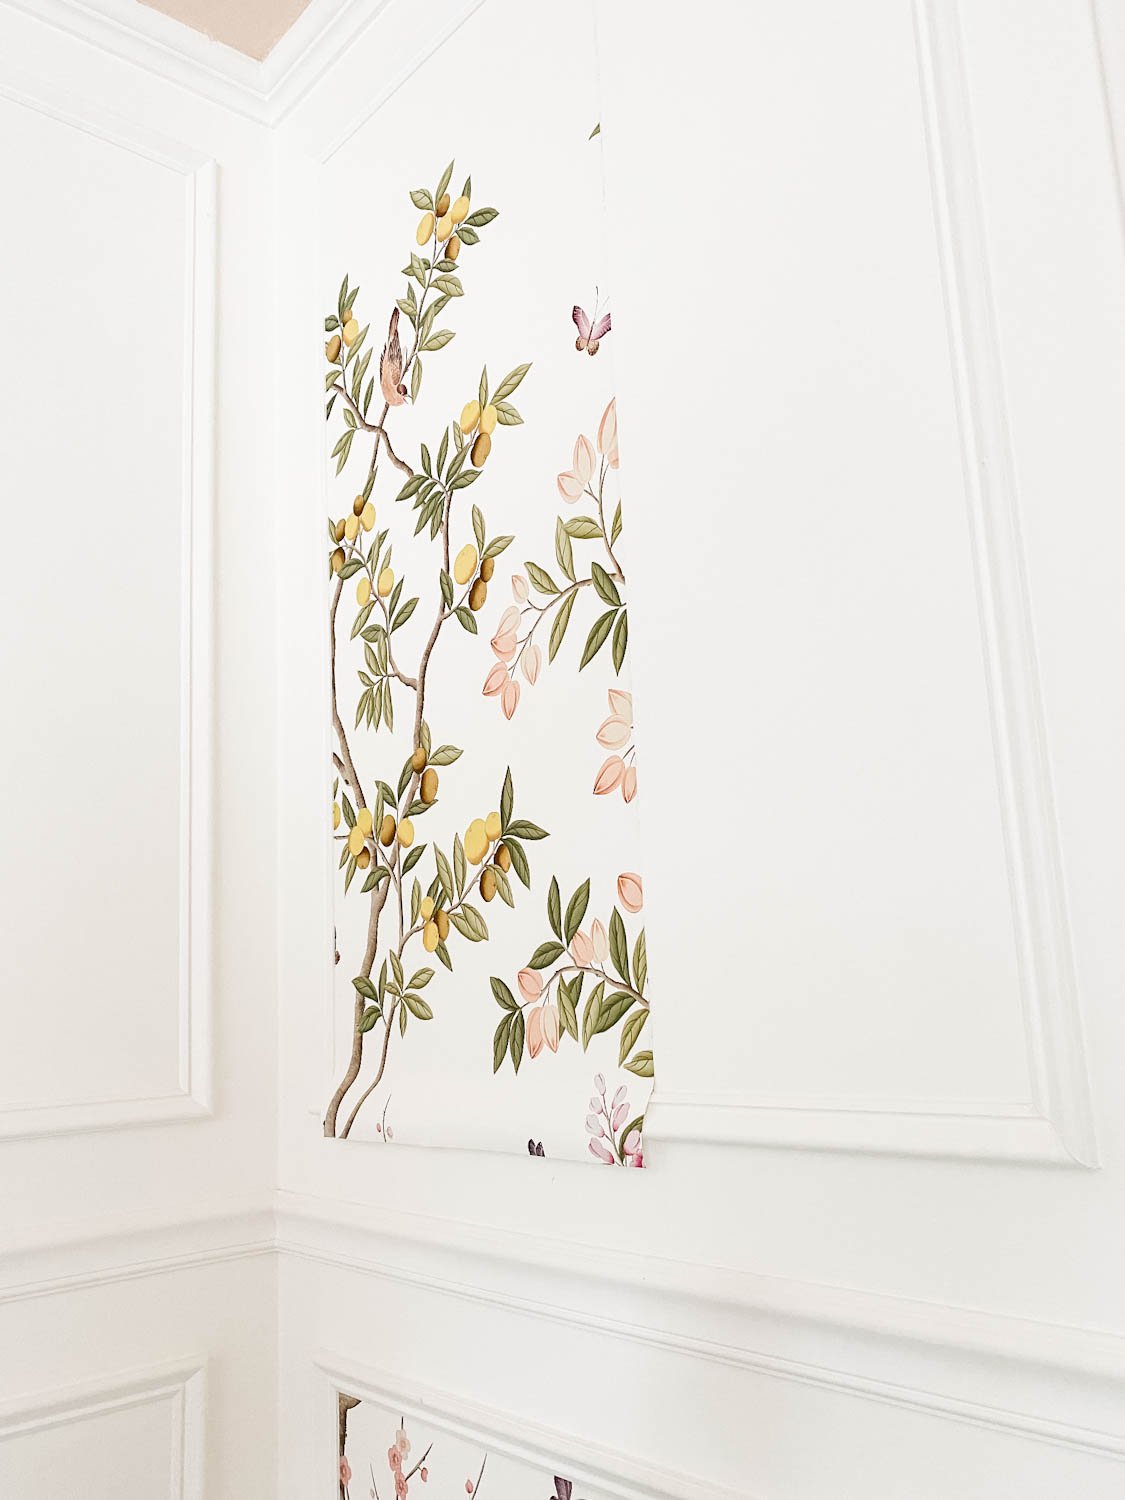
13. Using your metal edge (in my case, a trowel), press the wallpaper firmly against the edge of the molding and cut the excess with a sharp utility knife. (Change the blades often to make cutting easier with each wallpaper strip.)

14. Use a damp sponge (I dip mine in the bowl of water and wring it out often) to wipe away any excess paste left on the wallpaper.

15. Repeat Steps 6-14 to apply the next wallpaper strip, and be sure to do Steps 3-5 when starting each section of picture frame molding.
It turned out so perfect in here! Just look at Regan’s face when she saw her new wallpaper mural. Oh, my heart!

We have one last night in the crib and then it’s getting swapped for a big girl bed!
It’s like this wallpaper mural was made for this space. I just can’t get over how much it adds to the room!

Chinoiserie Wallpaper | Light Fixture | Crib | Crib Skirt | Rug
We still have big plans to add another wallpaper mural to our dining room, so hang tight for that too.
What do you think so far? Have you ever tried to hang wallpaper before? It’s one of those projects that I don’t look forward to doing at all, but once it’s done, I’m SO glad I did it. It really doesn’t take long to get the hang of how to wallpaper.
Wallpapering really isn’t as scary as you might think.
If you want to save this post for later, you can pin it here:


Related Posts
- Classic Decor Spotlight: Scenic Wall Mural Wallpaper
- Beginner’s Guide to Hanging Wallpaper
- The Best Modern Farmhouse Wallpaper Designs on a Budget
- Splurge vs Save Wallpaper Dupes
- 8 DIY-able Wall Molding Ideas to Add Character to Your Home


