
Hidden Projector Screen: Best DIY IKEA Hack Tutorial
How to build a box to hide an electric projector screen between built in IKEA shelves for the ultimate home media room.

This is by far the COOLEST DIY project in the history of this blog, mostly because this DIY projector screen setup comes with a magic trick. It appears and disappears with just the push of a button!
We have been working away at our media room makeover the last couple of weeks by using our usual IKEA built in bookcase hack to add this hidden projector screen.
(In case you’re wondering, we do have another door to access the media room. When the projector screen is down for family movie nights, we plan to use that other entrance to the room.)

As an Amazon Associate, I earn from qualifying purchases. Please read our disclosure policy.
How to Hide a Projector Screen
This DIY hidden projector screen box can be built between bookcases like we have placed above our French doors.
Our 84″ motorized electric projector screen is operated by a remote, so we can raise and lower the screen from anywhere in the room.
If you build this yourself, just make sure you have access to an outlet nearby to plug it in. Otherwise, you’ll have to run an extension cord or lower the screen manually (which is fine to do but isn’t nearly as cool).
We built this in a room with 8′ ceilings, so if you have taller ceilings, you will need to adjust for that by adding more than 1 height extender to your IKEA Billy bookcases.

Supplies
- 2 IKEA Billy bookcases with height extenders
- Motorized electric projector screen (ours is the 84″ size)
- 2 2x4x8 studs
- 2 1x12x8 boards
- 1 1x4x8 board
- 14 1x2x8 boards
- 20 8′ cove molding pieces
- 18 gauge finishing nails
- 2 1/2″ wood screws
- Wood filler
- Sandpaper
- Caulk
Tools
- Nail gun (We’ve had our Porter Cable Cordless Nailer for years and love it.)
- Power driver with bits
- Jig saw
- Miter saw (If you don’t have a compound miter saw, a miter box with a hand saw and circular saw will do just fine.)
- Coping saw

Step 1 – Anchor Bookcases (Make Outlet Hole)
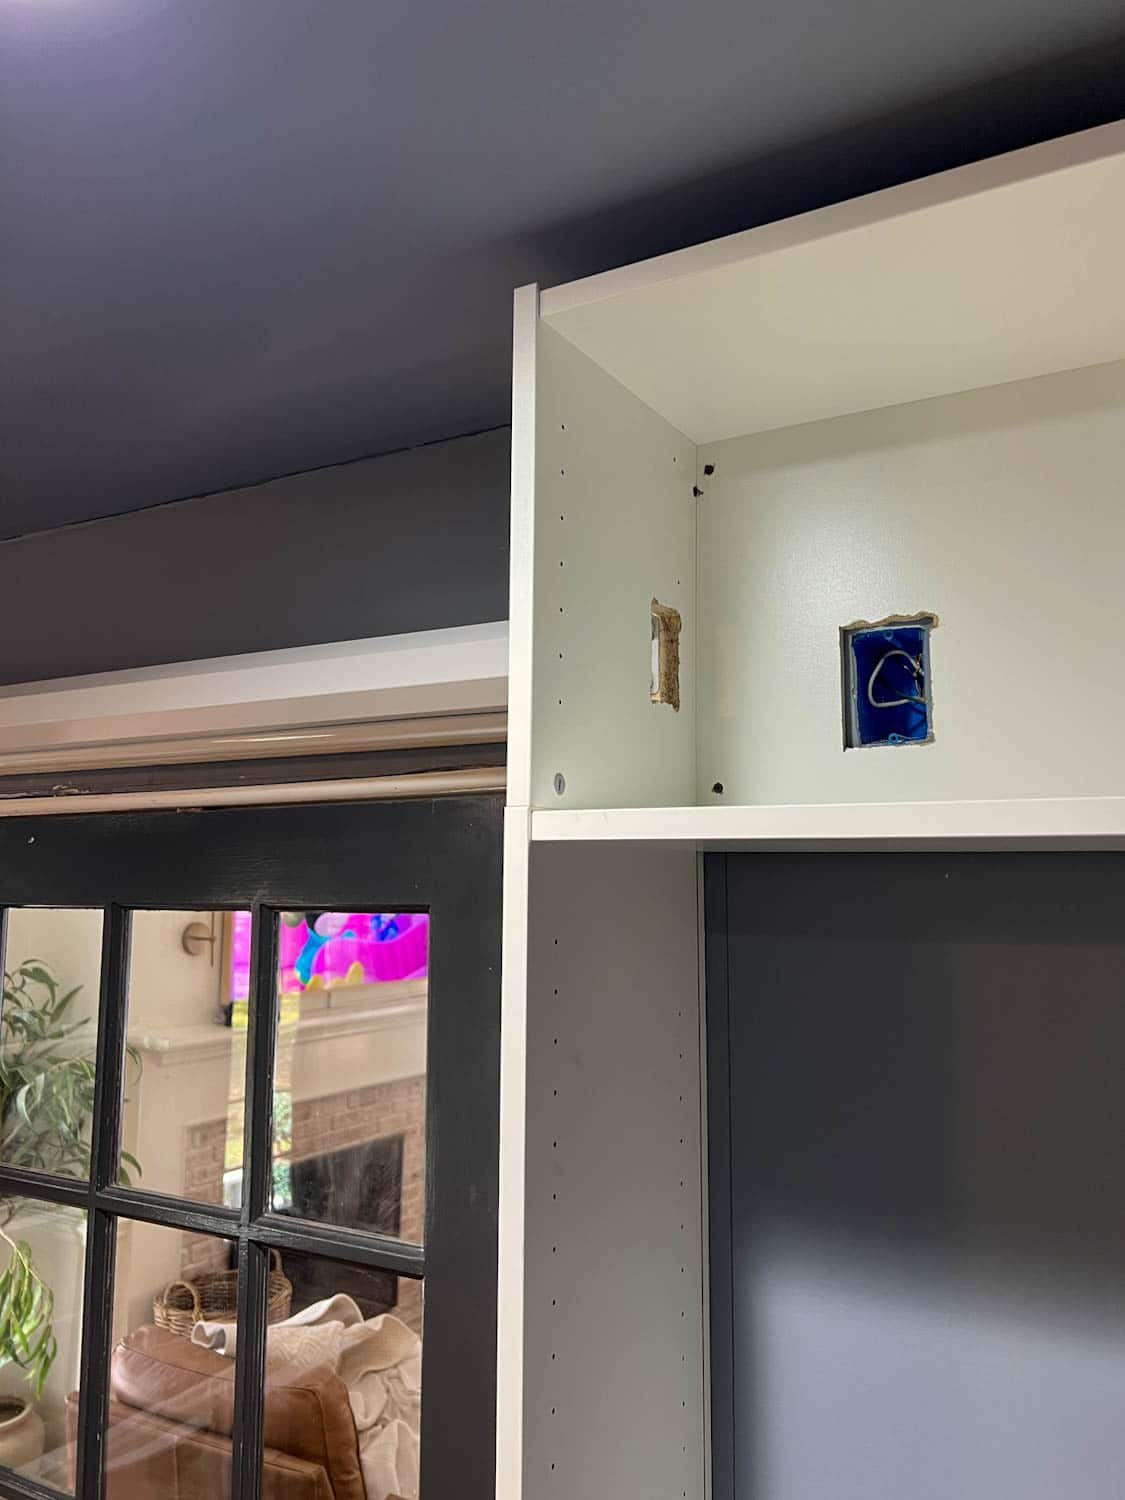
Assemble the IKEA Billy bookcases and place them where you want on the wall. If you are accessing an outlet for an electric screen, cut out the back and side of the bookcases with a jig saw (see image below).
Anchor the bookcases to the wall into studs with wood screws.
Step 2 – Anchor Screen to 2x4s
Cut 2 12″ lengths and 1 74″ length of 2x4s. Anchor the 2x4s to the wall between the bookcases with wood screws. Mount the projector screen to the 2x4s. This will make the screen jut out a couple inches so that it will lower smoothly without hitting the wall.


Step 3 – Brace Box Front
Cut 4 12″ lengths of 2x4s. Use wood screws to attach the 2×4 pieces to the middle section on the ceiling, to either side of the bookcases, and to the front of the middle section (pictured below).


Step 4 – Make the Bottom of the Box
Using the jig saw, cut a 1×12 board to make an opening for the screen. Attach the 1×12 underneath the 2×4 braces with more wood screws.
Place a 1×2 board underneath the 2×4 against the wall to hide where the screen is mounted.

Step 5 – Make the Front of the Box
Attach the second 1×12 board to the front of the 2x4s to finish the box shape.

Step 6 – Add Trim
Using the brad nailer, attach 1×2 boards to the top and bottom of box to add detail. Attach 1×4 boards to the sides of the box. Add 1×2 boards to the front of the bookcases too.
For a more ornate, traditional style, use finishing nails to add cove molding to the edges of the 1×2 and 1×4 boards. Use a coping saw to miter corners of the cove molding.

Step 7 – Wood Fill, Caulk, and Paint
Cover nail and screw holes with wood filler and sand smooth once the filler is dry. Caulk any cracks after sanding. Then, prime and paint!

Robert is so proud of his future gaming setup. Can’t you tell? 😉
We still have painting ahead of us, and we plan to add glass front doors to the bookcases. But it’s shaping up to be amazing!
We’ll be able to access the recessed screen for family movie nights, but we can retract it out of the way for everyday living to utilize the double doors.

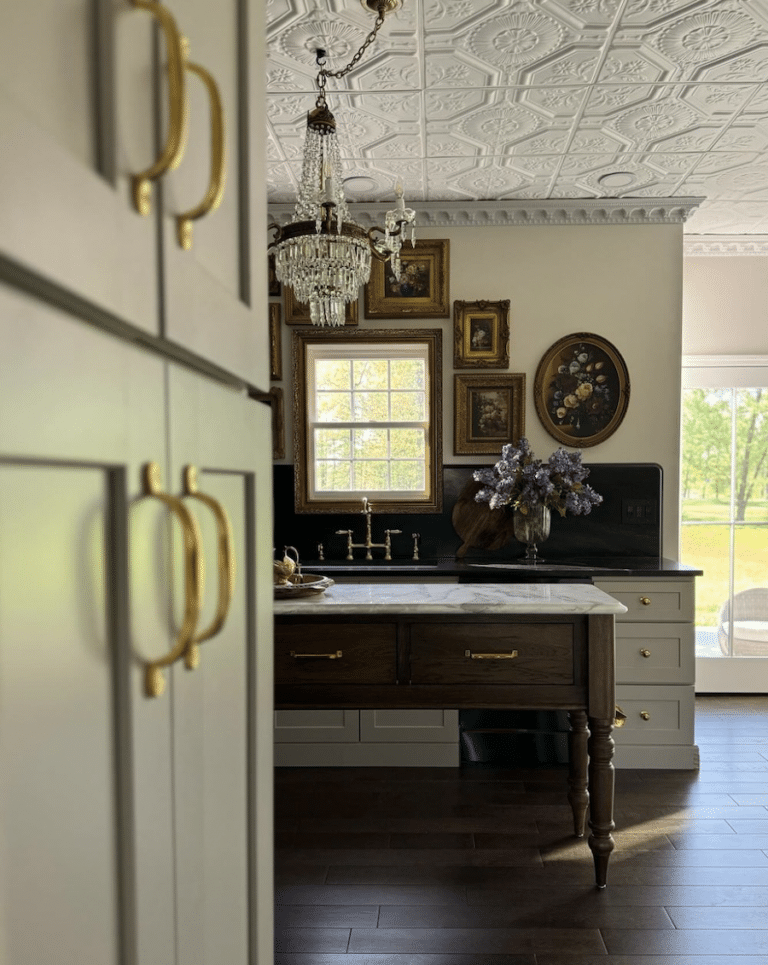
This entire media room will be painted a deep, rich blue/green color, but I’m still working on choosing the perfect shade.
We will add a really fun wallpaper to the ceiling too (this room isn’t supposed to take itself too seriously after all).
Robert has been working away on built-ins for the other 2 walls as well. I can’t wait to show y’all how it all comes together! Check our media room plans to see the rest of this room’s vision.
You can follow along in the Bless’er House Instagram Stories as we make more progress.

DIY IKEA Hack Ideas
See more DIY ideas to hack IKEA storage pieces below.
Frequently Asked Questions
You can see here how to use a shower curtain liner as a DIY movie screen. You can also use a white bed sheet, a white wall, a white plastic tarp, canvas drop cloth, or the ceiling.


That is soooo cool! I love the bookcases around the door frame as well!
I have been geeked out over this project since it started. Seriously my favorite to date.
That is super cool! How fun for your family!
Awe! Thanks, Jaime.