How to Make a Mood Board Room Design on Canva
A step-by-step tutorial depicting how to create a mood board design for planning a room makeover in your house to save time and money.
Learning how to make a mood board design has been such a huge part of our home makeover journey over the years. The biggest struggle I’ve always had for basically everything in life is decision making.
Feeling FOMO and second guessing every design decision when planning a room makeover is completely normal. So an inspiration board is the best cure I’ve found for decision paralysis.

Rug | Curtains | Duvet Set | Gray Pillows | Blue Pillow | Mirror | Lamp (painted Rustoleum Metallic Gold) | Throw
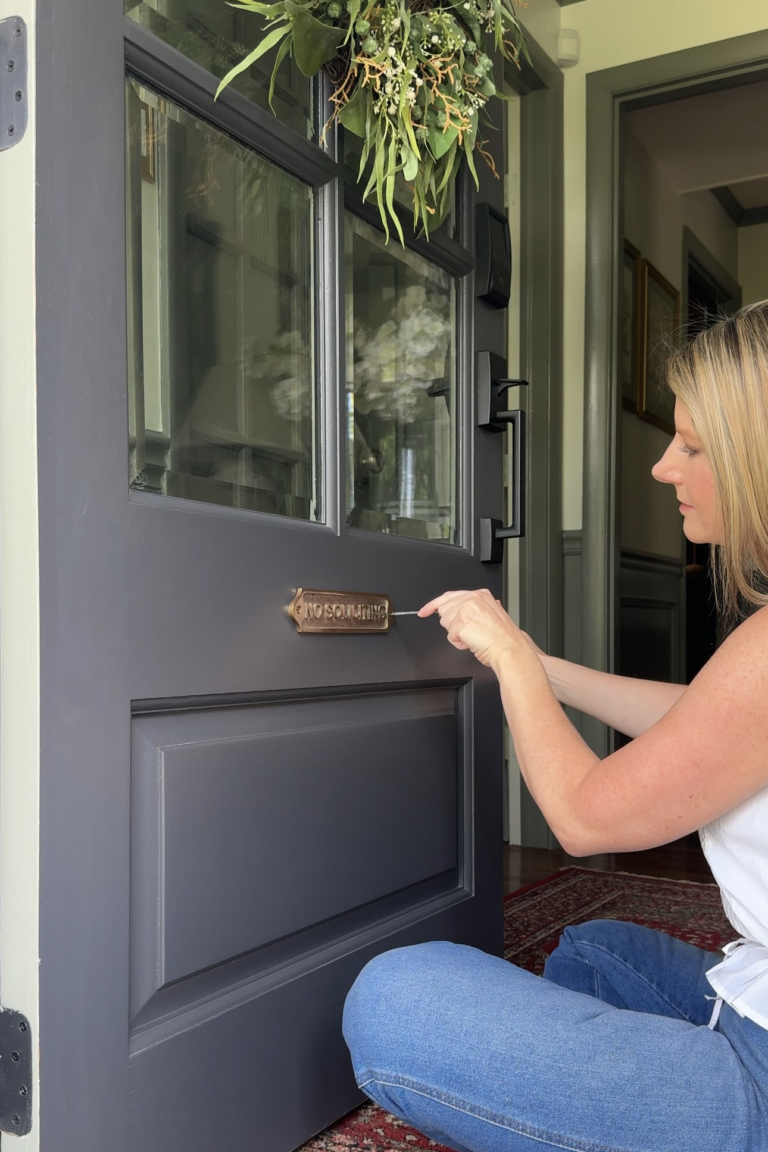
(See this bedroom makeover here.)
Why You Should Make a Mood Board Before Starting a Room Makeover
The beauty of creating mood board ideas is you can “try on” your room plans before ever buying a piece of furniture or light fixture. With mood boards, you’re able to see ahead of time what colors, patterns, and textures work well together so you don’t end up having buyers remorse on that $2,000 sofa you planned to buy.
If you’re planning a room remodel with your spouse, it’s a great tool to fully envision the design together so that you both have clarity and confidence moving forward with the makeover’s execution. Whatever you have to do to avoid an argument is worth it, right?
Robert and I make time before starting a room makeover to pull together a mood board so we can see the direction together.
Since we already have Regan’s little girl bedroom on the makeover docket to upgrade her from the nursery soon, now seemed like the perfect time to share.

Rocking Chair | Rug | Pouf | Green Pillow | Cream Pillow | Throw | Table | Floor Lamp | Table Lamp | Mural
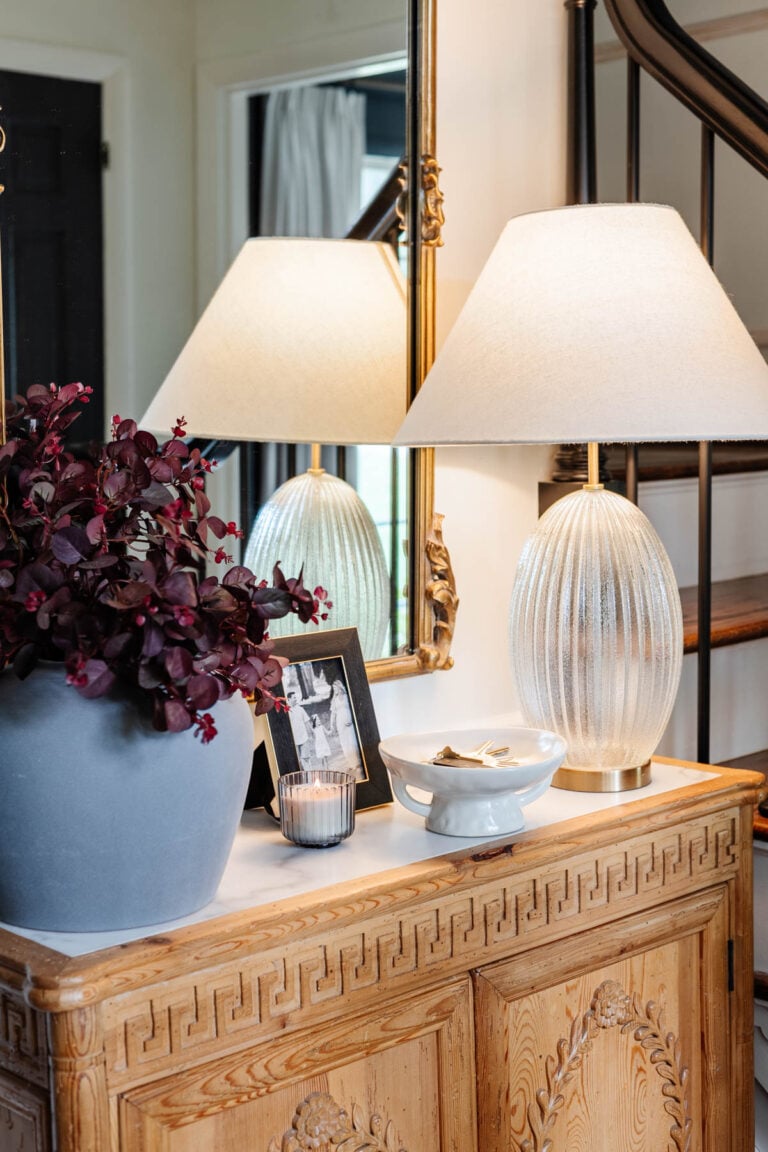
(See this nursery makeover here.)
What To Do Before Starting Your Mood Board Design
Before making a mood board, browse Pinterest, Instagram, Google, blogs, and any design websites to get ideas.
Save your inspiration images or screenshot items your plan to incorporate into a Google Drive folder.
Then, create an account on the Canva app. There is a free version and a paid pro version of Canva, both on desktop and as a mobile app, but if you want to utilize some of the paid features that make the mood boarding process faster, you can just use the 30 day free trial version and cancel when you’re finished.
I’ll show you how to utilize both the free and paid versions of Canva to create your mood board.
How to Create a Mood Board Design on Canva
UPDATE: You can see a video tutorial for how to create a mood board design on Canva here.
1. Go to Canva.com and click the “Create a Design” button at the top right of the screen.

2. Search “poster” on the next prompt and select the orientation you’d like for your mood board.
3. Click the “upload” icon on the left side toolbar and upload all of the images of inspirations / items you previously saved to your Google Drive folder.

4. Click the first item you want to place on your mood board. I often start with wallpaper, a rug, or flooring image since it serves as a foundation to place other items on top.

5. To adjust the size of an uploaded image: Click one of the circles in the corners and drag to the size you want. Click and drag in the middle of the image to position it where you want on the mood board.
6. To rotate an image: Click on the image to highlight it and a circular arrow will appear. Click the circular arrow and rotate the image as you want.

7. To remove a background on an image (paid Canva Pro option): Click the image, click “Effects” in the top toolbar, and select “Background Remover” in the top left of the screen.

8. To remove a background on an image (using a free second party app, if you don’t have the paid version of Canva): Navigate to Remove.bg in a new browser screen. Upload an image. Remove.bg will automatically remove the background from the image. Save. Upload the newly adjusted image to Canva to add to your mood board.

9. To duplicate an image: Double click (Mac) or right click (PC) the image and select “Copy”. Double click (Mac) or right click (PC) again and select “Paste”. A second image copied from the first image will appear. Move and resize as you’d like.


10. To flip an image: Click “Flip” in the top toolbar. Click “Flip Horizontal” or “Flip Vertical”. The image will now be flipped.


11. To layer images: Click an image. Click “Position” in the top toolbar on the right side. Select “Move Forward”, “Move to Front”, “Move Backward”, or “Move to Back”.
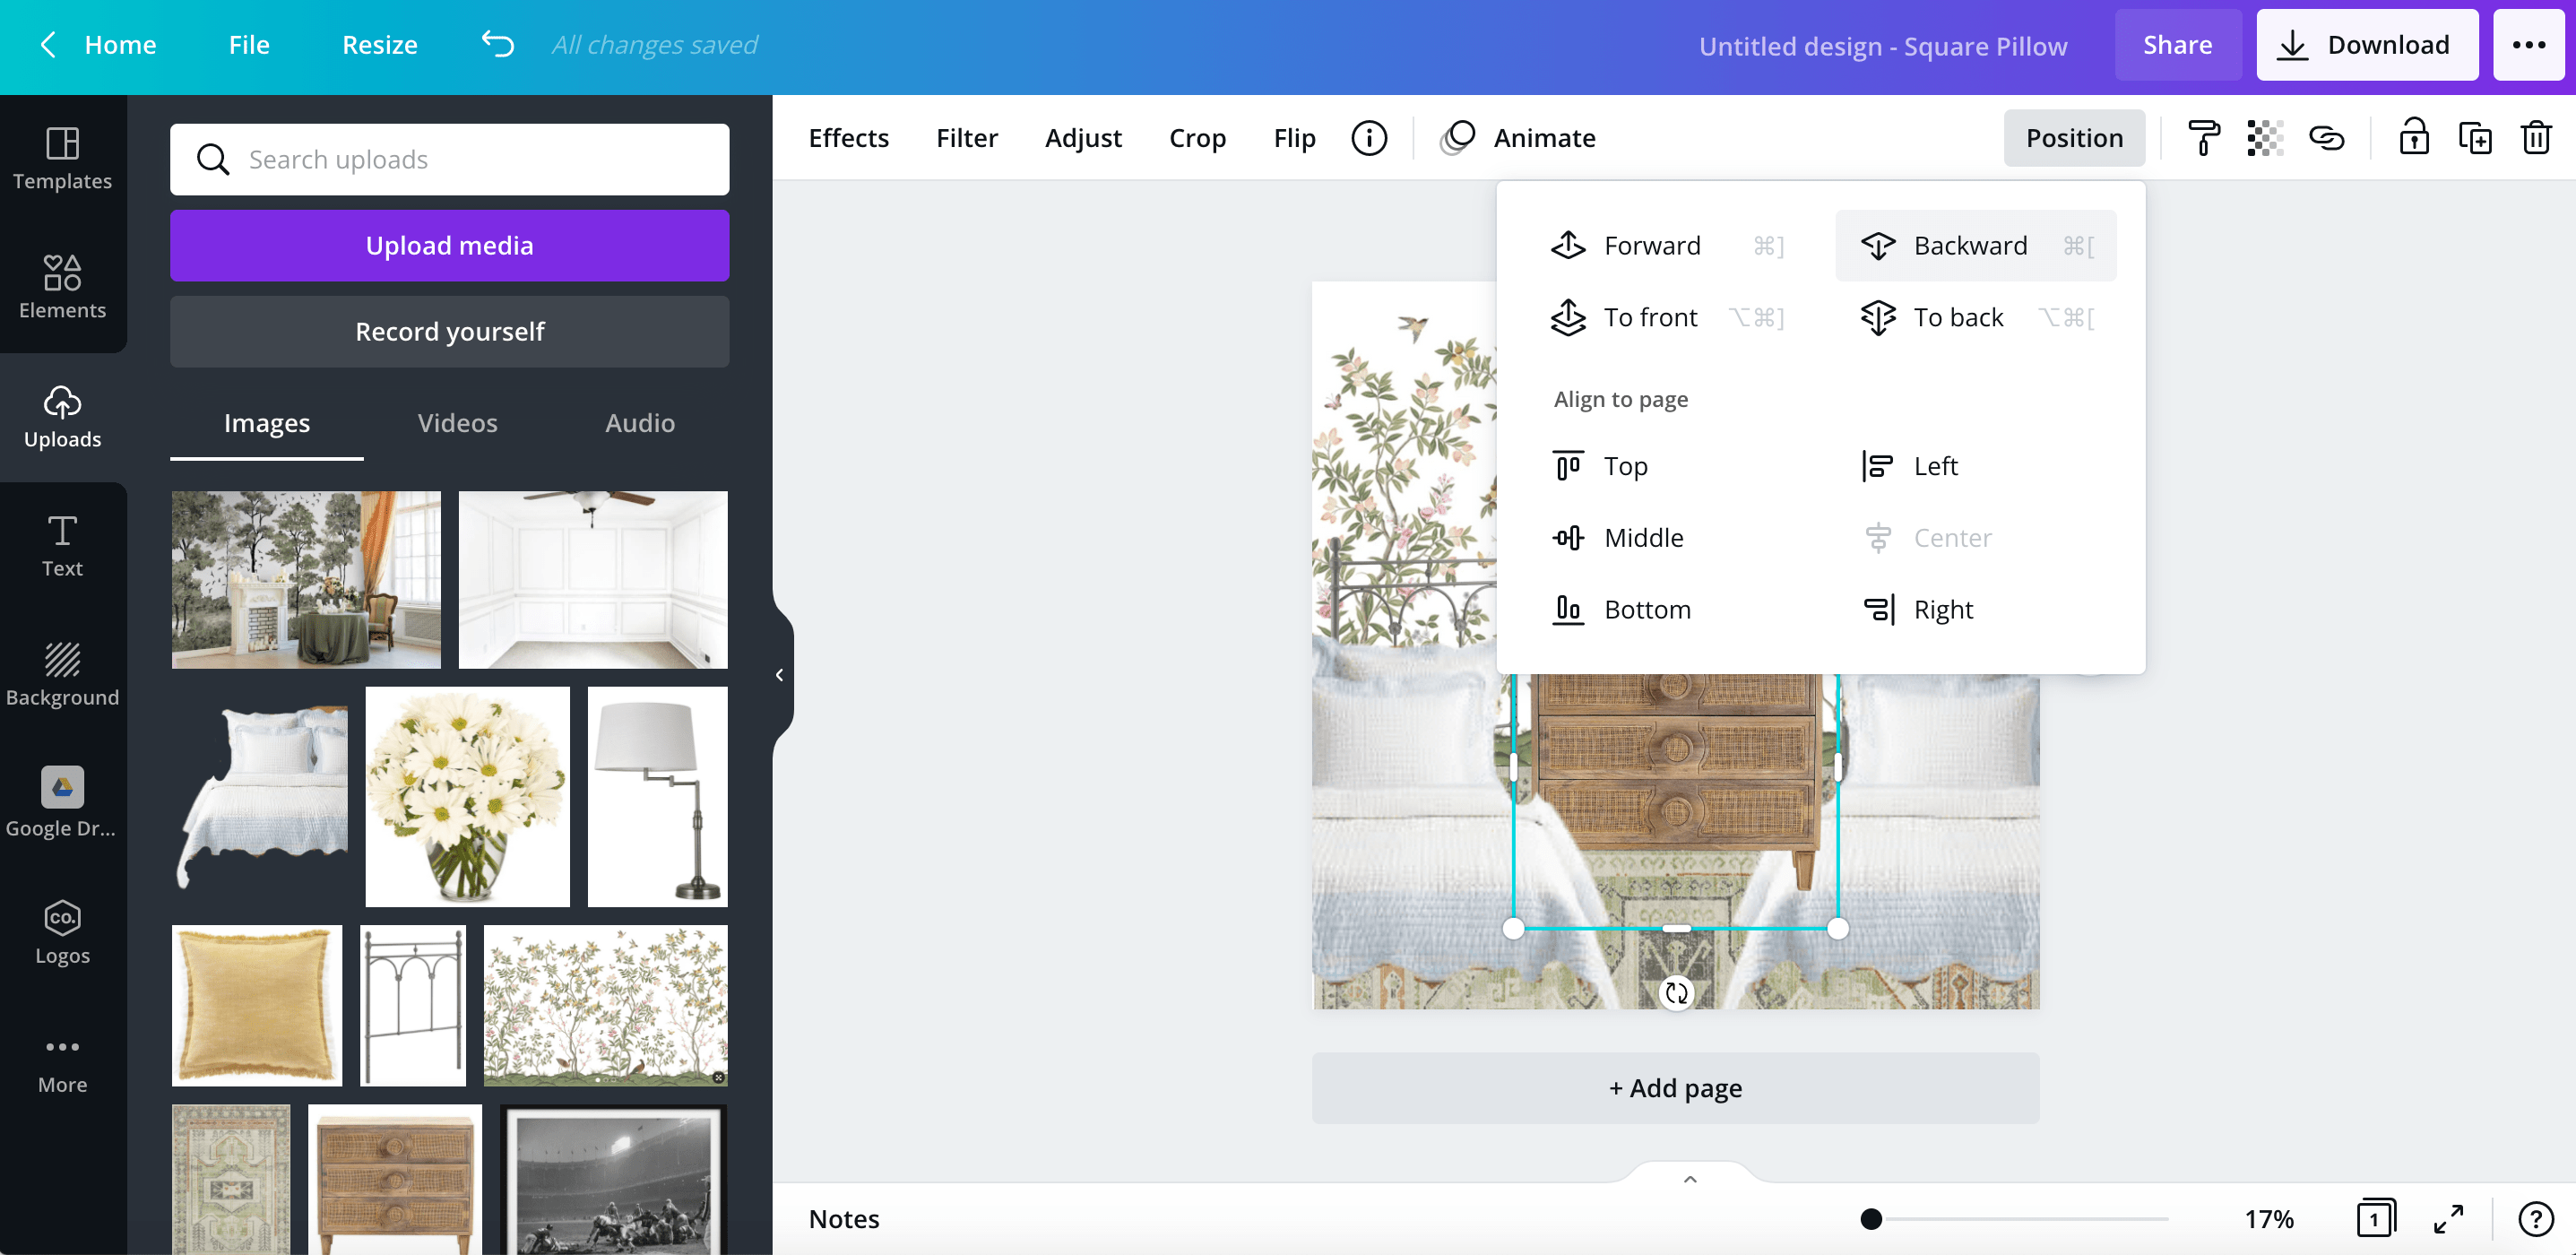

12. To see how your design will look in your room: Upload a photo of your room. Click “Position” and “Send to Back” to virtually place your room design in the room.


13. That’s it! Have fun “trying on” different decor on your mood board until you figure out the perfect room design for you.

Wallpaper | Rug | Dresser | Headboards | Quilts | Lamps | Pillows
So now we have Regan’s little girl bedroom makeover plan! It’s so bittersweet and part of me is really sad to be done with the crib.
But then I see that cute wallpaper and sweet twin beds the girls can have sleepovers in, and I’m happy again. More on all of that soon.
Are there any other little decorating details you’ve ever wondered about? I hope to share more about these things more often since it’s something I never think about.
If you want to save this post for later, you can pin it here:

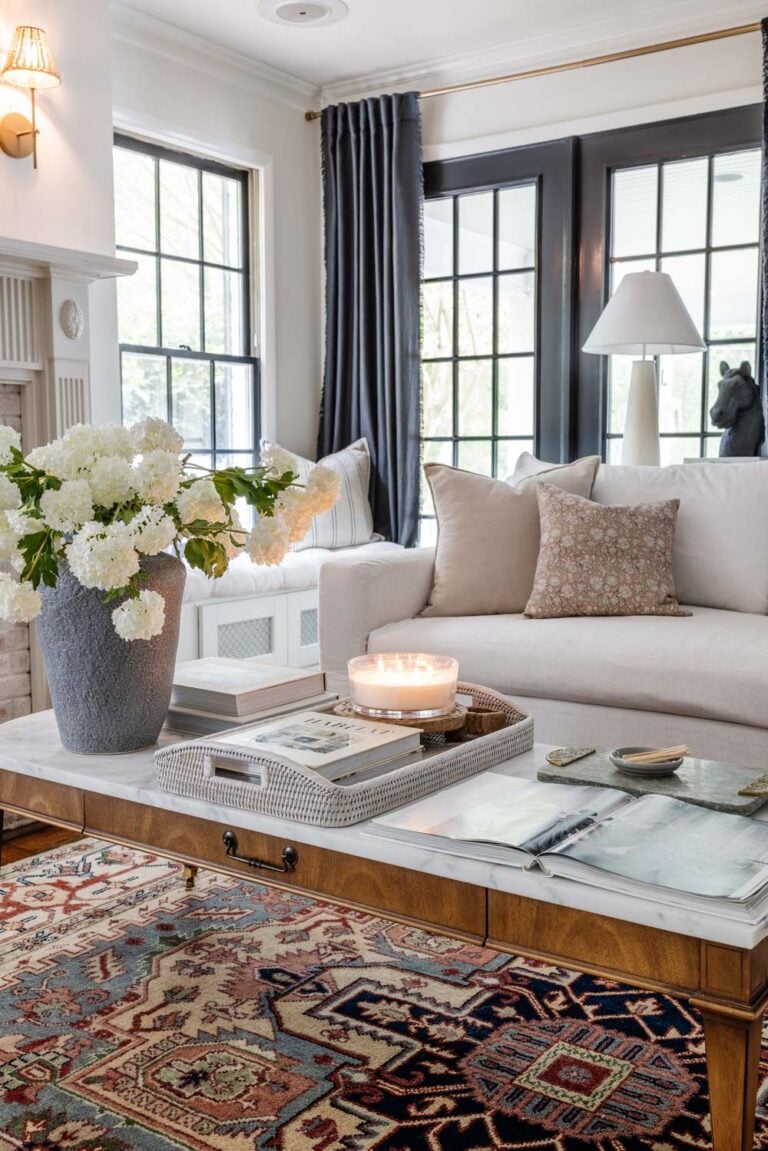
(See this living room makeover here.)

Related Posts
- How to Transition Away from Farmhouse Style
- 15 Ways to Transform Your Entire House with Just Paint
- 40 Ways to Improve Your Home for Under $100
- How to Choose the Perfect Paint Color for Your Home Every Time
- How to Find Your Decorating Style