
Easy DIY Wood Stain Using Vinegar and Steel Wool
How to make gorgeous aged wood stain with simple ingredients from your pantry and without the price tag and hassle of store bought wood stain.
If you are trying to reduce the cost of your home improvement supplies or want to swap harmful chemicals for natural solutions in your home, this DIY wood stain recipe is definitely for you.
I unlocked the code to finding the best natural wood stain, and it is AWESOMESAUCE! (Do we still say that word?)
If you have ever appreciated the look of aged wood, this recipe will teach you how to recreate the look on new wood by combining strong black tea with a vinegar solution and steel wool mixture for a chemical reaction that naturally darkens unfinished wood.
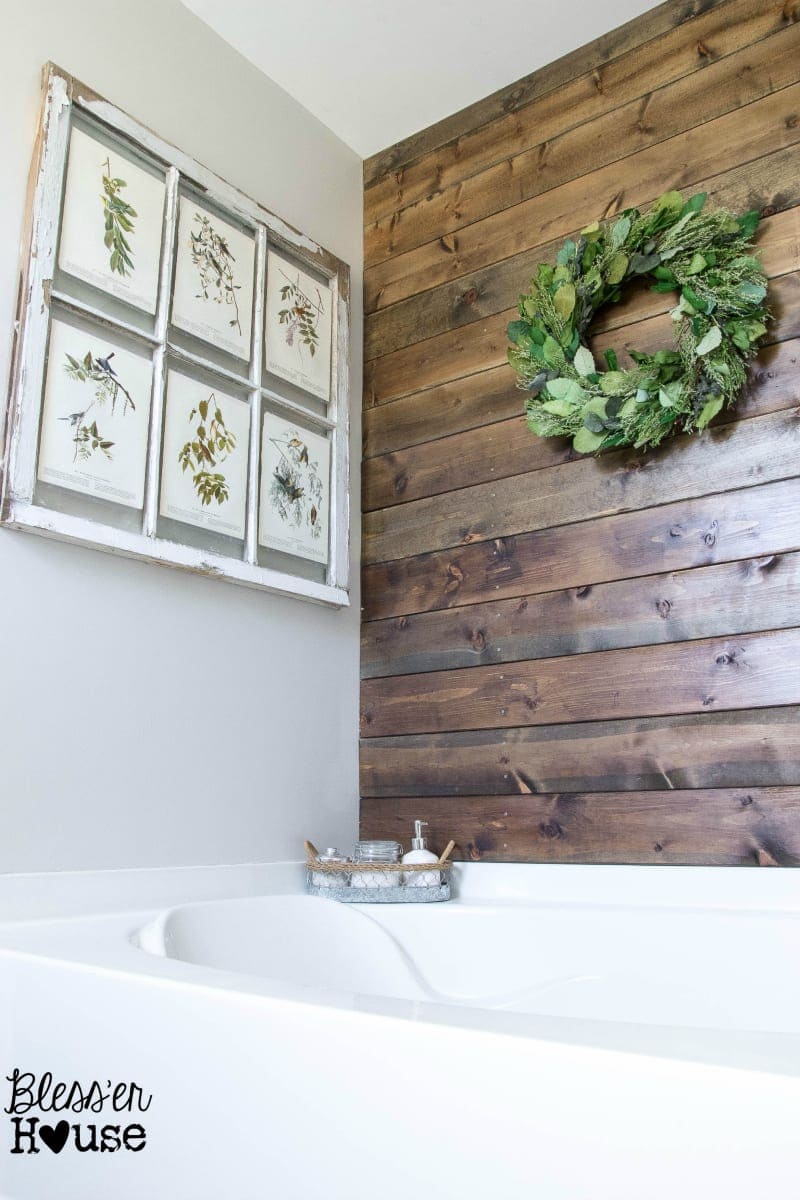
I conducted a little experiment in my kitchen on our bathroom plank wall project.

And I discovered that I am never going back to store-bought wood stains for as long as I can help it. This method rocked my world, y’all!
I’d heard about several variations of wood oxidation before to create a color change on different types of wood, so I put them to the test to find that perfect barnwood finish with this tried and true homemade wood stain.
It took all of 30 minutes of “labor”, was really easy clean-up, didn’t require the use of any harsh synthetic chemicals, and only cost me $5 since most of what I needed was already hanging out in my pantry.
Boom, baby! That’s what I’m talkin’ about.

Perfecting the Color of Natural Wood Stain
Going into this little experiment, I knew I was looking for the end result of a rich color wood tone with a little hint of gray blue color.
On a scrap test piece of wood, I tried all kinds of vinegar recipe combinations for a couple days by mixing steel wool grades and types of vinegar, and discovered that 0000 grade steel wool is the best for the impatient DIYer who doesn’t want to wait a couple of weeks to do this.
Homemade Pre-Stain Conditioners
Applying a wood conditioner pulls the natural tannins to the surface of your raw wood. The kind of wood you choose will determine the color. Heavy-tannin woods like oak or walnut will natural show a darker color than lighter-tannin woods like pine or poplar. So it’s a good idea to test your homemade stain on a scrap piece of wood before working in larger areas.
- Brewed tea
- Coffee
Vinegar Method
You can attempt this vinegar stain with different types of ingredients on any type of wood to find the best way to achieve the color of the wood you want.
- White vinegar
- Red wine vinegar
- Apple cider vinegar
- Balsamic vinegar
In my experiment, apple cider vinegar gave a more gray tint than white distilled vinegar.
Brushing wood with coffee brings out more of the brown tones of wood while black tea brings out the gray.
In the end, this was the winning method for me.
DIY Natural Wood Stain
Ingredients to Make Natural Wood Stain
- 2 cups of boiling water
- 4 family size black tea bags (I used these Luzianne tea bags if you want to be really specific.)
- 1 real steel wool pad of 0000 grade (I use these.)
- 2 cups of vinegar (White House brand apple cider vinegar to be exact.)
- 2 cheap chip brushes or foam brush
- glass jar
- Medium grit sandpaper
- Pieces of wood of your choice (pallet wood is great to use for this)
WORK SPACE: Be sure to wear gloves and protect your work area with waterproof drop cloths.

Step 1 – Sand
Lightly sand the wood surface with medium grit sandpaper and remove any dust so it will take the stain more evenly.
Step 2 – Make Wood Conditioner
To prep the wood conditioner, I let 4 black tea bags steep in the 2 cups of boiling water for 24 hours to make it really strong (I left the tea bags in the entire time).
Step 3 – Mix Vinegar and Steel Wool Stain
For the oxidizing stain, I combined the steel wool pad and vinegar in a large glass jar and let it sit for 24 hours too.
IMPORTANT: Leave the jar uncovered as the homemade stain will release gas that shouldn’t be covered.
Then the fun began!

Step 4 – Apply Conditioner to Wood
After 24 hours, when I was ready to stain, to pull the tannins out of the wood, I brushed it all down with the cold tea mixture and let it sit for an hour.

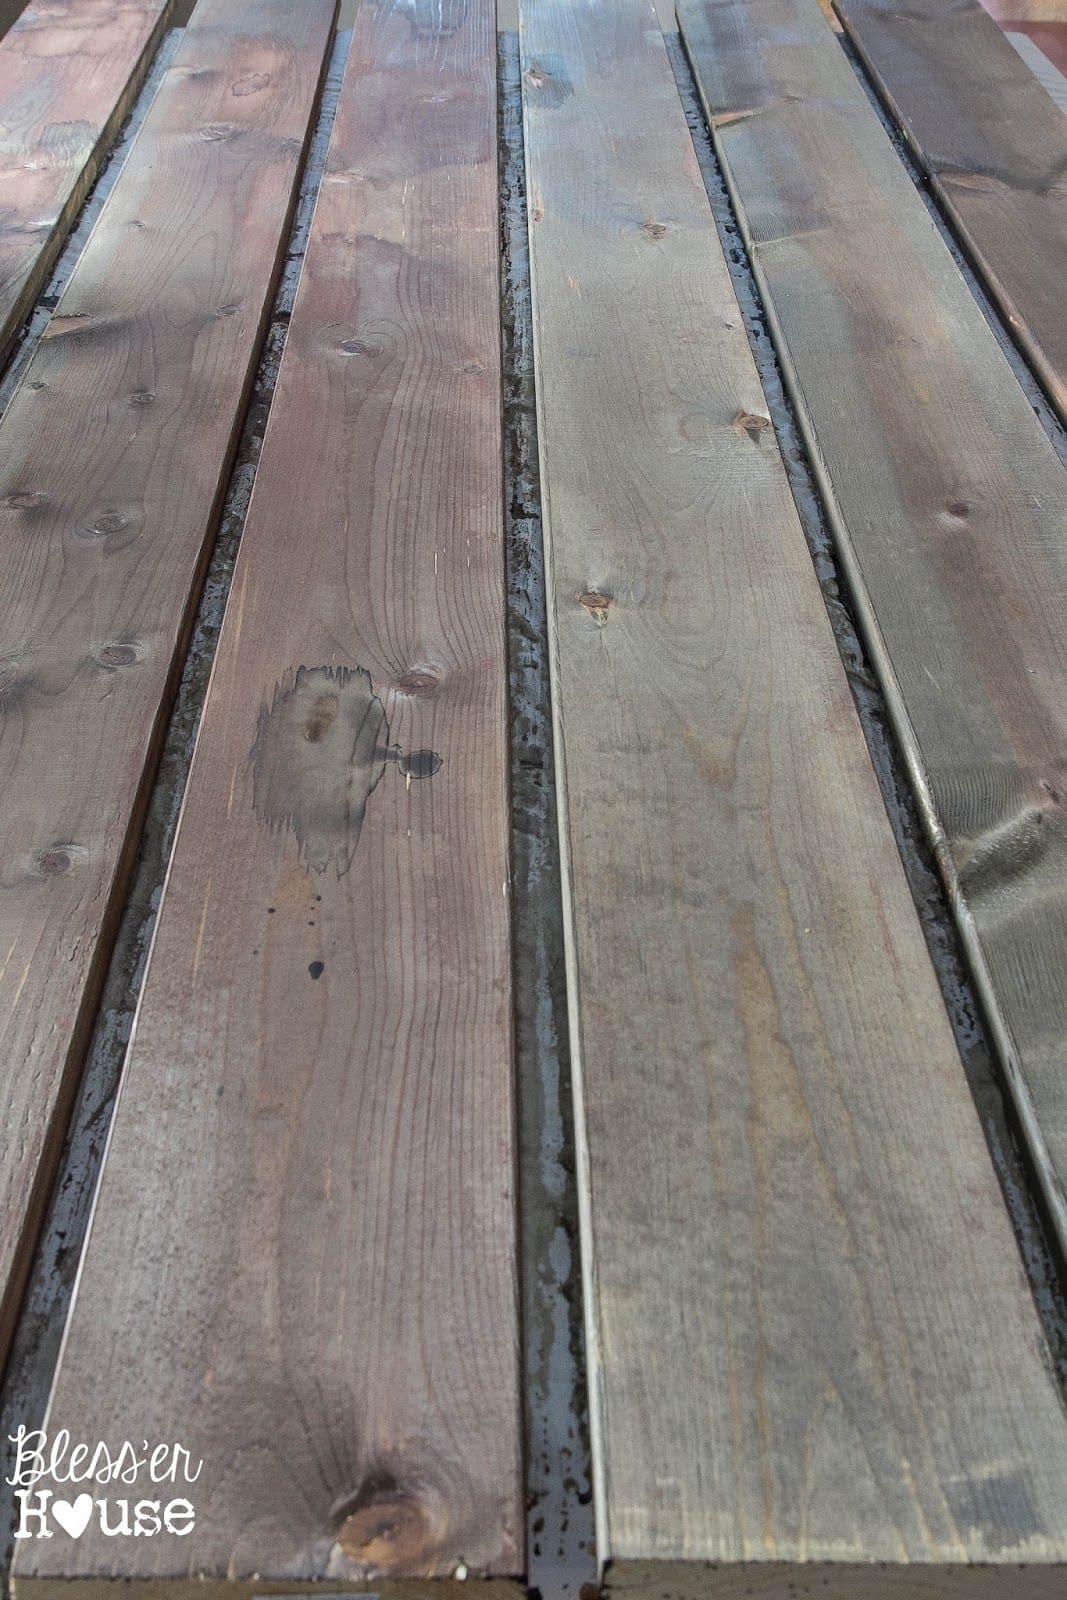
(Below) The left 3 planks are plain and the right 3 planks are brushed with the tea.

Step 5 – Apply Stain
After the hour mark, I brushed the wood with the steel wool / apple cider vinegar mixture, and it instantly turned gray. I was nearly jumping up and down with excitement. (I get excited over things that many “normal” people would probably think is crazy.)
The best part is watching the magic happen after this step.

5 minutes later, the color deepened and I knew it was going to be gorgeous!

After 15 minutes…

…and 30 minutes…


…and 1 hour, I had my perfectly aged wood. Insert fan girl squeal!
You will likely get a slightly different result on each wood board since this is a reactive finish that will all depend on how the tannic acid reacts to the solution. A commercial stain will give a more consistent result. This method is great for anyone who appreciates the natural variation of aged wood.
Considering it only costs about $5 for ingredients from the grocery store, it’s a steal for creating that distressed wood look!
There were a few spots I had to go back over and apply a little more of the oxidizing stain that left a few blotches, but I’ll sand them down a bit to even it out. And I think the imperfections give it a more realistic barn wood look anyway.
You most likely will not need a second coat of stain in order to achieve a dark color. But if you are looking to achieve a darker stain, you can apply an additional coat of the steel wool/vinegar solution.

Step 6 – Seal With a Top Coat
For the final step to seal in the color, apply a clear coat of wax with a lint free cloth or brush on a coat of polycrylic or polyurethane, especially if you are using the wood on a dining table top or coffee table or creating a weathered wood look in a high humidity space like a bathroom.
It almost reminds me of that glorious wood from my in-laws’ “magic barn” that I’m a bit infatuated with.
I’m so ready to get this plank wall up in our bathroom now! I might have to celebrate with something crazy like a science lab rocket launch. 😉
You can see how our DIY natural wood stained plank wall turned out here!
Shelf Life: The steel wool/vinegar homemade stain solution works best within 1-2 weeks since it can become less effective after a long time.
And we used the same staining method on our DIY wood beam doorway!

More Wood Project Ideas
Best Deck Stain Color for a Neutral Driftwood Look

DIY Faux Driftwood Outdoor Dining Table Makeover

How to Refinish Wood Furniture Without Stripping

How to Restore Wood Outdoor Furniture


Hi Lauren,
I’m just about to get keys to my first home (yay!)….the budget is tight and the place needs a complete re-do with decoration (the last lady was in her 90’s with a lot of cats – think complete carpeted and stuck in the 70’s).
Anyways, it’s by the beach and my plan was to go rustic/cottage/airy. I know there’s wood floors under the carpet upstairs and I think I’ll refinish them and make the most of them!
This technique is so pretty and unique – I love it!
So my question is – do you think it’s do-able on an entire floor (or several rooms and a hall)….without having lines where you stop and start….do you think making the solutions in small batches would be best (measuring out everything for consistency etc…..I’m worried the solutions will create different results if they’re different batches and stuff…..
Any advice greatly appreciated x
Hi Laura! Congrats on the new house! For floors, I really would go with a store-bought stain since it’s really impossible to control the color of the natural stain. It just oxidizes the wood to naturally weather, but there’s no telling what colors are in the wood already.
Does the length of time the tea is “brewed” affect the outcome? Can I use week old tea mixture and expect same result as 24 hour tea mixture?
As long as it has fully steeped, it really shouldn’t matter. Week old tea would be super potent and should still work. 🙂
How long did your chemical stain continue to change color?
It stopped changing color completely I’d say around 10 minutes. It might lighten some once it dries though since wet wood would be darker.
Can I use this stain over an already light stained table. It’s very light gray but lacks the “old” look.
It should work, as long as there isn’t a sealer on top. If there is sealer on top of the existing stain though, you might need to give it a light sanding to remove that clear layer. I would test in a small inconspicuous area first though.
Thanks for the post. I am re-siding my old barn and was going to use an ECO product, sounds similar to this, but states that it also preserves. Do you know if your recipe would be good for Exterior preservation?
Thanks Lauren! beautiful bathroom wall.
I don’t know for sure if you could use it for outdoors. It would at least need a few coats of exterior grade polyurethane. But I would test it out first on a scrap piece.
I used the stain on a trial piece of wood, it stained darker than I would like. Do you think less time soaking the steel wool/vinegar mixture would lighten it?