Hi y’all! If you haven’t dropped in to the latest happenings lately, I shared
Part One of building our faux fireplace earlier this week, and I’m SO excited about it! But what we did to it next was even better.
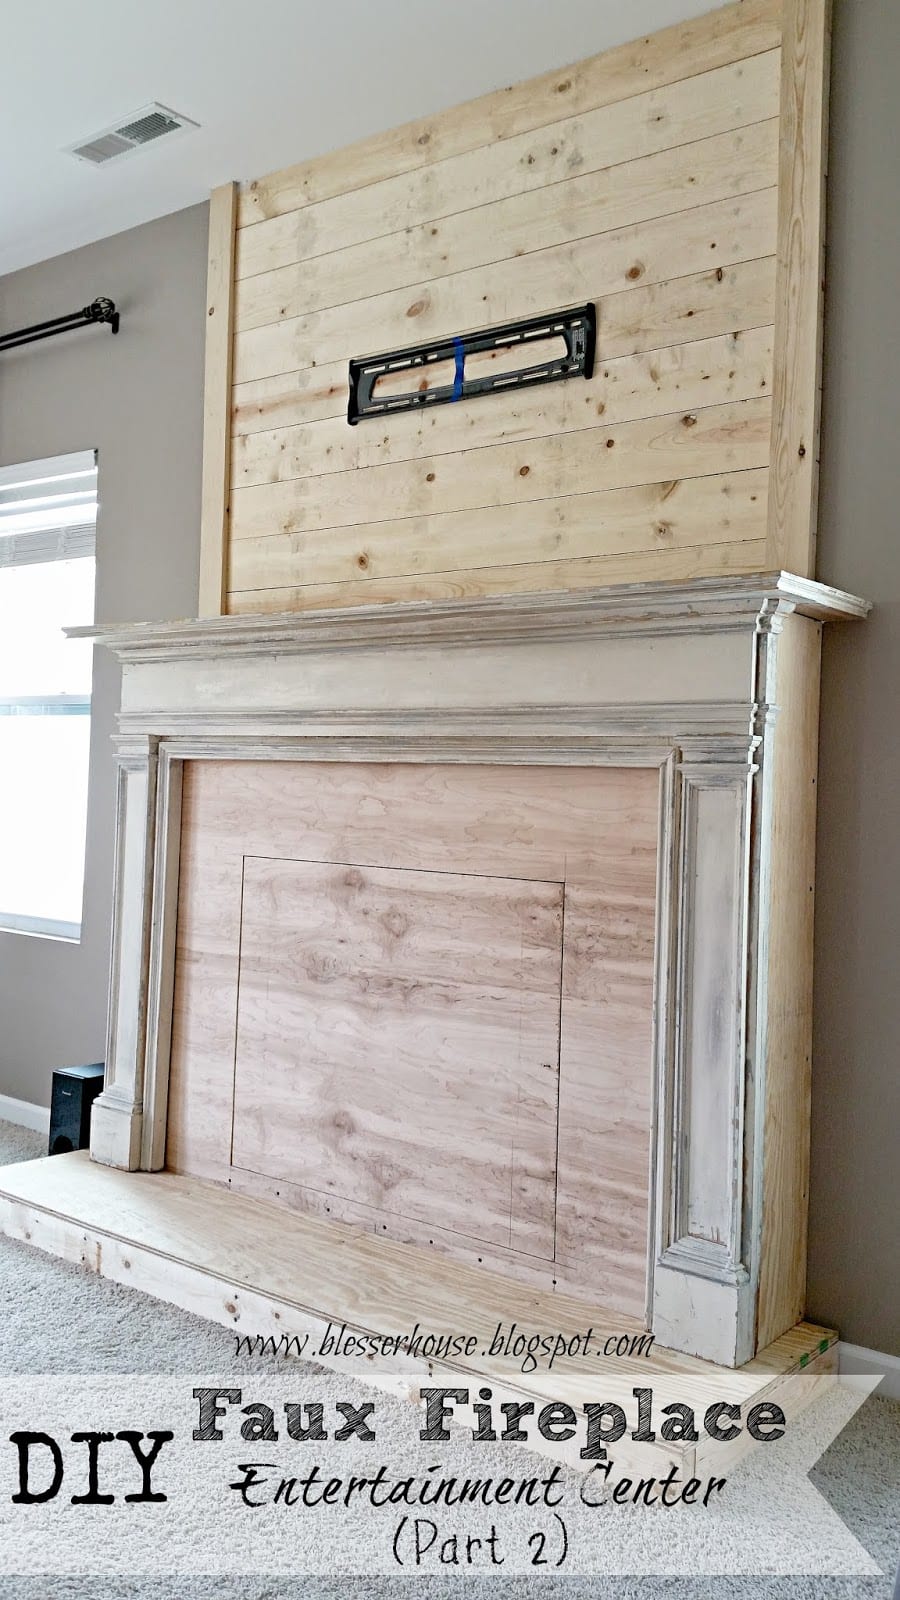
We added a plank wall! I have been dying to have a plank wall somewhere in our house, and while it’s not an entire wall, it has made a HUGE statement in our living room. And, in a way, we have faked a chimney in the process to make the fireplace look a little more authentic.
This step definitely wasn’t as complex as
Part One, but here’s what we did.
Supplies used: (Affiliate links are provided below. For more information, see my
full disclosure.)
- 9 1×6 pine planks (or however many you need for the space between the top of your mantel and ceiling)
- 2 1×4 pine planks
- Quarter round strip (to make sides of plank wall look finished)
- Long level
- Pencil
- 2 inch brad nails
- Nail setter (if nailing by hand)
- Popsicle sticks (or other kind of spacer)
- Power drill and hole saw drill bit (optional)
- Hammer or pneumatic nail gun (We have this 3-in-1 nailer and love it!)
The Steps:
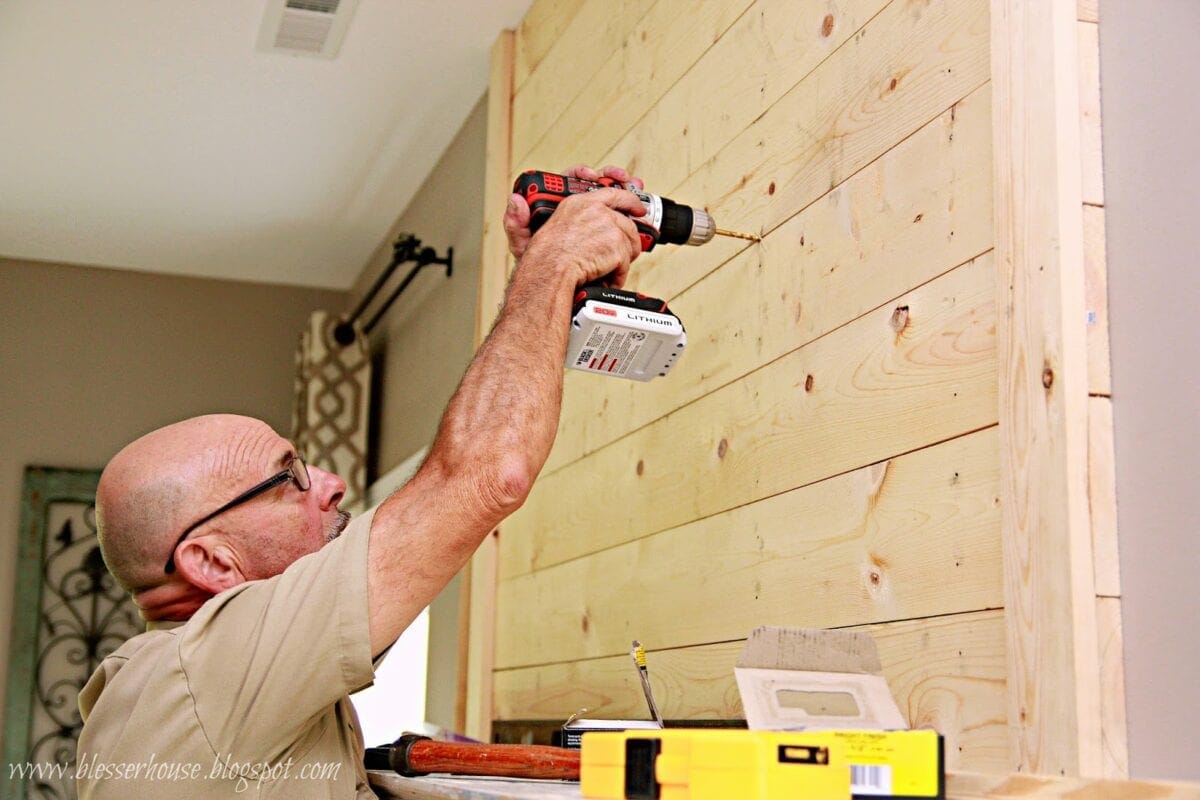
We decided how wide we wanted the plank wall to be (big enough to incorporate that monstrous TV that Robert is bonkers for…what is it with men and big TVs?) We used a level to draw a pencil line from the top of the mantel to the ceiling as a guide for either side of the wall.
Then, we used the level again to draw a pencil line for each stud in the wall.
Once the studs were marked, Robert started on the 1×6 planks cut to size based on the measurements we decided on for the width the wall. We used finishing nails on each of the studs for each plank and made sure to keep the planks lined up on the ends we had marked before.
I’ve seen some DIYers use coins as spacers between planks, but we’re completely broke so…
Okay, we’re not THAT frugal, but I already happened to have popsicle sticks and they were the first things I thought of.
Make sure you have them sticking out far enough to pull out. One of ours is still stuck between two of the planks and we tried everything to get it out. But we pushed it further in after giving up, and it’s not even noticeable. Oops. It’s there to stay.
For the last plank, we had to cut it by about an inch to make it fit.
Once all of the planks were up, we nailed a 1×4 over each end. We will put a small molding piece beside each of the 1x4s too to completely hide the plank ends on the sides.
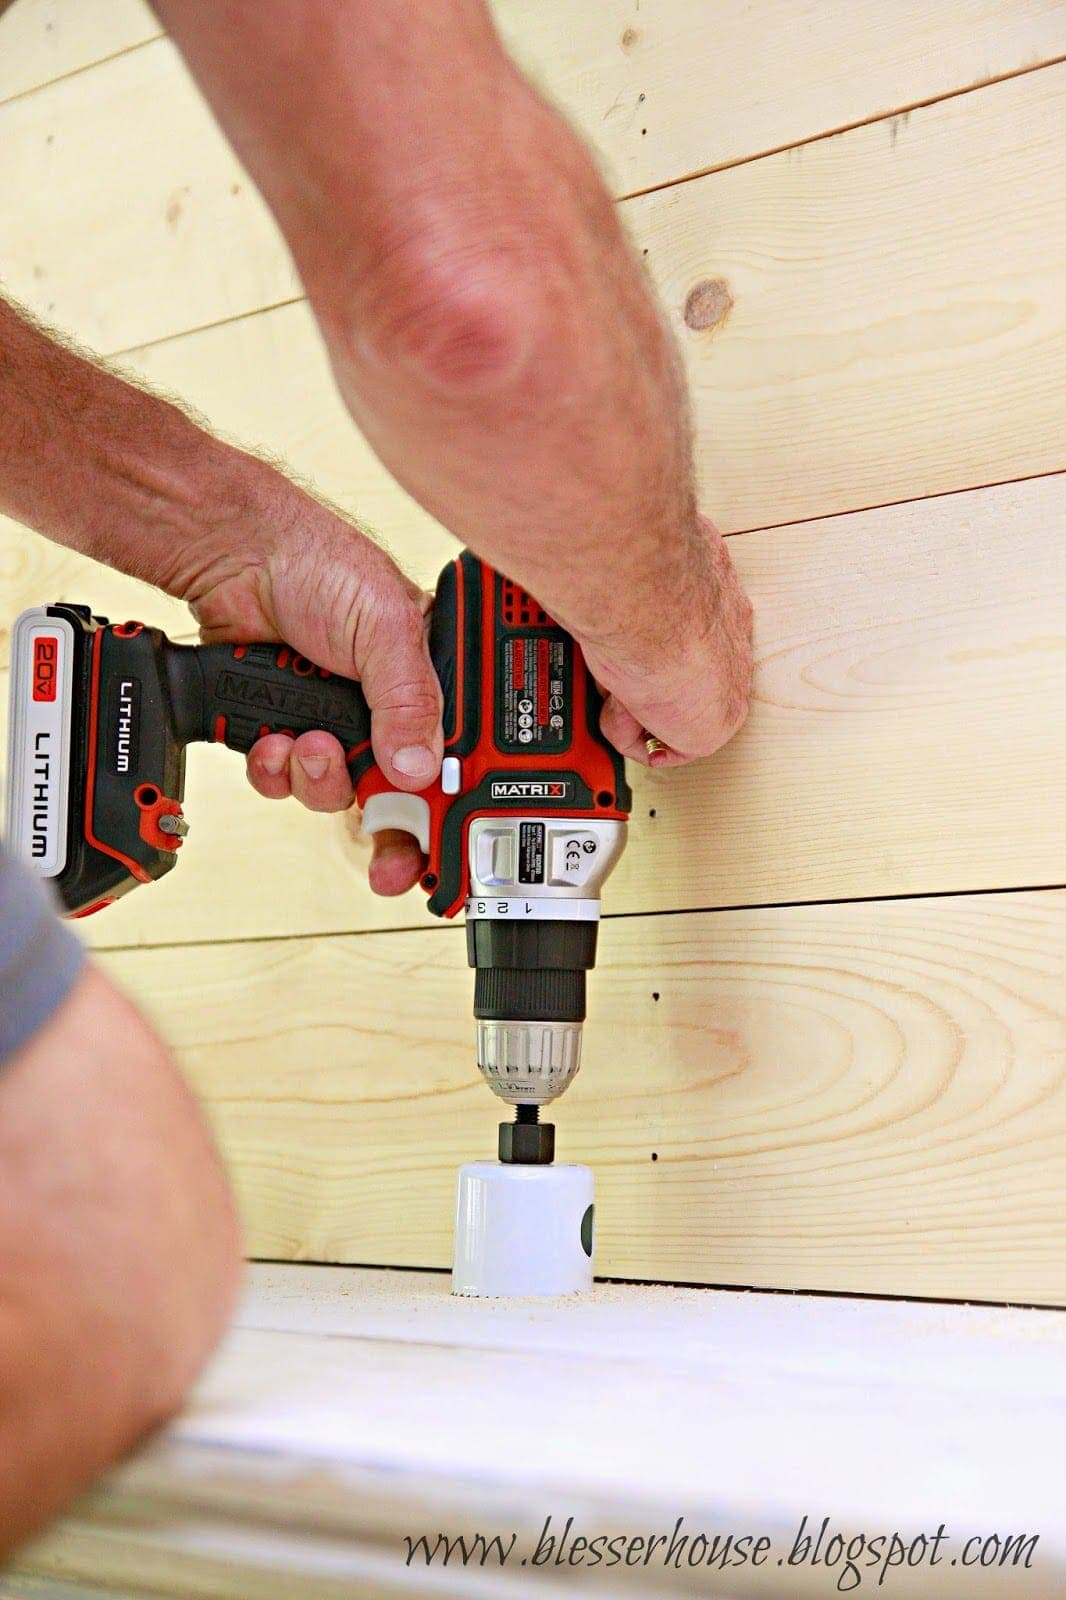
This part made me cringe…drilling a hole into our pretty new wall! But this is partly an entertainment center after all.
I would have loved to figure out a way to put the TV on another wall but there is no other place in our living room that would work. We drilled all the way through to the stud for the TV mount to be sure it would stay in place.
To run the cords straight down from the TV (and this is the advantage of a faux fireplace), we drilled a hole at the back of the mantel shelf using a hole saw drill bit. A working outlet is located behind our faux firebox door so that we can still access it and not have to deal with cords running around the room.
And now she’s ready for paint!

Follow:
Facebook | Pinterest | Instagram | Twitter | Google+ | Bloglovin | Hometalk


Do you store all your electronics in the inside? Do you have a heat problem? We have ALOT of electronics. I mean, Xbox 1, Xbox 360, Wii, N64, SNES, Game Cube, the Modem, and the router. We obviously wouldnt have all them on at once, but i would be concerned about having the xbox on all day and it being able to breathe.
We actually originally planned on storing them inside but realized the door was really heavy and it would be a pain to deal with. So we left them on top of the mantel instead and just hid them. We only have a Bluray player and PS3 though. That’s a lot of electronics to deal with! Maybe you could even use a short cabinet beside of the fireplace with a patterned vent screen on the front of the door to hide them but still allow them to breathe and receive a signal from remotes? We’ve thought about trying that instead of keeping them on the mantel before but they don’t bother us enough to go through that process just yet.
We too are going to put in a faux fireplace and put our tv above it. What is the overall height of yours from the floor to the mantel?
Floor to mantel, the height on ours is 58″. We do have 9′ ceilings though, so we were able to go a bit taller than with the standard 8′.