Learn how to add chunky window trim the easy way without any complicated miter cuts or special equipment.
We have been going a mile a minute here lately. As we’ve been getting closer to the finish line of Olivia’s bedroom makeover, we’ve been working around family vacations, reunions, and summer day trips. It’s exhausting but in a good way!
This certainly isn’t one of those gorgeously creative DIY posts, but this little project is by far one of my favorites for adding some oomph to a room.
My favorite thing to DIY in our very plain builder box house is adding architectural interest, and since we’ve already done similar trim in our master bathroom, I find myself drawn to the idea of chunky window molding throughout the rest of our house.
You can find all kinds of versions of this similar trim all over the internet, but this is our very simple take.
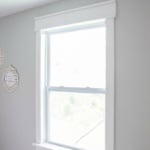
Olivia’s bedroom window was uh…lack luster. Blah. Boooooriiiiiing.
I mean, what’s a bedroom with a glamorous chandelier without some pretty window trim to go with it? That’s like wearing stilettos with your jogging shorts. Joan Rivers would have never forgiven us, bless her soul.
This trim is so easy and doesn’t require any fancy schmancy miter cuts. If you can cut in a straight line, you can do this. I pinky promise.
DIY Window Trim Supplies: (Affiliate links noted by asteriks below.)
- 1×2 (length depending on the size of your window)
- 2 1x4s
- 1×6
- Brad nails
- Wood screws
- Hammer
- Trim caulk*
- Paint (I used a sample size of Valspar Du Jour and it was just enough.)
- Jigsaw* (of whatever type of saw you prefer)
Here’s the game plan. A visual is probably easier for this one.
We started on the window sill first. We cut our 1×6 to the width of the window plus 10 inches to leave an excess of 5 inches on each side.
Once we had the width of our 1×6 cut, we held it up against the bottom of the window to mark where to cut out the corners to fit into the window base.
Once everything looked good, we used the brad nails to attach it.
For the sides of the trim, we held our 1x4s up on each side of the window to mark where to cut the length.
(Measuring is overrated in our house for some projects. If we can get away with lining up wood pieces, marking, and cutting, we do. It’s easier and just as accurate as going the extra step with a measuring tape.)
Once the sides of the trim were up, Robert got to work on the header by cutting the remainder of the 1×6 the same length as the window sill. He cut the 1×2 in two pieces using the same length as the 1×6.
I didn’t get a shot of him using wood screws to secure the 1x2s to the top and bottom of the 1×6, but you can get a good idea of it from the pictures. (Sometimes I’m just in awe of his mad skills and wonder to myself how I ever got so lucky for marrying such a handy guy and forget to pick up my camera…oops.)
He used brad nails again to attach the header to the top of the window and made sure to secure them into studs in the wall.
He added a length of 1×4 under the window sill too.
You can get a better idea of how the 1x2s are attached to the 1×6 from this angle. See that not so pretty gap between the wood and the wall? Caulk is your best friend.
Just so you know, I posed with my caulk gun doing an oh-so-sexy Charlie’s Angels pose and somehow it mysteriously disappeared from my memory card.
Okay, you caught me. Turns out, I’m not good at oh-so-sexy Charlie’s Angels poses. More like awkward Mr. Bean face.
Good thing my caulking is better than my modeling.
I went back over the brad nails one more time to make sure none were sticking out too.
I gave the nail holes and any wood knots a fill-in with some caulk, then smoothed it all out.
After two coats of white paint, Olivia’s room suddenly looked so much bigger! I kid you not. And now Joan Rivers would approve of our ensemble.
I have curtain panels ready to hang too, so this window is going to look so much bigger from the boring plain one before.
Amazing how much a little wood and paint can do, right?
Once the curtains go up and the area rug I ordered arrives, this space will really be singing…er dancing. I mean this is a ballerina room after all.
What do you think? A DIY you could handle? Robert is already eager to trim our living room and dining room windows, and I’m totally on board.
Update: See the full bedroom makeover reveal here!
Follow:
Facebook | Pinterest | Instagram | Twitter | Google+ | Bloglovin | Hometalk
You don’t happen to have an estimate on the cost do you? I only have 4 windows in my downstairs (sounds pretty sad when I say it out loud) and this would make them stand out so much more!
I’ll go back and add that in, Esther. I meant to mention that. With wood, caulk, and paint sample pot, the final cost is about $25 per window, depending on the size you have. It really does help a ton. 🙂 We have 6 windows downstairs that we’re wanting to do this to eventually.
Hi I love this. Unfortunately I’m in a council house and they aren’t the best build where I am. One of those you can’t hang anything on the walls or can knock a nail in with your hand lol. Anyway my windows have a plastic type lip at the bottoms. How can I make the ledge? and the top piece of wood is that moulding? I also don’t have windows with space either side like yours so can I add this great look another way. I’m on my own, female and clueless with diy but really want to have a go. Thanks.
Just remove the pkastic lip or ant other type of moulding that us there, you are going to cover it up anyhow, so even if it makes some large gouges it won’t matter.
If you don’t have much side room door only on one side because of an adjacent wall, just omit that side or make the width less on either side
This is great, thanks for the tutorial. Our new house has some of the windows done like this but the ones in the back are not. Now I can do them all!
So glad it could help, April! It really does add so much to a room.
I love the simple, yet amazing transformation of the window! It totally changes the look of the room…. I am definitely pinning this for future reference. Can’t wait to see the “finished product”.
Blessings,
Lanita
Thanks, Lanita! Hope it comes in handy one day. 🙂
LOVE it!!!! I have 17 windows in this house – they all need this. Thanks for showing the how-to.
Wow! Lucky girl to have 17 windows! Hope this comes in handy one day. 🙂
Trim like that instantly makes a room feel more fancy. Love the look of it in Olivia’s adorable bedroom. You’re so lucky to have a husband that knows what he’s doing….and has all the right tools (that’s always my problem with projects!) Oh, and by the way, I’m a huge fan of caulking…..can I join in with you for your next Charlie’s Angels pose?!!?!
Thanks, Jamie! It’s taken a lot of trial and error and a lot of hand-me-down tools for us. 🙂 I’m totally down for a double trouble Charlie’s Angels pose. Haha I’ll be the awkward one.
Wow…that bit of wood around the window has made a huge impact! Y’all did a great job – we appreciate that you don’t necessarily measure…we’re fly-by-the-seat-of-our-pants team too! Great job!
Best way to go right? I avoid numbers like the plague. Haha Thanks for the love!
Any idea on how to do this when your windows are not inset into the wall? Our windows and the wall are flush with each other and ive been trying to figure out how to recreate this look.
Since it’s flush, I would do it without the window sill and replace it with a 1×2 instead. Hope that helps. 🙂
You can add a faux window sill by doing the same thing that was done above the window. The 1×4 underneath it will give it support
This turned out beautiful–and you’re right–it is pretty easy! By the way I LOVE the paint color in that room. Would you mind me asking what color it is?
Thanks for sharing this at the Frugal Crafty Home Blog Hop. This will be one of my featured posts at our next party 🙂
Yay! Thanks so much for the feature love, Carrie! The paint color is Benjamin Moore Gray Owl. It’s my new fave. 🙂
A little trim really makes all the difference! Great tutorial. Featured at Be Inspired this morning. Thanks so much for sharing!
You’re so sweet! Thank you, Sharon!
What a transformation Lauren. I am pinning and planning too!. Thank you for sharing. Visiting from Elizabeth & Co.
Thanks, Joy!
Okay this tutorial is wonderful! We just purchased a craftsman that has been remodeled and they removed the period looking window frames so we are looking to do this! Can you tell me, did you simply paint the inside of the window on the left and right sides or did you use wood there as well? Thanks!
They removed the craftsman window frames?! Blasphemy. J/k But whyyyy?! Haha Yes, we just painted the inside of the window. We caulked the seam between the wood and the drywall so that it all looked like one piece. Less work and cheaper that way too. Hope it helps!
Wow, that is beautiful. I am amazed. I would love to do this to our windows. Could you tell me what kind of saw you use? I have always wanted to do board and batten and I would love to do this window trim. What is the best power tools for amantures like me? ?
Hi Harmony! Really the main two saws we stick to for all of our projects are a circular saw and a jigsaw. The jigsaw is especially easy to learn on if you’re a beginner and have never touched a power tool in your life. My husband does the circular saw because I’m still a wimp about it. 😉
thank. I bought plantation shutters from Habitat for Humanity that just didn’t fit the old trim. I think this is going to work and look great..
Yay! Glad it could help!
Just have to say thank you to you and Robert for posting this lovely idea. I completed my first window this morning and it only took about an hour and a half. It was just the perfect solution for my less than bland and boring windows. They have zero charm now but with this technique, they will be fabulous. Doing window number 2 soon. Thank you so much!
I’m so glad to hear that, Donna! It really does add so much character for very little. We just finished window #10 in our house. 4 more and we’re done. 🙂
Now this proves how a small change can bring a lot of difference. You are lucky to have a husband who know these things. I have a single casement window ( http://canglow.ca/windows/casement/ ) in the bedroom and I like to do something like this with that one. I am not sure how it will end up but then, I want to try it.
It’s taken a lot of learning and teaching ourselves how. Our first couple of DIYs were pretty rough. 😉 This one is definitely great for a beginner since it’s all simple, straight cuts. I have faith in you, Hazel. 🙂
Curious of what your window looks like with curtains. Would you please add a pic?
Love the casing.
Hi, Charlotte. Sure! Here’s the post with the entire room finished and the curtains on the window: https://www.blesserhouse.com/2015/07/ballerina-girl-bedroom-makeover-reveal.html
Hi Lauren, great tutorial! We are beginners too, can I ask what kind of wood did you use to keep the cost low?
Thank you, Diana
Hi, Diana! I just used pine boards that I picked up at Lowe’s and filled the knots with wood filler. Worked great!
Did you have to sand after filling knots and blemishes with wood filler?
We are doing this same thing and about to prep for paint. Worried about knots and blemishes showing thru paint and trim not being smooth
Yes! After the wood filler is dry, sand with medium grit and fine grit. Then prime and paint. 🙂
Ah this is awesome and perfect timing! The previous owners ripped out the frames and plasteed them (very badly I may add!) This is to be my next task after fitting a shower! …. on a side note, how the he’ll did you get his white vest so whitell? ! My husbands has gone a funny grey colour after wearing it to work ? and I just can’t get it clean!
Glad it could help, Kate! As for my husband’s attire, I have no idea but bleach is usually my best answer. 😉
Love this window trim makeover! Define going to attempt this. Kate as far as the white vest advice, I’ve eliminated the use of bleach on many things, including clothing. I’ve got 5 children, best combo is hydrogen peroxide and baking soda and warm water.. what a HUGE difference without the smell and wear off bleach.
Looks great. However, what really shocks me is that it didn’t have a frame. I’ve never seen a window without a frame. I live in Massachusetts and every house I have been in has window frames. I guess not. I learned something. lol
I know! I thought it was weird too. Our builder didn’t include window frames unless we wanted to pay for the upgrade to get them. But so glad they were frameless because it made it that much easier to give them our own style.
Thank you so much for posting this method!! My bedroom window has been trim less for SIX YEARS. We had the window replaced, but my husband told the contractor he could handle installing molding himself. BUT, he never did it. Flash forward 6 years, he is gone, and I am left to finish up the bazillion little unfinished projects myself. Pinterest to the rescue!! I have now replaced flooring, a toilet, a bathroom sink and faucet, and NOW – WINDOW MOLDING!! This project was really my first foray into power tools! I could never have figured out HOW to do this myself. Your instructions were so clear, I thought, “Why not? If I mess it up, I’ll have some extra lumber for a campfire in the backyard next summer!!”. Thank you again!!
Wow! You go girl! I’m so glad it helped!
Excellent tutorial!! Thanks for sharing…going to store to trim my kitchen window tomorrow! YAY! I’ll share your tutorial with the hubs.
Yay! Hope it turns out well, Holly!
Beautiful beautiful beautiful! We are doing this to our windows based on your plans! The fiancee thinks we should cover the top of the blinds with the 1×6 to hide it. What do you think?
Yay! Glad it’ll come in handy! I think covering the top of the blinds is up to you, but would you be able to remove them easily eventually? We didn’t cover the top since our blinds slide out of clips at the top for removal and ours came with a plastic moulding strip to make it look more tailored.
Just wonderful! Thank you so much for sharing! I’ll definitely be doing the trimming on all my windows! Like, immediately!! :)))
Woohoo! Glad it helped!
Hi Lauren I’m wandering what size brad nail you use here…thinking about doin this….thanks for your help.
I believe we used 1 1/2 inch brad nails.
This is such a good idea and looks wonderful! We actually bought all of the supplies today to do the windows in our kid’s bedroom. Question about painting–did you prime the boards first? And what kind of paint did you use on the boards? I’m debating on whether to use a latex matte paint and go over it with polycrylic or whether it needs to be something more durable.
Awesome! I would suggest priming the wood first. You can wait until after it’s all installed. Caulk, prime, paint. I used a latex semi-gloss since semi-gloss is usually best for trim. No need to use polycrylic. 🙂
Beautiful!!! Awesome! Now I know what I want to do with my windows. Never thought it would be that easy! Thank you!
Glad it could help, Sheila!
Can I ask about the sanding of the wood?? Did you do it by hand? Or with a sander? And once they were all put together and up or before? Rounded edges? Etc?
Hi Jaime! We just sanded the wood filler by hand after it had dried to get it nice and smooth, nothing too crazy.
Quick question. I am shiplapping our half bathroom and have a window I am doing this to. Should I lay the shiplap first then cover with this frame. Or do frame first then shiplap up to it?.
I would frame the window first and then add the shiplap, in case for whatever reason down the road you decide you want to get rid of the shiplap years later.
none of my windows have frames either – this is a post I’ve been searching for as I’ve been wanting to add one to my kitchen window. One question. My windows have rounded corners(not squared off ones like you have? how would I put a ‘frame’ around my windows?
I have the same problem, with the rounded corners.
Is the bottom piece (under the window sill) the same length as the sill? I Want to do this today in my daughter’s room but not sure what to put that piece as
The board under the new window sill is the same length as the existing window sill.
I am so very excited to find you. I have the old 60’s windows, oh so not pretty, and I have always wanted to do this , but alas, no talent. It has always looked so incredibly hard, but you have given me hope. I will have to send you my before and after shots. Thank you to a great team.
This is great. Exactly what I want to do in our house. Quick question…did you leave the drywall in the interior sides of the window exposed and just painted it? We have blinds that are mounted inside the window frame, so I don’t really want to add trim inside the window frame and then buy new blinds. Thanks for this post!
Yes, we left the drywall exposed and just ran a line of caulk between the drywall edge and the wood, then painted. We did it that way for that same reason so our blinds would still fit.
Wow what a difference! Never would have thought of this idea myself but it works really well. Thanks for the inspiration!
My windows are set back about 2 1/2 inches into the wall. The dry wall wraps over the edge which frames the window. In other words, it’s not the square drywall frame that your wood trim lays flat so nicely on to secure. Any suggestions? Thank you.
Hi Debbie! Do you think you can send a photo to me so I can help you resolve the issue a little better? Just email me at [email protected] Thanks!
This looks great, what type of wood did you use?
Thanks, Diane! We just used common whitewood.
Lauren, thank you for sharing your blog! My wife and I have enjoyed it and it’s helped us in our remodel.
I noted that you didn’t case the inside of the window with wood because you had existing blinds you wanted to fit back into the windows. Makes sense.
We are planning on replacing our window treatments at the same time we case the windows. Do you think it’s worth trying to case the inside of the windows? Do you ever wish yours were wood on the inside, or do you never notice the sheetrock? Just wondering if it’s worth the added time. I would likely need to use a thin cabinet plywood so it wouldn’t cover up too much of the window frame.
Thanks again!
Kevin & Rikki
Hi Kevin! So glad to hear it has helped! We really didn’t miss casing that part of the window at all, especially since after caulking and painting, we couldn’t even tell where the wood stopped and where the sheetrock started. But that’s totally up to your preference.
I think it’s beautiful!! You and your husband have done a wonderful jobs with this and your other projects. Thanks for the ideas.
You are welcome. My husband is a great help in all my ideas! 🙂
hello
going to give this a try with my small bathroom window
so you just used a hammer for the brad nails? I cant afford an air nailer lol ugh Hope its not too difficult.
Yes! Just a hammer works really. And To drive the brad nails in further so they don’t stick up at all, use a nail punch/setter, put a little wood filler over top of the nail hole, sand, prime, paint, and it’ll look flawless. 🙂
I want to do this to the windows in our master! LOVE this! My only concern is that there is a small, marbled like sill. Would you recommend putting a wood shelf around it or just framing the window as mention and using the existing sill? I can’t seem to picture it!
Hmm… I’d have to see a photo to really get a good idea of what you’re working with, but I think I would use the existing sill.
Did you treat the wood with a special primer so the knots wont bleed through? If so what did you use? Thanks. the project looks great
Great question. Yes. Any primer will work. However, Kilz Premium is my preferred brand.
we have rounded edges around our windows.. do you know the best way to get around that?
The rounded edges should not make too much of a difference. Tape should do the trick. If you get paint specific tape, it is thin enough to manipulate around the rounded windows.
Love this look!!!. You guys did a great job! We recently had new windows installed and are doing this inside trim to 15 windows in our house. The tutorial is very helpful. How far does the 1×2 stick out on each side of the top 1×6? 1″ maybe?
Hi, Susan. A little more than an inch but not much more. I never thought to measure that part directly as we just made sure to center it along the top of the window frame. 🙂 I hope you enjoy the look when you are finished. We are so pleased with the big change it made to the whole room.
Hi Lauren, I just finished framing my dining room window using your step-by-step post and I have received raving reviews! Thank you! I only wish I would have thought to change out my doorway trim before painting and finalizing everything. 🙁
I plan to carry this look through the rest of the house, but I have 1 triple-window with a half-moon over the top of the center window that has me a little perplexed. I am wondering if the 6″ trim will look too bulky rounded over that half-moon? There is enough space between the windows to add the 1×4 trim, which I think will look really good, just not sure how to top it all off?? I would love to hear your thoughts, or if you have had to do a similar window?
Hi, Erin! Window trim makes such a difference. We have not worked with rounded or half-moon windows. I am sure if the space is there it should look good if you already like the look without the trim. If you could share a picture to my email I may be able to give you a better answer.
Thanks so much for the tips, Lauren! I have an extra wide double window in my breakfast area that I would like to make “look” like two windows. I would like to somehow put trim between the two windows so that I can give each window it’s own roman shade instead of using one large roman shade. Does this make sense? And, have you ever attempted something like this? I’m not sure it’s worth the trouble but would love your input. Thanks again!
I have not worked with anything like you are describing. While what you are describing makes sense, I am not sure I would want to make a window smaller or take away from the additional light by splitting it in two. However, I have not seen the window or the space. Have you tried joining the Facebook group I host for decorating ideas? The members there have such a large range of experience, experiments and ideas. They are a GREAT support for things related to this question. I hope you get the look you are looking to obtain. Please let me know how it turns out. 🙂
I hadn’t considered the decrease in light – thanks for pointing that out. I’ll look into your Facebook group. Thank you, and thanks again for sharing your wonderful ideas!
Hi! Quick question- why did you not paint the boards before nailing up? Would that not have been easier than painting them while they are already on the wall?
Hi, Kayla! Good question. We wanted a clean smooth finish over the nails.
So happy I found your post! I’ve been wanting to do something to my bedroom window for ages. The window is a weird size 48″ wide an only 22 ” high (a slider) so this trim application will do wonders for it. My next hurdle is a blind that will fit – the window is only set into the wall about 1″ and it’s metal so hanging a blind has been quite a problem. The current shade is mounted on the outside which is not the most attractive look LOL
Thanks for the inspiration. Going to do the project tomorrow.
Question- why did your husband use wood screws and not brad nails to attach the 1×2 to the 1×6 in the header? My dad is insistent that we can just use brad nails and the wood screws are completely unnecessary. Just want to make sure I use the correct thing to keep it together well. Thank you so much!
It’s totally up to you! This is just a guide, but you of course can do what you (and your dad) feel best 🙂
So my window currently has no casing. It’s just drywall. But it does have a sill and a skirt. The issue is that the sill only extends about .75″ on each side so we can’t add any casing with the current sills.
What should I do in this case?
Hi Kaitie! You can actually remove the current sill. Just take it off with a pry bar and you should be able to add one to the length you need.