

DIY Faux Wall Planking – for $20 for a Whole Room!
How to install DIY faux wall planking using just a board and permanent marker for a temporary wall treatment on a budget.
Yes, we actually did wall planking in an entire room for $20. That is IF you want to really call them planked walls.
But you be the judge… do these look like planked walls to you?

The Problem With Real Wall Planking
Here’s the problem about real wall planking:
- It’s expensive, especially considering the increase in lumber prices these days.
- It’s time consuming. In the past, it’s taken us 2-3 days to complete the real thing.
- It’s very permanent. In the future, if you want to change your style and rip out your wall planking, you better plan to replace the drywall.
And since we are tackling a shared teen girls’ bedroom at our neighbors’ house, we are very aware of how quickly their styles change (and how quickly they grow up and move out… I’m not crying, you’re crying.) So we needed temporary.

Side note: These walls we painted Sherwin Williams Evergreen Fog turned out to be the perfect color! (More designer recommended sage green paint colors are in this post.)
When to Use Faux Wall Planking
Anyways, this faux DIY wall planking seemed like the perfect solution to solve all of those 3 problems because it’s especially the perfect solution for kids’ rooms… or teens who absolutely love the boho vibe made oh-so-complete with cottage-y wall panels.
(It’s also great for “trying on” the planked wall look if you’re not sure you really want to commit. If you don’t love it, paint right over it. Problem solved. Or if you live in a rental and are allowed to paint, it’s a good way to get the planked accent wall look that way too.)
How to Make Faux Planked Walls
The solution: paint pens.

Those two words might have made your brain come to a screeching halt, but hear me out.
This faux wall paneling method is every bit as good as the peel and stick shiplap wallpaper stuff you’d find at Target or Wayfair and similar in concept.
It’s just meant for looks to trick the eye, and there are no actual 3D wall planks. Except the paint pen method is way cheaper and less frustrating to install than even the wallpaper approach.
We did several faux shiplap methods at our old house, so it seemed right to bust out one of our favorite old tricks all over again.
How to DIY Faux Wall Planking
Supplies
- Black Sharpie Oil Based Medium Point Paint Pen (regular Sharpies do NOT cut it)
- 1 1x6x8 board (or longer if you’re working on a room with ceilings taller than 8′.)
- 1 1x6x4 board (in the pre-cut section of Home Depot or Lowe’s)
- Level
- Square
- Tape measure
- Circular saw or even just a hand saw will do
- Step ladder
- An extra pair of helping hands, if possible (not mandatory but definitely helpful)

Steps
Measure for Spacers
- Measure the space between your baseboards and window apron, window head casing and crown molding, and the wall space between your baseboards and crown molding. Write down those three measurements.
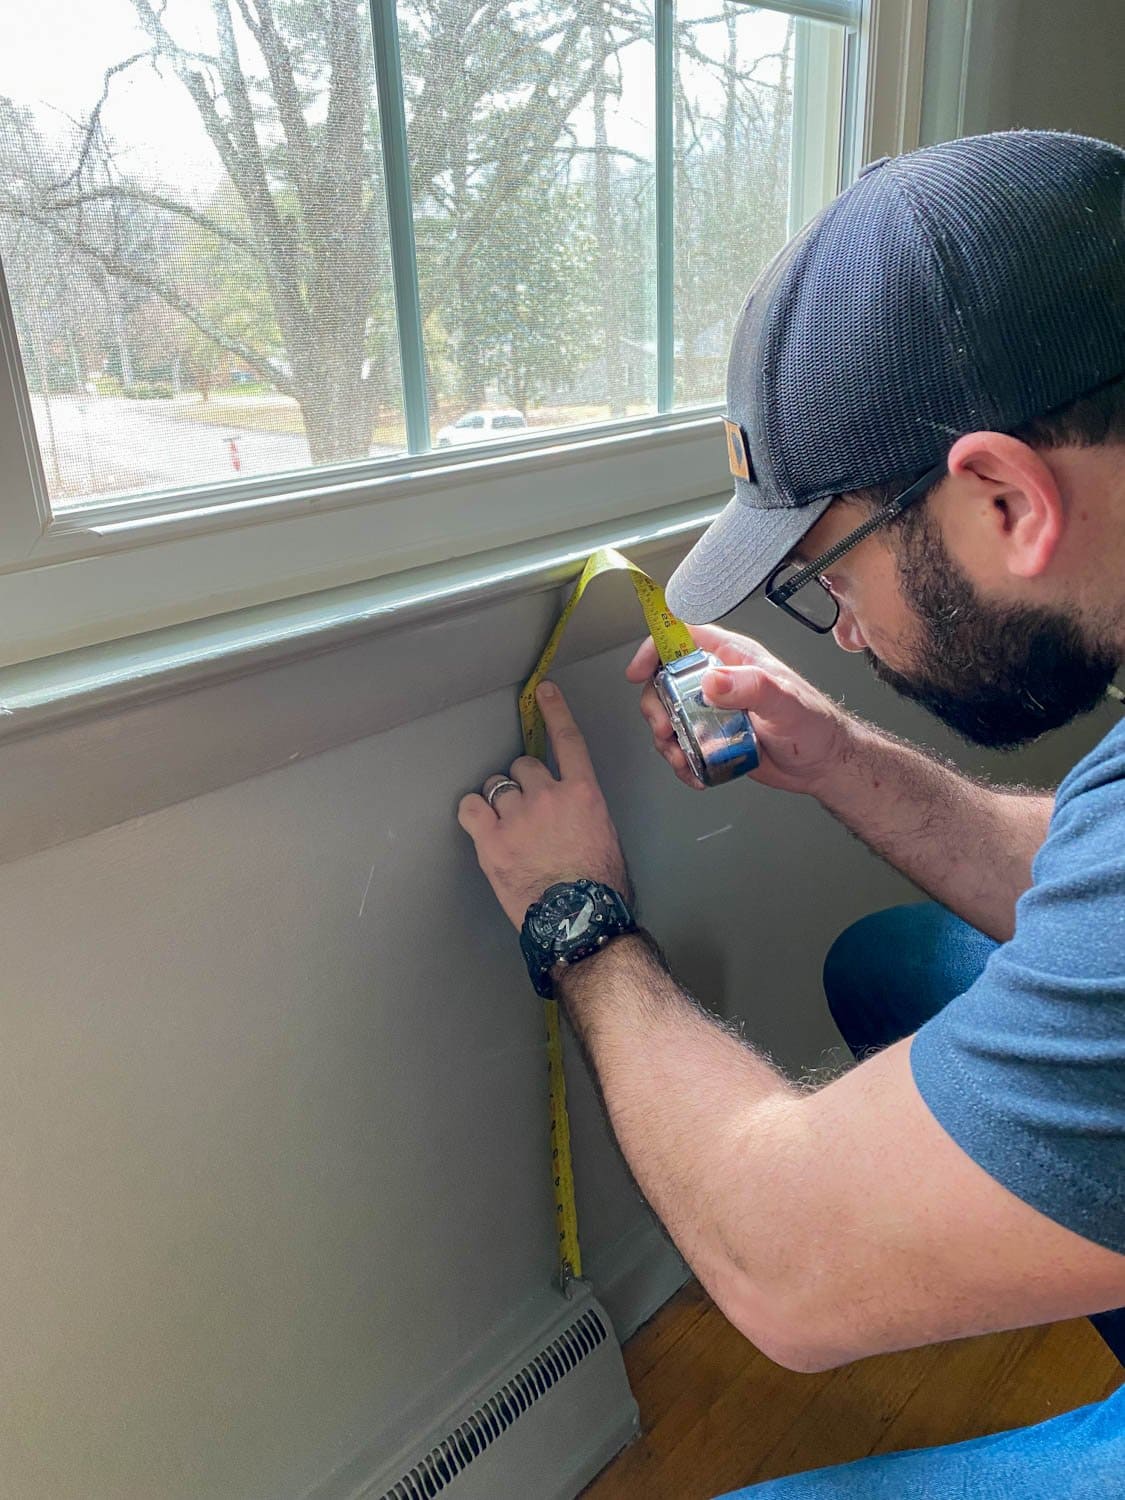
Cut Boards for Spacers
2. Cut your 1x6x8 board to your longest measurement (for the walls minus the baseboard and crown molding). Cut the 1x6x4 board to your two shorter measurements for the spaces above and below the windows.
These boards will be used as spacers.

Use a Level To Get Started
3. Start at an unobstructed corner. Place the 1×6 spacer board against the corner and use a level to make sure it is plumb. Adjust the board if necessary.
(It’s better to be plumb than to be completely in line with a wonky corner so your lines don’t end up crooked all across the wall.)
Trace Spacers with Paint Pen to Mimic Wall Planking
4. As one person holds the 1×6 spacer board in place, have the other person climb on the step ladder and trace the paint pen along the side of the board.
(It took a little while to get the paint pen started, and I had to step every so often to blot/shake/compress the tip so the paint would keep flowing.)

4. When you reach a window, use the shorter spacer boards and repeat.


5. Check every 3-4 lines with the level to make sure your lines aren’t going crooked.

6. And you have a fully planked room! It took us 2 pens and about 2 hours to complete this space, which is pretty amazing!

So now we have all of the fun decorating ahead.
These faux planked walls really are amazing though. Even standing in the room staring at it in person, I’m almost in disbelief.

Have you ever done a wall treatment with a Sharpie paint pen before? Or real wall planking for that matter? If you’re a purist you can find the real wall planking method here.
And here are 8 more wall molding ideas you can DIY too.
Next time you see this room it will be filled with all the cute things!
Yes, just apply a coat of oil or water-based bonding primer, let dry, and paint with whatever color of interior paint you’d like.
It just looks like black lines on a wall. You have to examine the lines to tell it’s not real shiplap, but you can tell it’s not the real deal once you get a foot or two away. Still, it’s pretty convincing.
Related Posts
- Easy DIY Vertical Shiplap Wainscoting
- 8 DIY-able Wall Molding Ideas to Add Character to Your Home
- 15 Ways to Transform Your Entire House with Just Paint
- DIY Painted Wall Paneling




You emails to me just appeared. Don’t know what happened, but I am so happy to get them again.
This post is mine blowing! Had you not said this is not really shiplap, I would not have know. Your work is incredible. I love it, and can hardly wait to see everything. Like everything you do, it will be amazing. Thanks for the fantastic, classical ideas.
Stay warm and safe.
Hi Ivory! It’s very possible my emails disappeared because I have seriously slacked off in sending them. This room makeover threw me for a loop this week and I’m behind on everything… groceries, laundry, emails, everything. Haha! Trying to get better about it. Thank you so much!
This is one of those kind of ideas that young women who love a new idea can accomplish. Very novel, inexpensive and a challenge! I love it but at my over the hill age, I would need about 5 helpers?….
Very good idea!!
I bet your the kid that wrote on the walls! ?
I promise I didn’t. Haha! My brother was that kid. 😉 Good thing he was really really cute.
I have seen people do this for crown molding and baseboards too. A black paint pen with a grey paint pen line next to it to make the shadow! This looks awesome!?
That’s so smart!
Wow, pretty amazing looking walls! My only question is, how do you tell your kids not to write on the wall once they see you do this??? 😉
Do it when they’re not home (get a babysitter if you have to)
Just a thought.
Great question, though! ? ☺️
I should add… Warning: Do this project when kids are not looking to avoid “artistic temptation”. 😉
I used this idea on a plywood floor to make it like like a wood floor. Turned out great!
Oh cool!