
DIY IKEA Pantry Cabinet Using Hemnes
How to turn an IKEA Hemnes cabinet in a freestanding IKEA pantry cupboard and give it a custom high-end look with antique mirror window film.
We are so relieved to finally have our food storage situation under control since adding this IKEA pantry cabinet situation in our kitchen as a freestanding pantry cupboard!

Kitchen Pantry 2.0
That should really be the title of this post. I know the minimalist lifestyle is cool and all. And half of the world lives with probably a quarter of the size of our kitchen with no problem.
But y’all! I don’t know how they do it.
Update: See how we organized our freestanding pantry cupboard here.

Why an IKEA Pantry Cabinet Might Be Your Best Solution
Our kitchen was in dire need of better pantry storage, so I decided on a do-over.
If you have very limited kitchen cabinet space or are living without a pantry at all, this IKEA pantry cabinet solution does the trick.
Maybe it’s because we entertain a lot and cook 95% of our meals at home. We’ve made it work up until this point by stuffing chip bags, canned goods, and ingredients on two little shelves in our laundry room cabinet.

Using IKEA Organizers as a Kitchen Cabinet Food Storage Solution
I even came up with a handy dandy storage system in an upper kitchen cabinet.
After a year, it still wasn’t working.

And the more we thought about it, the more we realized this coffee bar on the far wall of our kitchen really wasn’t being utilized to its full potential.
So… plot twist! We hauled that baby outta here.

Also, spoiler alert: If something isn’t functioning well for you and your family in your home, don’t be afraid to change it. What’s so great about something looking pretty if it’s wasting space?
DIY IKEA Pantry Cabinet
On to Plan B, which entailed putting together a bajillion and a half IKEA pieces to build two IKEA Hemnes cabinets.

Supplies Used
(Some affiliate links are provided below. Full disclosure here.)
- 2 IKEA Hemnes glass front cabinets
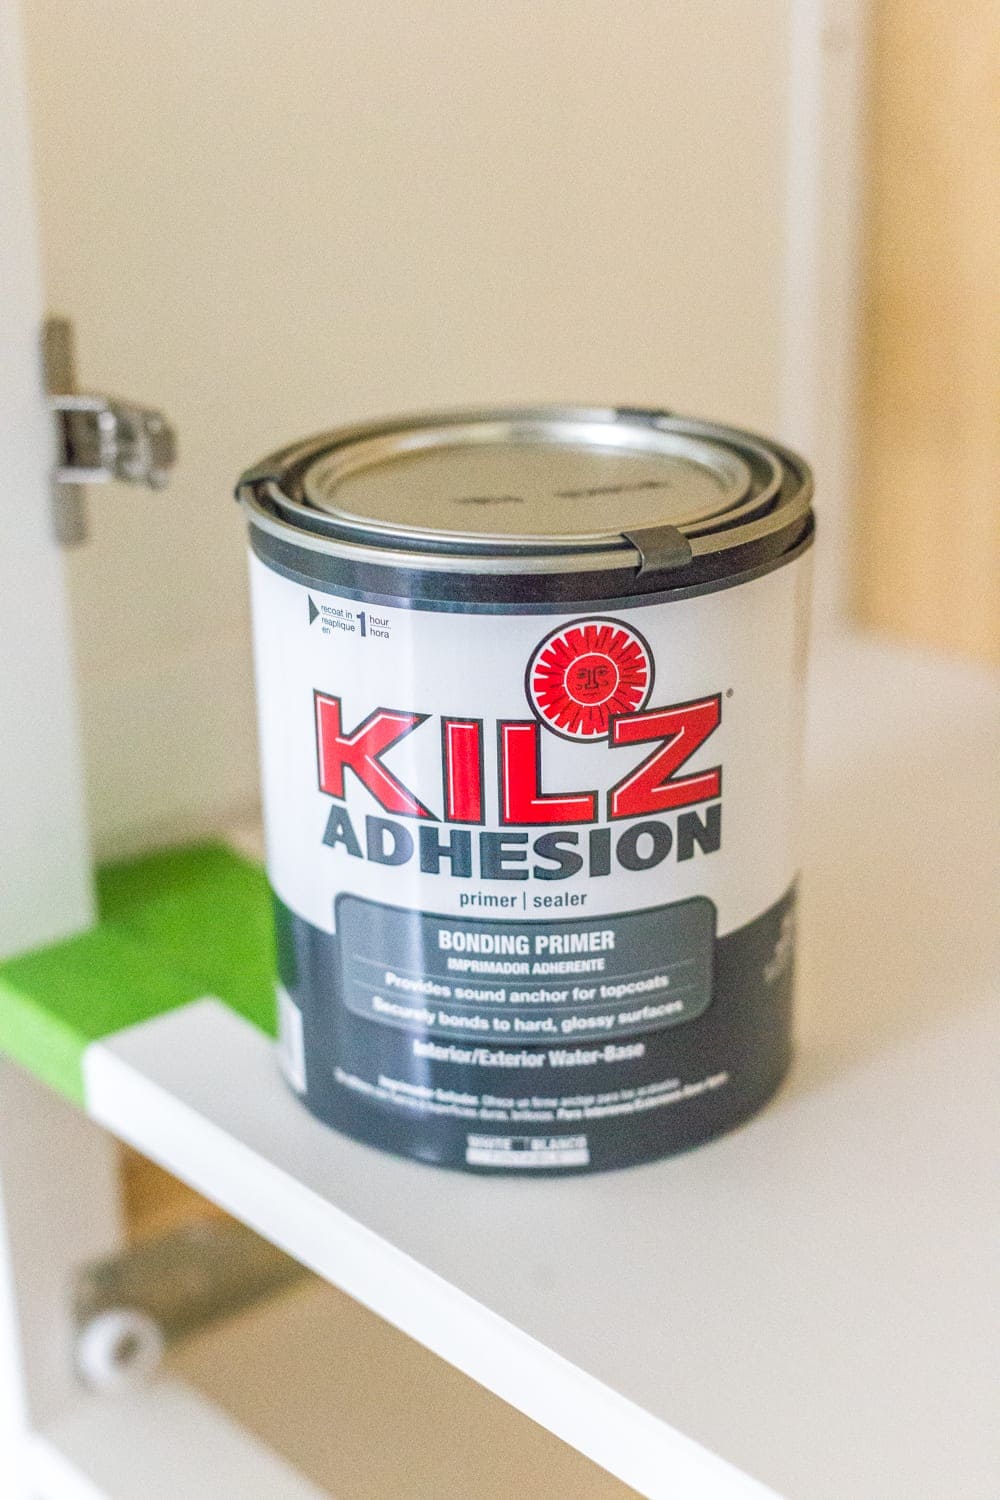
- Kilz Adhesion Primer
- Cabinet/trim enamel paint in color of choice (We used Behr Marquee enamel satin paint in the color Sherwin Williams Billiard to match our lower kitchen cabinets.)
- Paint brush (I prefer 1 1/5″ angled Purdy brushes)
- Masking liquid (optional but highly recommend)
- Antique mirror window film
- Spray bottle with water and 8 drops of dish soap
- Scissors
- Sharpie
- Credit card or squeegee
- X-acto knife
- Paper towels or clean, dry rags
The Steps
1. Find someone who will geek out at putting the cabinet together for you. Just kidding. Kind of. Robert loves putting together IKEA furniture, and I think he’s a total weirdo for it. 😉 According to him, they’re like giant LEGO. Whatever you gotta tell yourself, man.

2. Follow these steps for painting IKEA furniture to prevent scuffs and chips. Laminate is tricky business to paint.

The key is definitely a good primer like Kilz Adhesion.
3. Once the primer and paint dried on the cabinet, I did the same thing on the glass front cabinet doors.
IKEA Pantry Cabinet Painting Tip
BUT little tip that I wish I hadn’t skipped: Brush masking liquid on the glass before painting. I’ve used it for painting French doors before (you can see the how-to here) and it makes painting around glass so much easier and faster.
Just peel the masking liquid off of the glass once it’s dry, and the paint pulls right up with it.
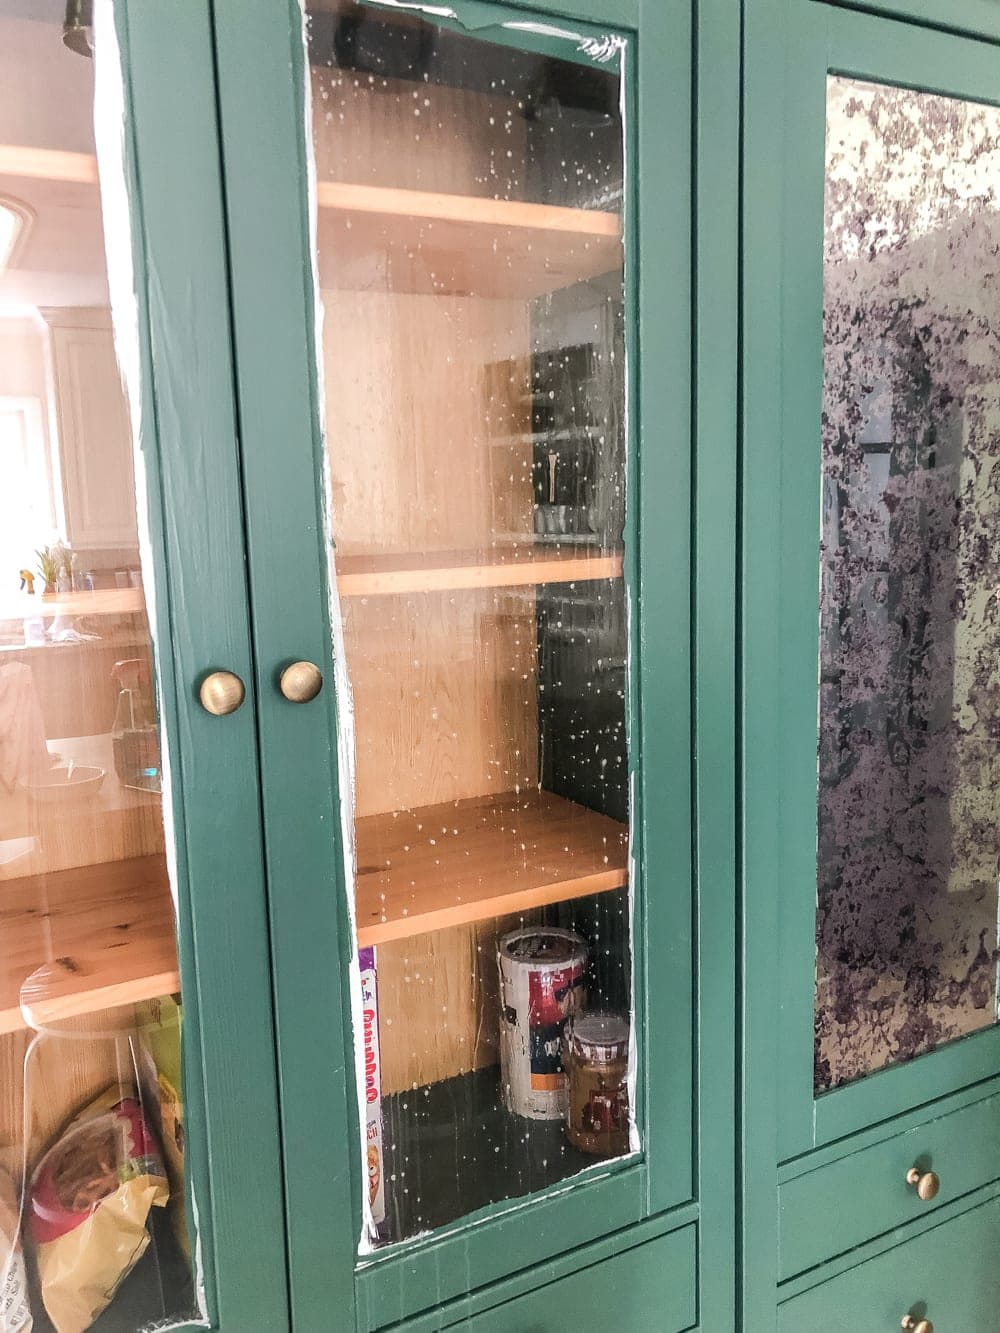
I painted the glass doors thinking I would just scrape up the paint on the glass with a razor later for a clean edge. Nope! That stuff was on there.
(This is why I’m the guinea pig, y’all. Taking one for the team here. Welcome to life as a blogger making it up as we go.)
So I had to do the next step with dried paint still stuck on the glass, and it made the job a tad tricky.

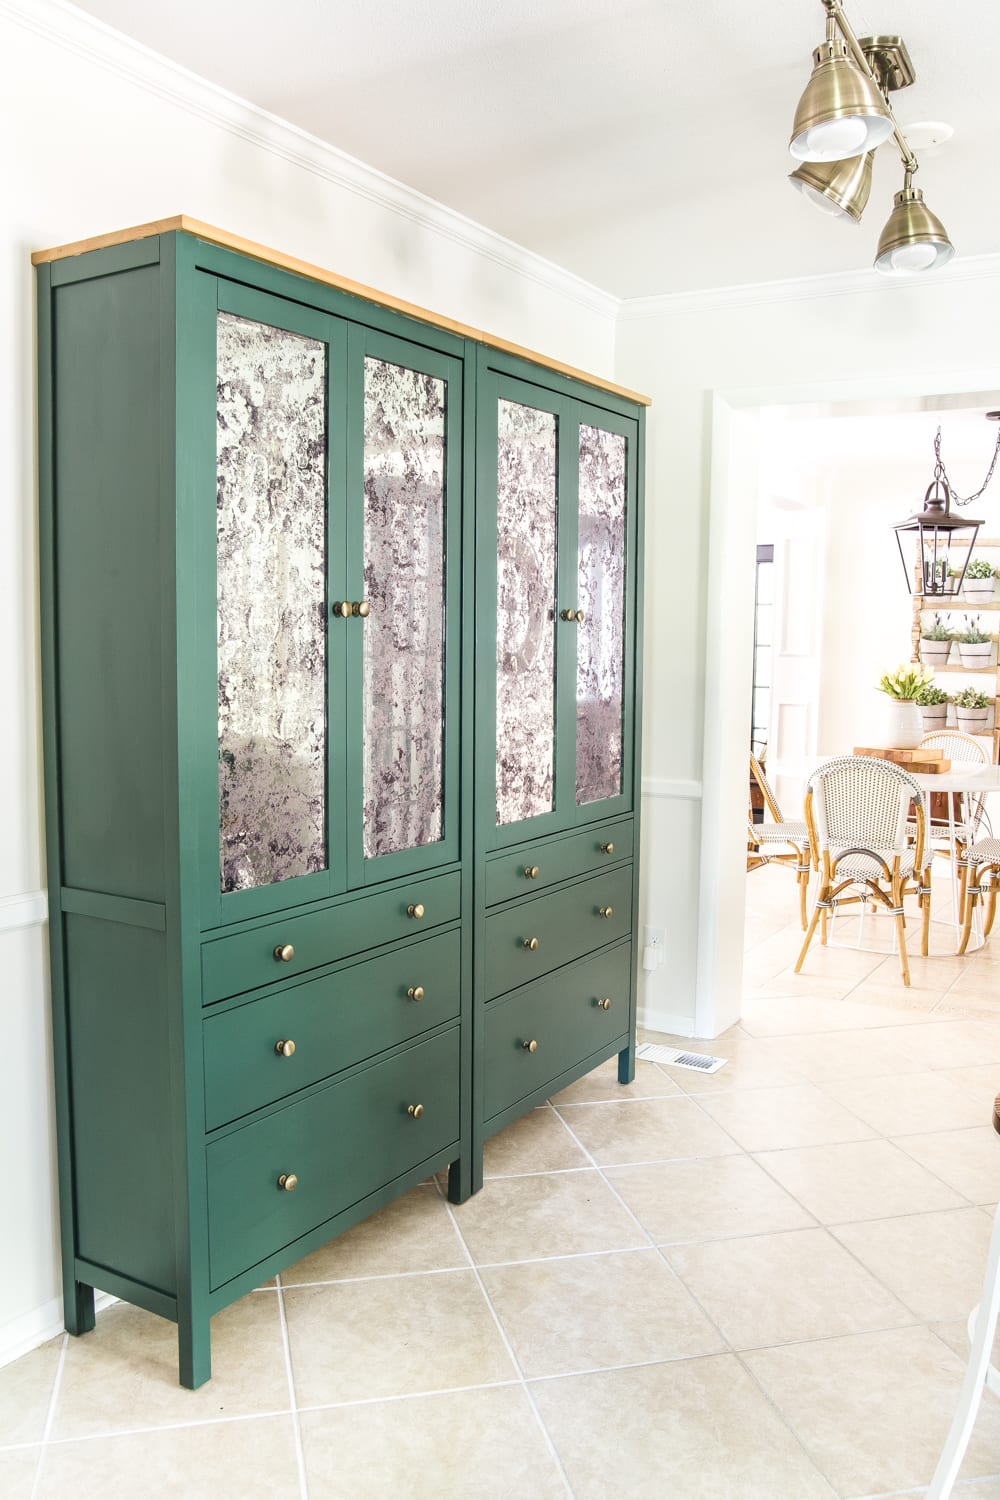
4. To hide all of the food that will be stored in the cabinets later, I found this window film that looks so much like a real antique mirror finish!
I knew it would tie in our stainless steel appliance colors on the cabinet with the rest of the kitchen as well as bounce light from the window on the opposite side of the room to brighten up this dark interior wall.
You can follow this video to install the film if you need a better visual.

5. First, measure the width and height of the glass panel on the cabinet front and add 1 inch to each measurement.
6. Mark the measurements on the backside of the film with a Sharpie and cut with scissors.
7. Lay the film on a flat surface and slowly peel off the backing as you spritz the film with the spray bottle of water/soap solution. Fully saturate the film.

8. Spray the glass on the cabinet door with the water/soap solution too.
9. Position your window film onto the glass and smooth out any air bubbles starting from the middle and working your way out to the edges with the credit card or squeegee.

10. Trim any excess film with a sharp X-acto knife. And wipe up any residual water/soap solution with a towel.
Ta da! All done.
IKEA Pantry Cabinet Storage Solutions
I’m still working on getting food moved over from various places all over the kitchen into these cabinets so that it’ll all be in one place. And hopefully I’ll have a pretty organized system soon once I can wrap my brain around it.

Update: This now organized IKEA pantry cabinet looks so good! I can’t begin to explain how nice it is to open these doors and drawers to find exactly what you needed.


The Final Pantry Cabinet Results
It ties in with our kitchen cabinets so perfectly! And I love that one day when we have the funds to replace this flooring that we won’t have to demo these cabinets since they aren’t built in.
They are anchored though (which you should always make sure you do).
They look downright fancy for IKEA, huh?

The Rest of Our Budget Kitchen Refresh
If you’re new around these parts and want to see more of our kitchen refresh from last year, you can check it out here.
Or if you’re an IKEA fanatic like we are, you can check out this post for all kinds of ideas to make IKEA items look designer-y.
So I’m curious, what do y’all do for your pantry situation? Got any great organizing solutions that work for you? The inside of these cabinets aren’t nearly as pretty as the outside at the moment, but we’ll get there.
If you want to save this post for later, you can pin it here:


AMAZING!!!!!
Lauren, girl, you are AMAZING!
Seriously love this piece of furniture, and the purpose it will serve as well. Is there anything you can’t do? I am ALWAYS thrilled when a new post arrives in my
e-mail because I know it’s going to be filled with so much decorative inspiration. And once again, you nailed it! But then again, you always do. Every. Single. Time.
Deb 🙂
These are so pretty! This is a great solution, and you made it beautiful! I’ve wondered what happens to the water and dish soap behind the mirror film, does it somehow evaporate, and how does it get out? Inquiring minds want to know! We don’t have an Ikea near us, but i’ve been to one on vacation, such a cool store! I have a small laminate two door storage cabinet in my
laundry room that is just basic white, and I’m now inspired to maybe paint it!
So beautiful! Your new cabinets look amazing. My hubby is a master at putting IKEA furniture together too – not that he likes it all that much but is a total PRO! Thanks for your inspiration!
Thank you!! AND Bless those hubbies for doing it. I know it would not get done if it were up to me. Or, it wouldn’t look as nice. You are most welcome and thank you for your support and encouragement.
What an amazing job! You have inspired me to do the same 🙂 I have a wall in my kitchen that i had tall narrow upper cabinets made out of antique windows. Bought a buffet to go underneath not realizing how close they would hit making the buffet top pretty much useless except for a decorative piece in the middle and areas to stuff junk! It does not work for us and i have just lived with it. Thanks for being the “guinea pig” here and paving the way!
You are going to love it!! I am so glad you are going to use this post. 🙂
Where d you find the antique mirror film? Have seen film for Sun blocking but have not been this
Hi, Barb!! Here is a link to the film. https://www.decorativefilm.com/solyx-sx-6040-antique-silver-mirror-59-wide?gclid=CjwKCAjwqqrmBRAAEiwAdpDXtNUHzWHNH837ryIUGXFCA1ImXr31RiePlYr8oP2SdCuRoqpb6EaT6BoCDKEQAvD_BwE
I hope you enjoy!!
Beautiful transformation, as well as the master bedroom closet doors. How many feet of antique film did you purchase for your french closet doors?
Hi, Monica! AaaHHH! I wish I could remember how much I used. Measure your space and then you should be able to match a desired amount. You will want to get a little extra if you use my same technique. I cut each piece a little too big to make sure it fit well along the edges. https://www.blesserhouse.com/master-bedroom-update-mirrored-french-closet-doors/