
DIY Oversized Sheet Music Sign
We all know by now I have a book obsession. Library card catalog coffee tables, card catalog cabinet pulls, and strangely enough…limited books on the living room bookshelf. Mainly because they’re sprinkled everywhere else in our house and packed into our office.
In my defense, I was raised by a librarian. But I have a confession to make. In addition to being a book worm, I was a band nerd. (I know what you’re thinking. “Lauren was hot stuff in high school.”) So any chance I can sneak in something pertaining to music in our decor, I have flashbacks. Band camp flashbacks. Hardcore stuff.

When I got the idea to incorporate a favorite song of mine into Olivia’s room, I ran with it! (Me? Run?) Or danced with it. I first heard “I Hope You Dance” by LeeAnn Womack when I was 12, backstage during a Nutcracker production like I did every year, and my gal pals and I played it on repeat between our numbers in the dressing rooms.
But it wasn’t until Olivia came along 13 years later that I really understood what the lyrics meant. The words of the song say so many things I’d want her to know as she grows up. (*tear*)
I found this beautiful oversized sheet music sign from RH Baby and Child for my inspiration. 1. It was out of my price range. 2. I wanted a vertical print. 3. The song I wanted wasn’t an option.

Problem solved. DIY to save the day as usual. I am so thankful I have an incredible husband who takes my ideas and makes them happen.
Here’s what we used:
*affiliates
- 24×36″ cut 3/4″ thick particle board
- 1x2x8″ pine furring strips
- Brad nails and wood nails
- Nail gun* or hammer
- Circular saw/jigsaw* (just something to cut a simple straight line…nothing tricky)
- Black tea (I use Luzianne.)
- DIY wood stain (My recipe is here.) Any store-bought stain will work though.
- 24×36″ engineer print from Staples. (Or any other size of your choosing)
- A sheet music file (I used this one if you want my exact print.)
- Mod Podge* Matte
- Large craft brush and/or paint brush
- Paper towels
Robert started out with a piece of particle board that he’d cut down to the size I needed for the engineer print I’d had made for the sheet music (more on that in just a minute). We already had the particle board as scrap wood hanging out in our garage, so we didn’t have to buy any for this project.

First, he lined up, marked, and cut the lengths he needed of the 1×2 strips to attach to the back of the particle board to support the sign and prevent bowing.

He measured and cut strips for the sides of the sign too.

This step would have been much easier with a nail gun, but the one we usually borrow from my parents was all the way across town. Robert just decided to tough it out old school.
He nailed brad nails through the front of the particle board to attach the 1×2 strips on the back around the edges of the sign.

The back ended up looking like this.

For the frame, he marked and cut 1×2 strips for the top and bottom of the sign. He nailed them into the sides of the strips on the back of the sign.


And he added more 1×2 strips to the sides. Now the fun part for me! (Poor Robert is my grunt labor.)

Those pretty yellowy white wood pieces needed to be weathered up first.

I busted out the old tried and true DIY stain made from tea, apple cider vinegar, and steel wool for the frame pieces. This stuff is so easy. Easy cleanup and not a pleasant smell but it’s not packed with chemicals either. And you can’t argue with stain you can make with ingredients already hanging out in your pantry. Every dollar counts.

I put some of the stain on the edges of the particle board too just in case some ended up showing later.
I have to backtrack a little bit to explain how I actually “made” the sheet music. I bought the sheet music for the song I wanted online first. Legally. It was about $2 for a digital file. Google will pull up all kinds of sites where you can buy the song you want. Instead of printing that digital file on my home printer, I sent it off to Staples to have it made as an engineer print.
(Side note: In case you’re thinking of making a bunch of these and selling them, I wouldn’t do it. Because I bought one file for the sheet music, I felt like it was fine for me to make this one print for my own house. But when you start getting into selling sheet music that you don’t own the copyright to, you could get in a whole heap of trouble. Just keeping the legal stuff in mind.)

If you come across a sheet music file that doesn’t have a high enough resolution to print on such a big scale, you can piece it together on Picmonkey using the steps I did on my DIY Oversized Map to make it the resolution you need.
If you’ve never seen this before, this is an engineer print. Whoever came up with the idea to print wall decor and photos on engineer print is just genius. I don’t know who thought it up first or I would link them here. This huge 24×36″ print cost $3 and some change at Staples.

I could have kept the paper a crisp white if I wanted, but typical me chose to antique it. Antiquing paper is super simple. Brew a cup of black tea and let it steep for about 5 minutes. I laid my print on our kitchen counter and started working on this at night. Sorry for the icky lighting.
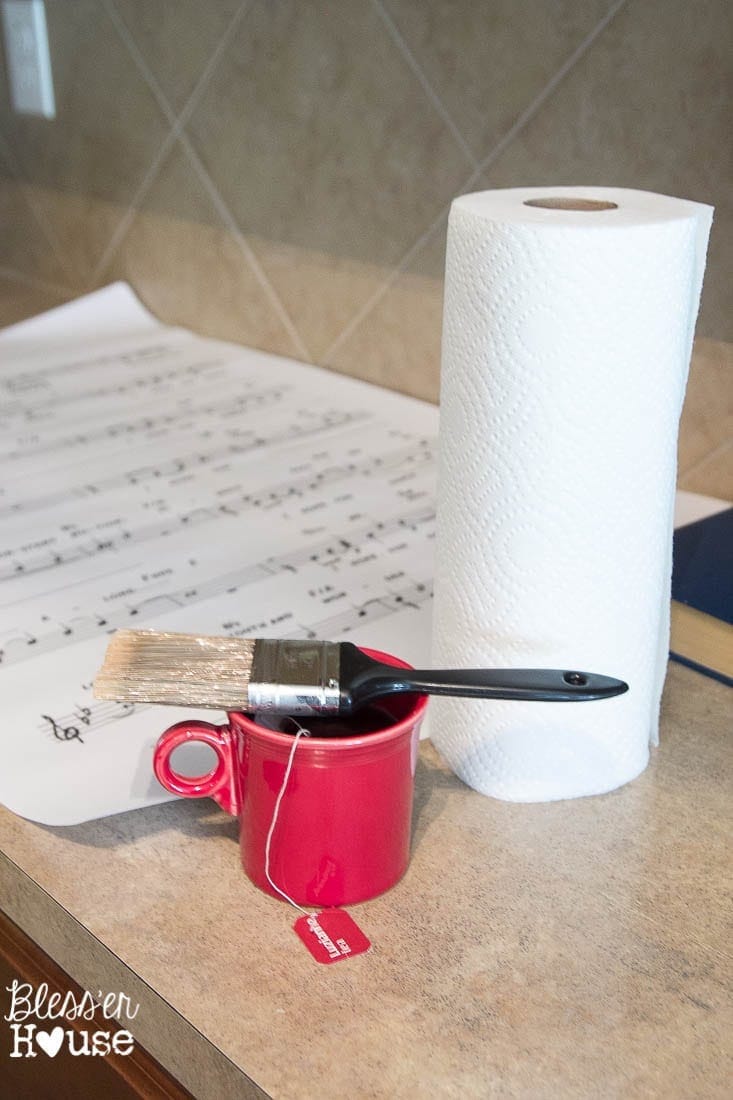
Once my tea was ready, I used a clean paint brush to dip it in the tea cup, wipe off any major drips on the cup rim, and worked in sections brushing the tea on the paper.

I blotted up each section with paper towels so the paper wouldn’t get too dark. You could skip this step if you wanted your paper darker.

When I was finished tea staining, I let the paper dry overnight.
The next morning, I lined up the dry engineer print on the particle board and worked in sections with Mod Podge.
I started by applying the Mod Podge to the top of the particle board sign and pressed the top of engineer print down where I wanted. Robert held up the end of the paper while I applied and pressed, moving further down the print and smoothing out any air bubbles as I went. (I would have snapped a picture but our 2 year-old wasn’t up to handling my pricey camera…as you can imagine.)

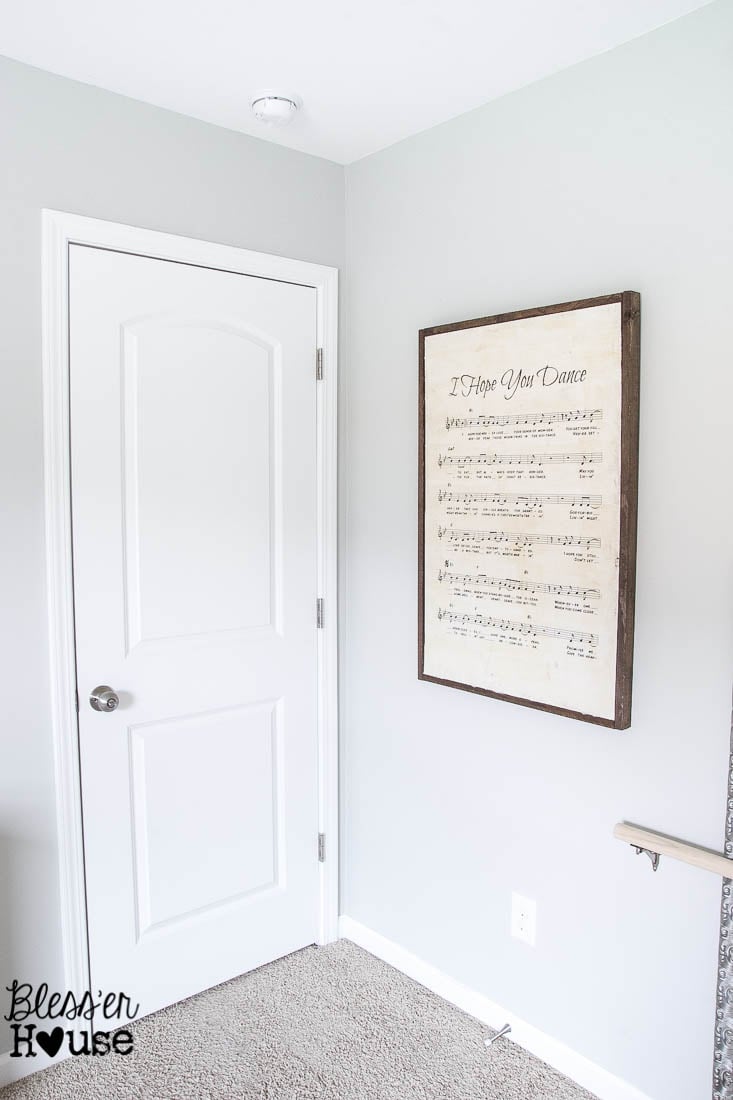
I gave the print a coat of Mod Podge on top to seal it. Then let it dry and it was ready to hang!

We have another sign for the second half of the song too that will hang on the other side of her mirror and DIY ballet barre. It just hasn’t made it up on the wall yet.

I’m so thrilled with how it turned out! I love the antique-y imperfections on the paper. The particle board made a really cool crinkly texture too. If you aren’t a fan of the texture though, you can use smooth plywood instead.

Is it sad that we’ve been in this house for nearly a year and half, and this is the first piece of wall decor she’s had in her room?

If it’s weird to you that we hung it behind her door, it’ll make sense once we get the second sign up there and you see the whole wall.
I can’t believe this cost less than $20 to make. And since we already had the particle board as scraps, it cost us more like $13.

I’m already trying to think of places where I can hang more of these ginormous signs. I’m ready to make about 5 more!

Maybe next time, I’ll have to make it a book page to appease my book worm side. My band nerd side is satisfied over here.
And Olivia couldn’t care less, but one day maybe she’ll appreciate the meaning behind it.
Have you guys put any great song lyrics around your houses lately? What book would you print a page from to hang on your wall? Do I dare ask for a band nerd roll call?
I’ll start- Lauren, alto saxophone and colorguard flags and sabres. I miss the people…the uniforms, not so much. 😉
Update: See the full bedroom makeover reveal here!

Follow:
Facebook | Pinterest | Instagram | Twitter | Google+ | Bloglovin | Hometalk


Comment & question– Lovely project and the question is– what’s the difference between a regular print and an engineer print? Thanks
An engineer print is only black and white and costs $3-4. An enlarged regular print of the same size can be made into color but regardless of whether you choose color/black&white it will cost $20-30 more than an engineer print. I hope that helps. 🙂
This is a song my son loves because it reminds him of his daughter. I never thought of having it printed on an engineer print and framing it for him. That would be such a special gift! Maybe even make two, one for him and one from my granddaughter! Thank you so much for the idea and inspiration. I am such a big fan of your blog!
Aw that would be so sweet! There really are endless possibilities- songs, poems, children’s book pages, quotes, scriptures, tons of possibilities. 🙂 Thanks so much for the love, Sandy!
Can you do color engineer prints? How about book covers in the play room? “Oh, the Places You’ll Go”, “Wind in the Willows” “Madeline” “Anne of Green Gables” – just off the top of my head. Ooooh that sounds like a good idea for a library as well. 🙂 Beautiful job with the room so far.
Engineer prints only come in black and white. 🙁 But it’s definitely a good solution for some cheap classroom/library decor. (wink wink) I like that idea for playroom decor! Maybe make it like a giant coloring book and then frame the finished products. That’d be cute.
Shel Silverstein illustrations. Though I’m not a fan of “Giving Tree”, he has others.
quick update. Staples now does color engineer prints! Yay! I’m working on your Irish Blessing sign now for my own home and just discovered that tidbit.
WHAT?! Shut the front door! Ohhhhh I’m already brainstorming colored engineer print ideas over here now. You might have started something.
I hate/love that song. Ever since I became a mother it always make me cry. 🙂 If I had a daughter I would totally steal the ballet barre idea, I LOVE it!! and kinda secretly want one for myself 😉
P.S. My husband lives in Irish wool hats exactly like the one your is wearing in the picture.
I know! That song and the Darius Rucker song, “It Won’t Be Like This For Long” gets me EVERY time. My husband practically lives in his Irish wool hats. His parents brought that one he’s wearing back from a trip to Ireland last year. I gotta admit, they’re pretty dapper. 🙂 Your hubby has good taste.
Don’t you just love engineer prints? I have one of my kids in my bedroom and would have them all over my house if I could 🙂 I LOVE how you framed yours and what a perfect song for a little girls room. I can’t wait to see the other sign your planing on making.
Yes! They’re awesome! I can’t believe this was my first time having one printed. I think I’m hooked. Haha Thanks for the love, Katie! I can’t wait to show more progress.