
DIY Oversized Vintage Map

- 1 piece of plywood (later cut to the approximate size of your map)
- Wood stain (I used Rustoleum Weathered Gray)
- Brown paint (optional)
- Several sheets of parchment paper
- A computer and laser printer
- Mod Podge
- Sponge brush and/or small paint brush
- Scissors
- A pen or pencil

Once you find the perfect map, zoom in (because zoomable will work best) and capture a snapshot of a portion of the map image. (PC users, you can do this using the Snipping Tool under your Start Menu.)
Continue capturing snapshots and saving each image as pieces of your map. The snapshots should be as close in size with each other as possible.
2. Piece together snapshots in Picmonkey like a puzzle.
Once you have saved all of the snapshots you need of your map, go to Picmonkey.com, hover over the tab that says Design, and click the size of the canvas you need. I chose 8×10.

Once you’ve opened a blank canvas in Picmonkey, click the Overlays tab on the far left toolbar (the one shaped like a butterfly).

In the Overlays toolbar, click Your Own at the top to open the folder where you saved your map snapshots.

Okay, I know. You’re probaby wondering why on earth would I tell you to take snapshot pieces of a map, just to piece them back together again. By taking snapshot pieces and putting them back together in Picmonkey, you are creating a higher resolution file. If you had simply saved the original map image as a whole, you would end up with a very grainy, pixelated map.
Taking apart the map and putting it back together creates a sharp, crisp image that can be blown up to large sizes. Technology is super annoying but amazing at the same time, isn’t it?

On your canvas, place and resize one snapshot at a time and piece them together like a puzzle as you continue to use the Overlay uploading tool. I pieced together one side and the top of the map to make sure my length and width were the right size for the 8×10 canvas.
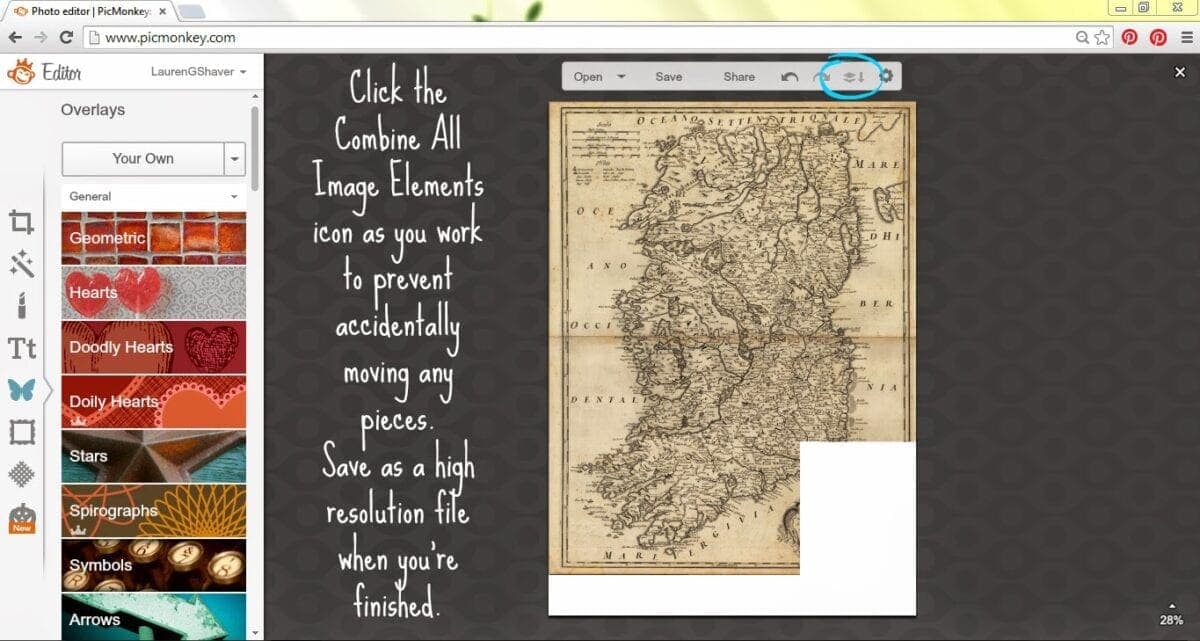
After you’ve adjusted for the length and width, you can click the Combine All Image Elements icon at the top of the page to prevent any pieces from moving around as you place more pieces.
Once your map is all pieced together, save in as large of a format as possible. Picmonkey calls it “Sean”, which is the highest resolution file option.
If the file is larger than 1 MB, resize it to be just under that size. My file ended up being 995 KB.
3. Upload into Block Posters and print.
I had a hard time figuring out this part without having the capability of Photoshop, but this website was a lifesaver. BlockPosters.com allows you to upload an image and print a poster by dissecting the image into equal parts and creating a PDF. It might sound complicated, but just hang with me for a sec.

On the home screen of the Block Posters website, upload the finished map you saved from Picmonkey. If the image is larger than 1 MB, you’ll need to resize it to just under that size.

Here’s where you need to adjust the poster size of your image and determine what paper size you’re using in your printer. I needed my map to be about 24″ wide and 36″ tall, so I chose portrait orientation at 3 letter sized pages wide.

Once your poster size is configured, download the image and print.


Concentrating on one page at a time, I marked each page’s placement.

I brushed on a layer of Mod Podge where I had marked the page and used the placement marking to position and smooth the page onto the plywood. I used an old credit card as sort of a squeegee to smooth out any bubbles as I went.
Then, I repeated the same position, mark, paste, place method on the rest of the map pages.


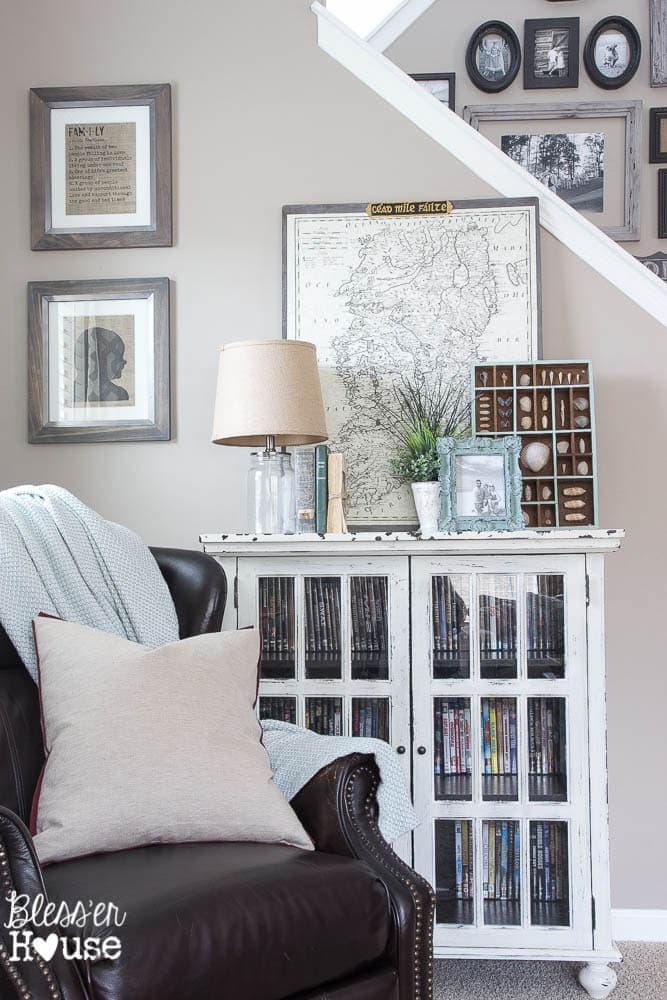
My in-laws visited Ireland recently, and brought back this Gaelic plate. It translates to “A Thousand Welcomes”. Robert got the idea to screw it into the top of the map, and it’s perfect!


You are so talented, Lauren! This looks like something straight out of the Pottery Barn Catalog for $200! I didn’t know anything about Block Posters but it looks like a fantastic website to use!
Super job on the map. It looks great in your entry.
Judith
Love it! I think you lost me on the Picmonkey though. Where did you get the lamp? It is great!
If you want to make one, I’ll help you with it. Maybe my instructions aren’t the most clear. I’ll have to tweak them. I stole the lamp from our office. I found it at Goodwill several months ago (where else? Haha)
Love it Lauren! Um I think we read each others minds this week…cause I posted my DIY map this week too : )
Miss visiting your page on a weekly basis…this full time job is taking over ahhh!!! so glad I got to see this though…turned out awesome!
Deb
Haha I just commented the same thing on your map post but for some reason it didn’t show up. Too funny though! And hey, life happens. You’ll find your balance soon, I’m sure. It’s gotta be tough. Thanks for the love girl!
So stinking cool! It looks amazing! Great project!!
Thanks, Heather!