
How to Dry Hydrangeas for Fall Decor
Buckle up for the EASIEST tutorial in the history of this blog.
Honestly, this probably doesn’t even constitute a post except that I’m over here like, “Look at my pretty dried hydrangeas that I get to decorate with for FREE this fall?!”

Related: Pressed Leaf Art Gallery Wall and Fall Entryway
How to Dry Hydrangeas the Easy Way
Anyway, I had no idea how easy it would be to snip hydrangeas out of my own backyard to use for years in the future.
Our hydrangeas absolutely exploded this year, and they were way too pretty to go to waste once the cold set in.
When to Cut Hydrangeas to Dry Them
Wait until late August – early October when blooms start to become less vibrant in color. The petals will start to feel “crunchy” and not as soft as summer blooms.
Too early to cut:

Ready to cut:

Related: Simple DIY Pressed Flower Art
How to Dry Hydrangeas in a Vase
- Cut your stems at 12-18 inches long.
- Remove all of the leaves from the stems.
- And then place the flowers in a vase with about 1 inch of water.
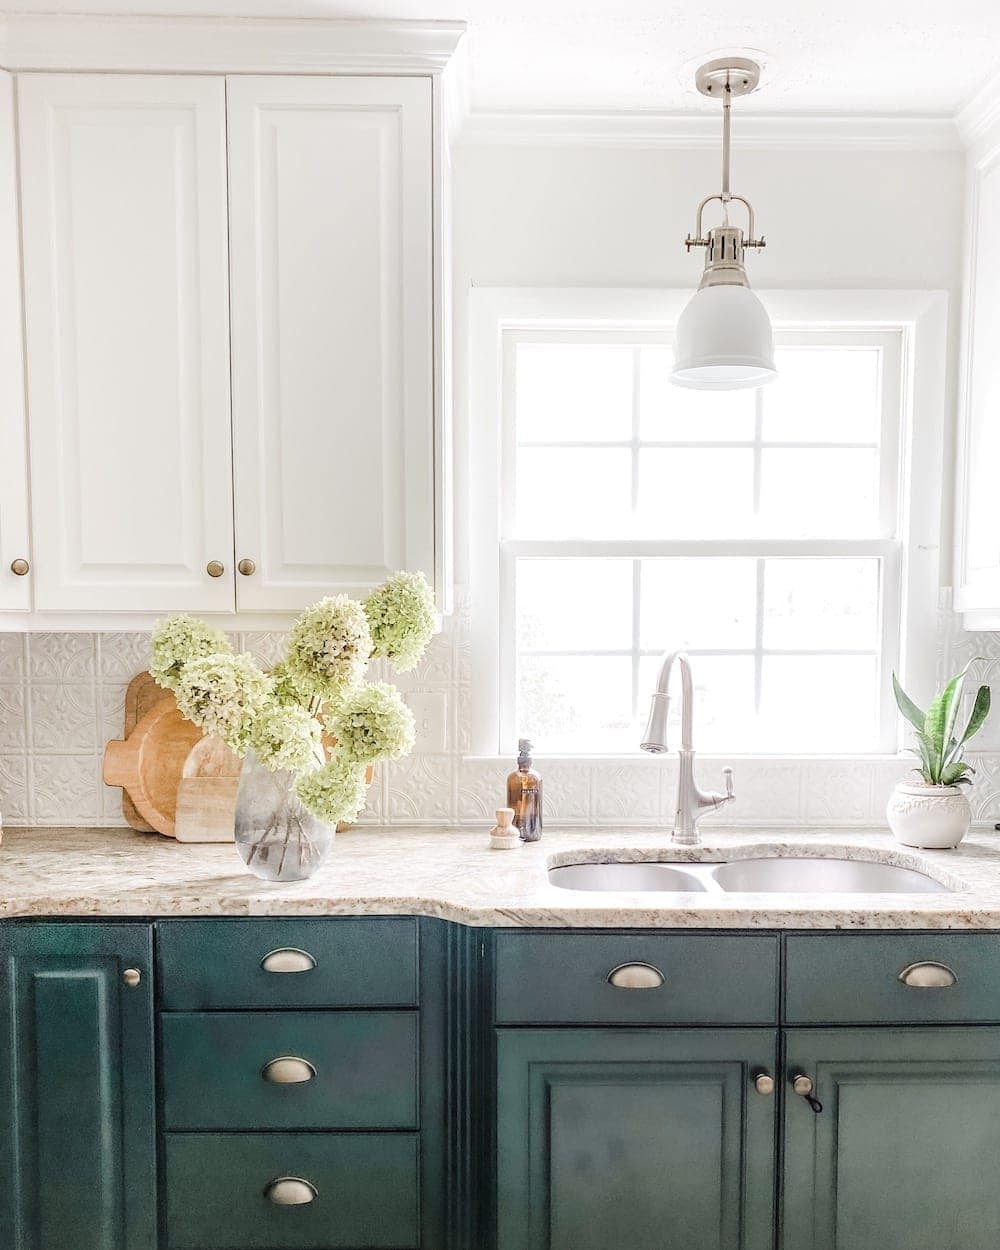
5. Put the vase in a cool spot indoors out of direct sunlight and wait about 1-2 weeks.
6. The water will evaporate and naturally dry your hydrangeas over time.
How to Dry Hydrangeas Using the Hanging Method
There are other methods like hanging hydrangea blooms upside down in a dark, cool spot (like a closet). Just use a clothespin to attach the end of the stem to a clothesline or coat hanger in a closet so that the bloom is hanging upside down.
Keeping them in a dark, dry place helps the hydrangea blooms retain their color as they dry.
I prefer the vase hanging method because it’s the easiest, hands-off approach. And I get to enjoy the blooms immediately as they dry.

Related: Preserved Flowers + How to Dry Leaves and Flowers for Decor
How to Preserve Dried Hydrangeas
After your hydrangeas have dried, lightly spray them with aerosol hairspray (good ol’ Aqua Net works great). Be sure to spray far enough away from the bloom so as not to disturb the petals. Ensure that the entire bloom is coated evenly, including the underside of the petals.
Arrange your dried hydrangeas in vases, bowls, baskets, make wreaths, whatever you’d like to add a little texture and muted color for natural (and FREE) fall decor.
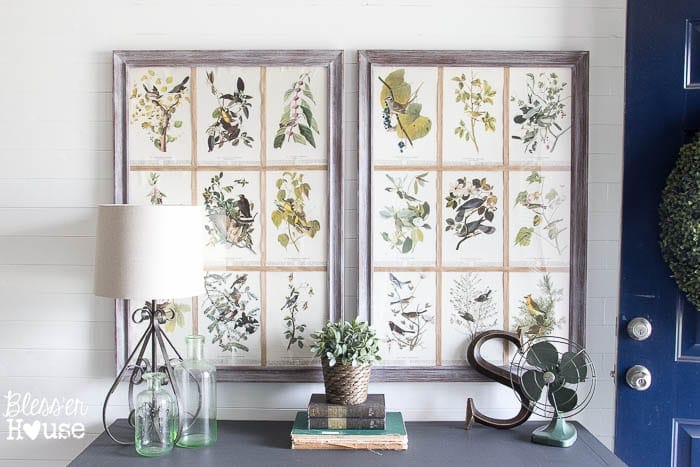
I pressed these leaves in books too (sort of like how I did with pressed flowers in summers’ past). I have big plans for all of the dried “yard garb” for fall decor, but I’ll share more about that later.

Related: DIY Fall Decor Ideas to Create Cozy Home Vibes
Can’t believe this so-not-outdoorsy girl is saying this but nature is so dang cool.
Have you ever dried hydrangeas or pressed leaves for decor? It’d be the perfect backyard scavenger hunt and biology lesson as a home craft project with kiddos.
More Floral Decorating Ideas
How to Make a Simple Fall Floral Arrangement Step By Step

Where to Find the Best Fake Flowers That Look Real


Been doing this for years…. I find a vase that I will use or give someone flowers. Cut Hydrangeas to length for a vase usually 6-8 depends on their flower size. Cut and place in vase and let naturally dry….NO WATER just flowers arranged in a vase. Let dry naturally. It’s a no brainer!
Such a great lasting gift of flowers and vase.
I love hydrangeas and yours are beautiful! Do you spray them with anything to preserve them from year to year?
I was wondering that, too. I heard of using hair spray on them to preserve, but wasn’t sure. Would love to hear if anyone has a preservative spray to use.
I spray mine with washing up liquid & water.
Irene..
Hi Lauren,
I just love this idea of pressed leaves. My question is, what did you use as the background in these frames? I like the look but cannot tell what it is.
Thank you so much for all your inspiration!
F. Fontana
Hi, Faye! Pressed leaves are such a great way to capture fall and use it in your decorating. I used textured paper for the background of the flowers. You can find it at Michael’s. It is called Martha Stuart wedding cake textured cardstock. There is a link in this post https://www.blesserhouse.com/diy-pressed-flower-art/