
How to Make a DIY Christmas Tree Stand Using a Planter Pot
(Works with baskets, barrels, buckets, and more!)
Every year, I see Christmas trees in pretty planter pots on Instagram, and I make a mental note to try it but never get around to it. So I finally decided this was the year. I turned our tree into a “potted Christmas tree” using a planter we already owned and the difference is chef’s kiss.
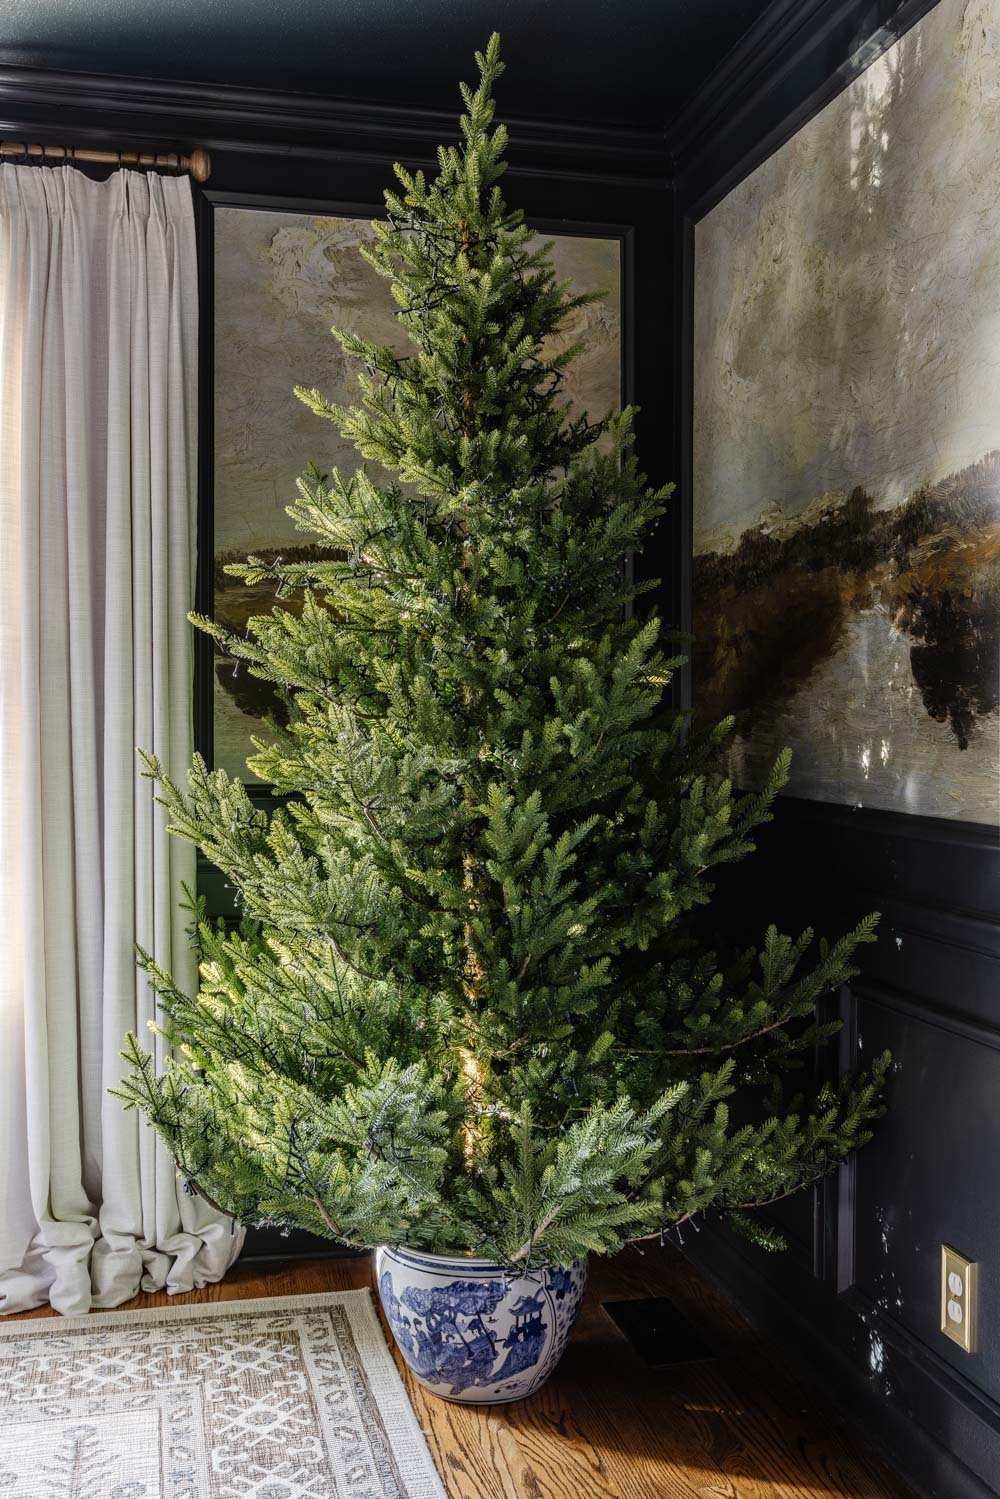
The best part is this method works with ANY decorative container: a planter, a basket, a ceramic urn, a vintage barrel, a wooden trunk, an antique crock, a galvanized bucket, even a tire or a bass drum… whatever fits your style, the quirkier the better.
I shared this DIY tree stand tutorial as an Instagram reel, so if you need a video walk-through, click over there, but I wanted to break down all the steps here so you can easily follow along to create it yourself.
Let’s make your Christmas tree look custom and designer-worthy without spending a fortune. Because best of all… the supplies only cost about $20! (Minus the planter I swiped to repurpose from my front porch.)
As an Amazon Associate, I earn from qualifying purchases. Full disclosure
Supplies You’ll Need
- Artificial Christmas tree (remove the original stand – I used this unlit Christmas tree with these incandescent style micro lights)
- Decorative planter, basket, bucket, or barrel (I used this 18″ blue and white planter)
- 1-gallon plastic bucket (this becomes the weighted base)
- PVC pipe sized to match your tree’s center pole (our pipe was 1.25″ in diameter)
- Quick-set concrete
- Painter’s tape or duct tape (to seal the bottom of the PVC)
- Drop cloth or cardboard
- Small level
- 5-gallon bucket and shovel for mixing
- Hand saw or circular saw
- Some wooden boards or concrete blocks for support as the concrete dries
- Optional: moss, fabric, or filler to hide the bucket rim
(If your Christmas tree is larger than 7.5′, you might need to use a 3-gallon or 5-gallon bucket to anchor it with more weight.)

Step 1: Choose Your Container
Pick a decorative vessel that fits your decorating style.
A few great ideas:
- Large ceramic planters
- Vintage wood barrels
- Galvanized metal buckets
- Woven baskets
- Wooden trunk
Tip: Your container should be wide enough to comfortably fit a 1-gallon bucket inside with a little wiggle room. Make sure whatever vessel you choose has a flat bottom.
Step 2: Prep the Base
This step is what makes the tree super sturdy, even sturdier than many store-bought stands.
- Place the 1-gallon bucket inside your decorative planter.
- Measure your tree’s trunk/pole so you know what diameter PVC pipe you need.
- Cut the PVC pipe so it will sit inside the bucket while sticking up high enough to support most of the tree pole.
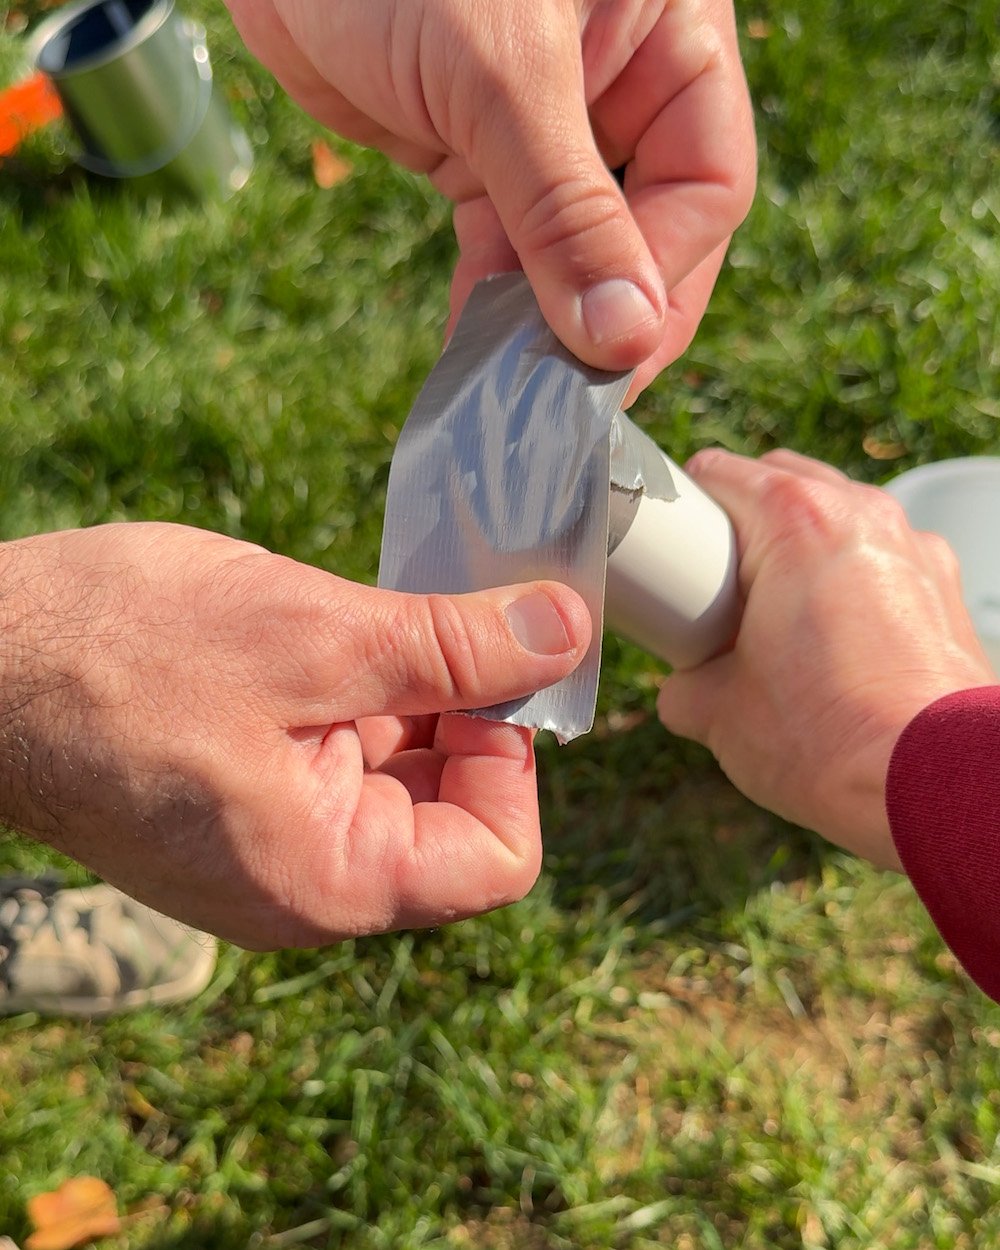
- Seal the bottom of the PVC with painter’s tape so concrete doesn’t fill the inside.
This PVC “sleeve” becomes your new tree stand, so it’s important to do this step to check that it will fit first.
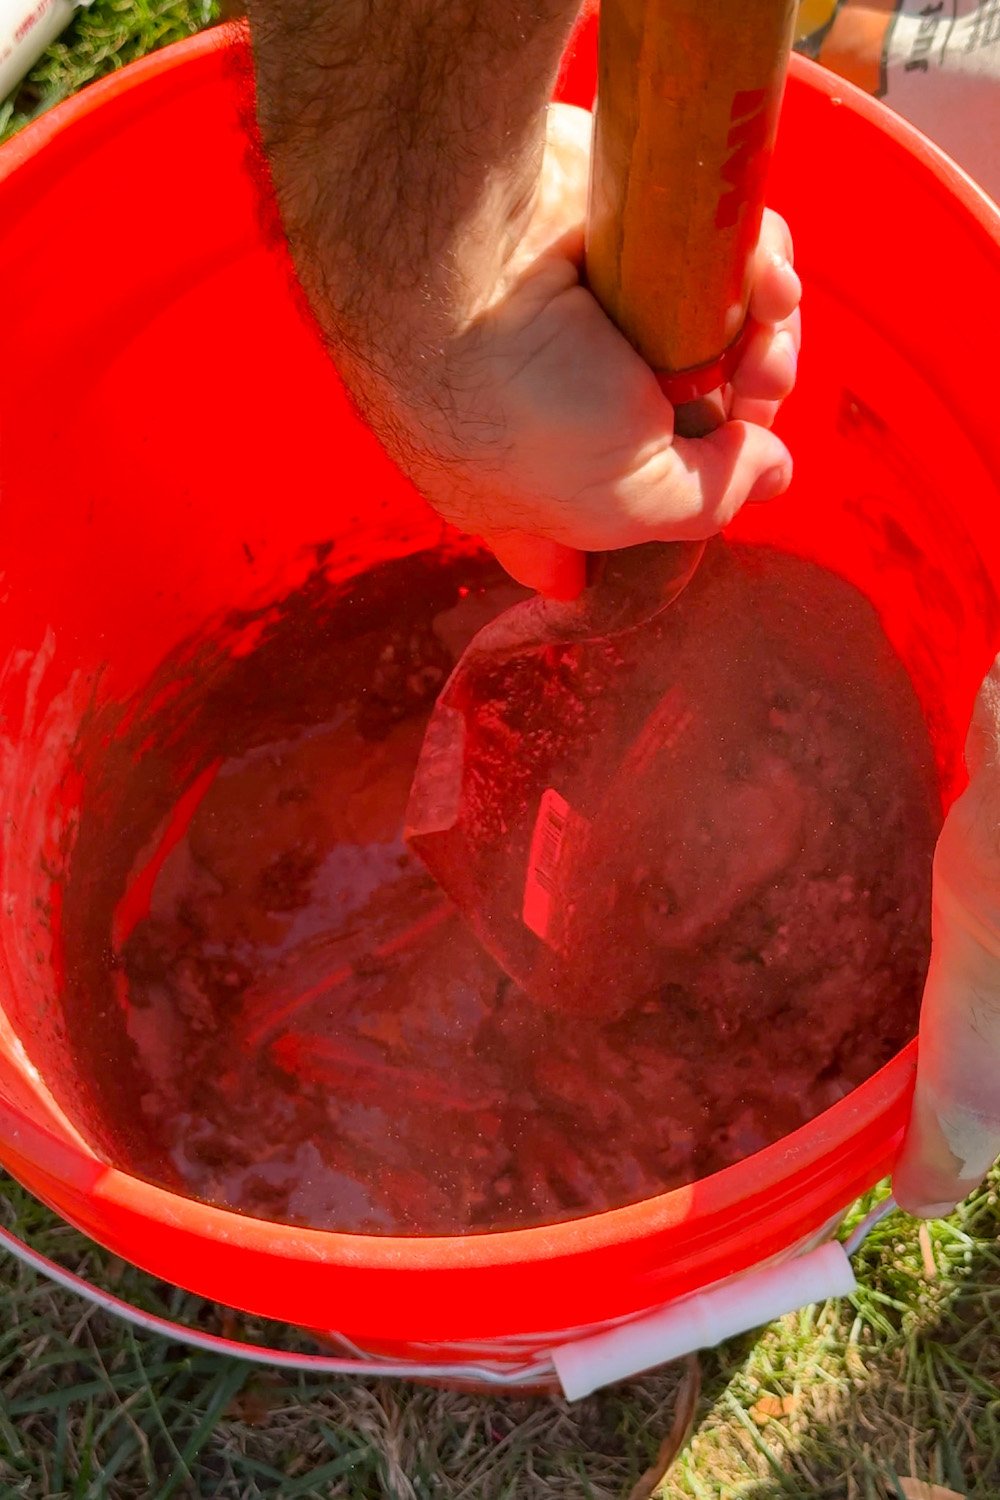
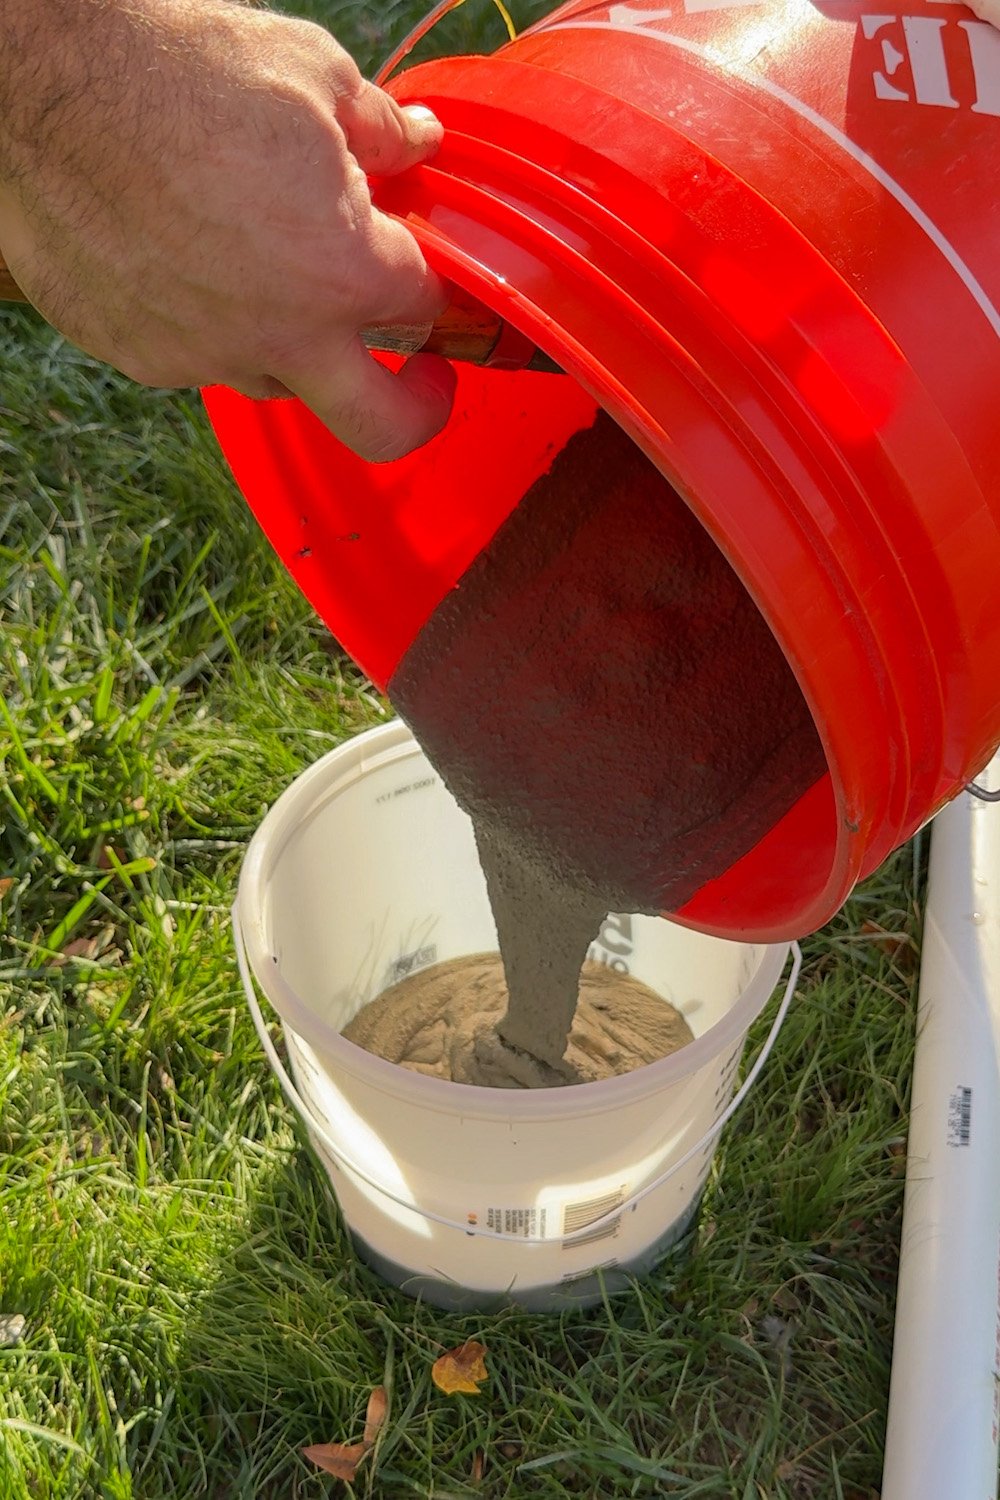
Step 3: Mix the Concrete
- Lay down a drop cloth to protect your floors.
- Mix quick-set concrete according to the bag instructions.
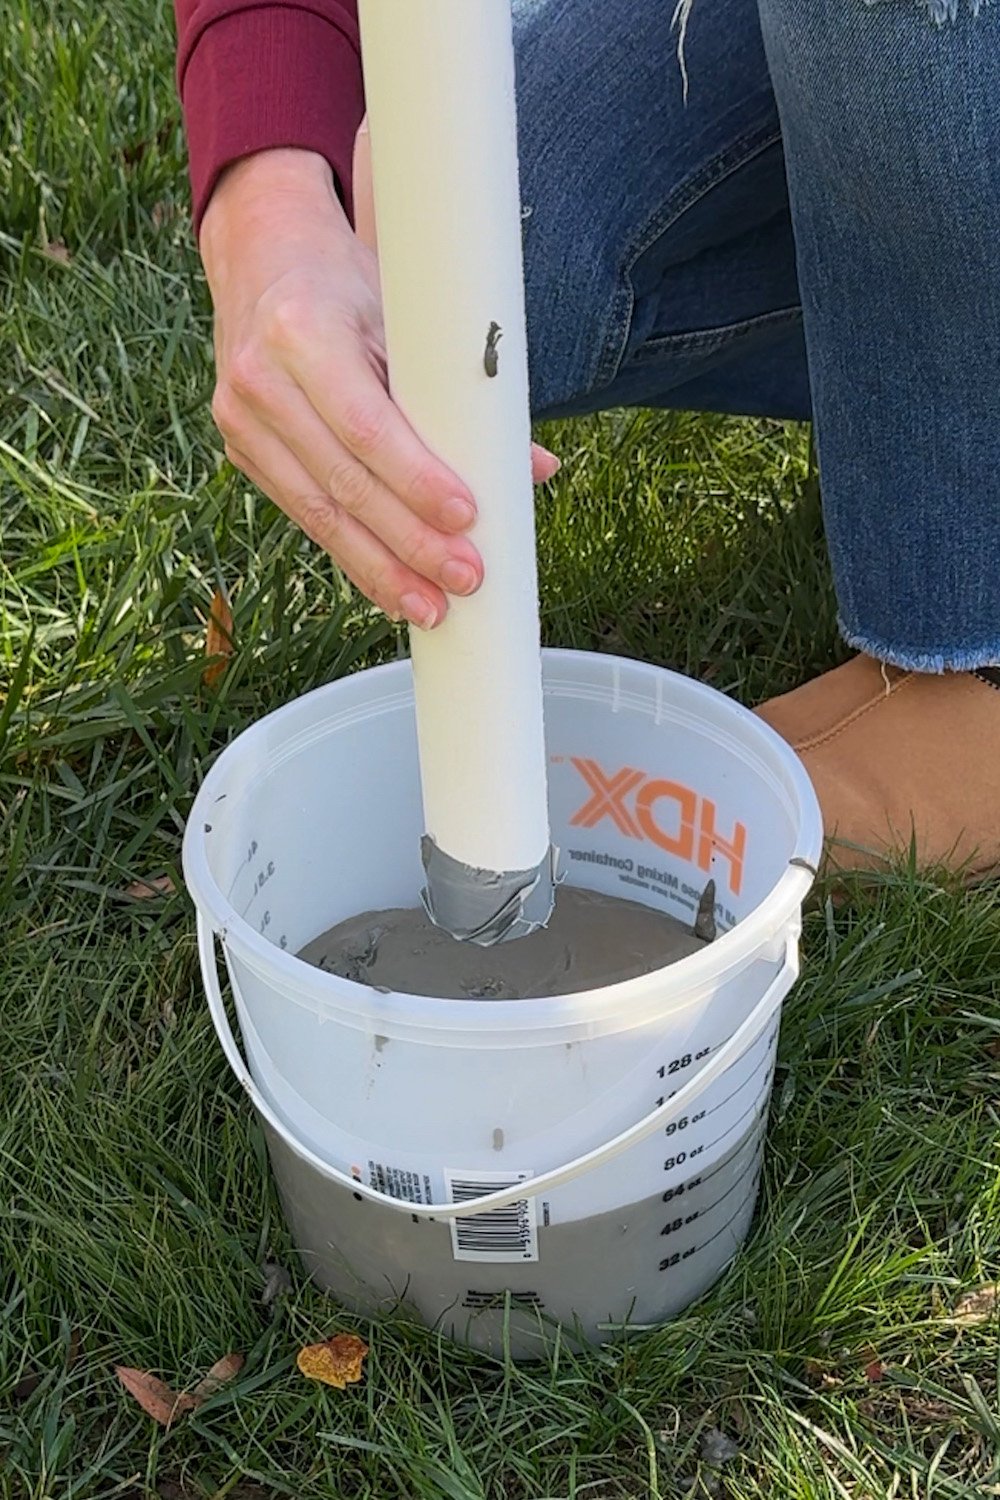
- Pour the concrete into the bucket until it’s about ¾ full.
- Insert the PVC pipe into the center of the wet concrete.
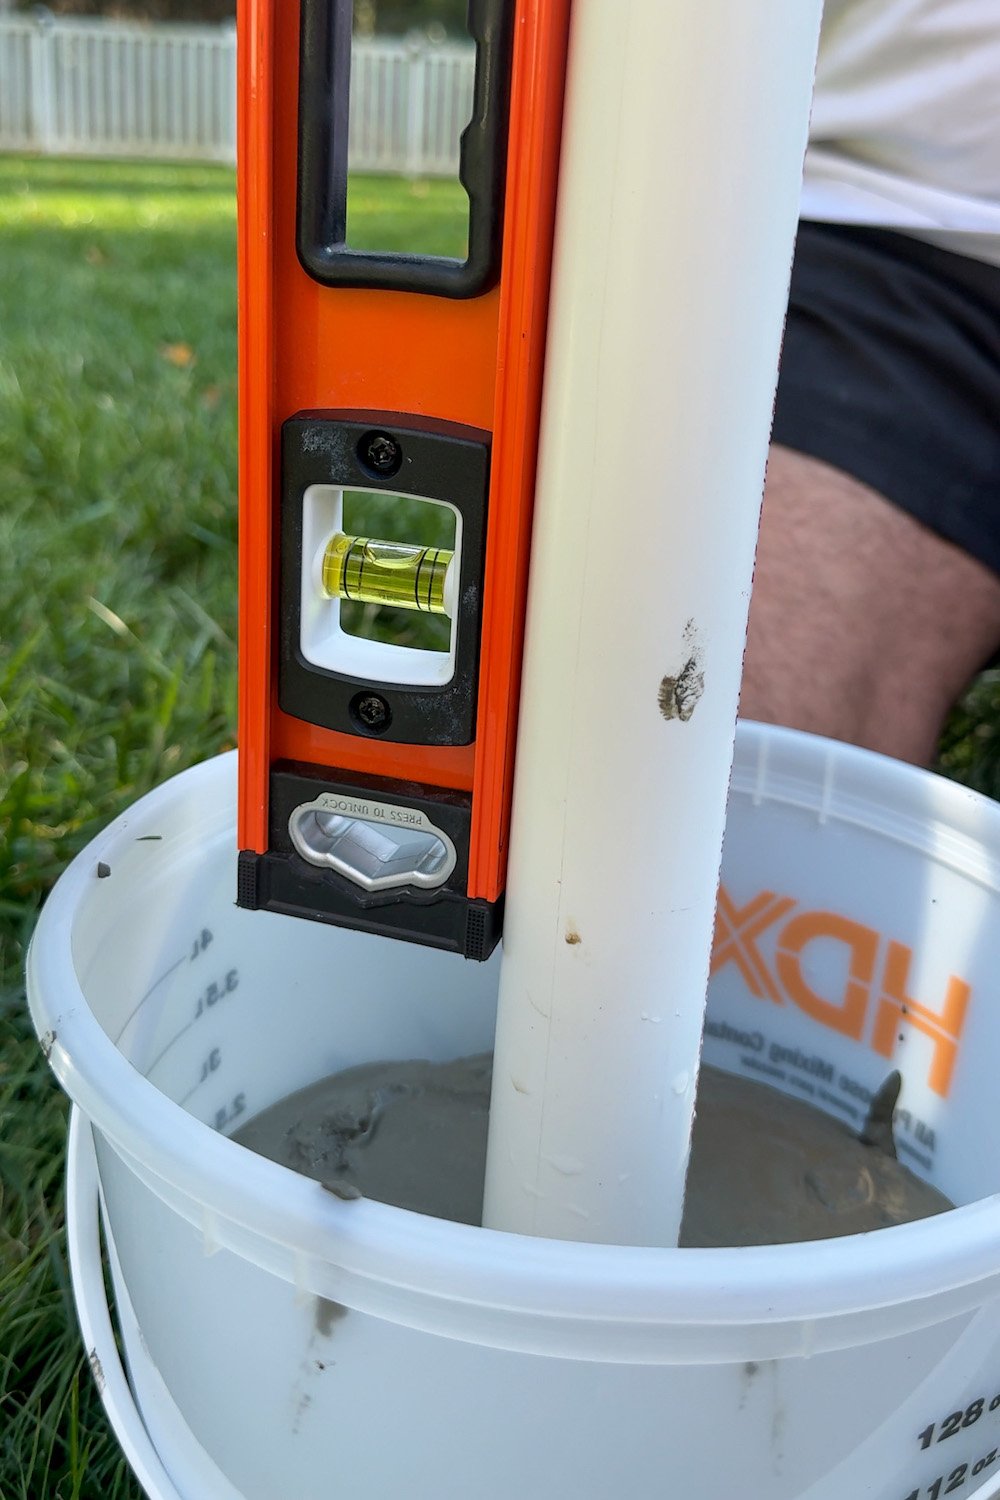
- Use a level to make sure it’s perfectly straight all around (plumb).
- Use wooden boards or concrete blocks placed across the top of the bucket to keep the pipe in place as the concrete dries.
- Let the concrete fully cure, overnight is ideal.
Once cured, you’ll have a heavy, solid base that your tree can slip right into.
Step 4: Insert the Tree into the PVC Pipe
When the concrete is fully set:
- Slide the bottom pole of your tree into the pipe.
- If it’s too loose: wrap a little electrical tape around the pole until it fits snugly.
- If it’s too tight: sand the inside of the PVC or remove tape if your pole has pre-installed grip tape.
- Give the tree a little shake. It should feel solid and secure.
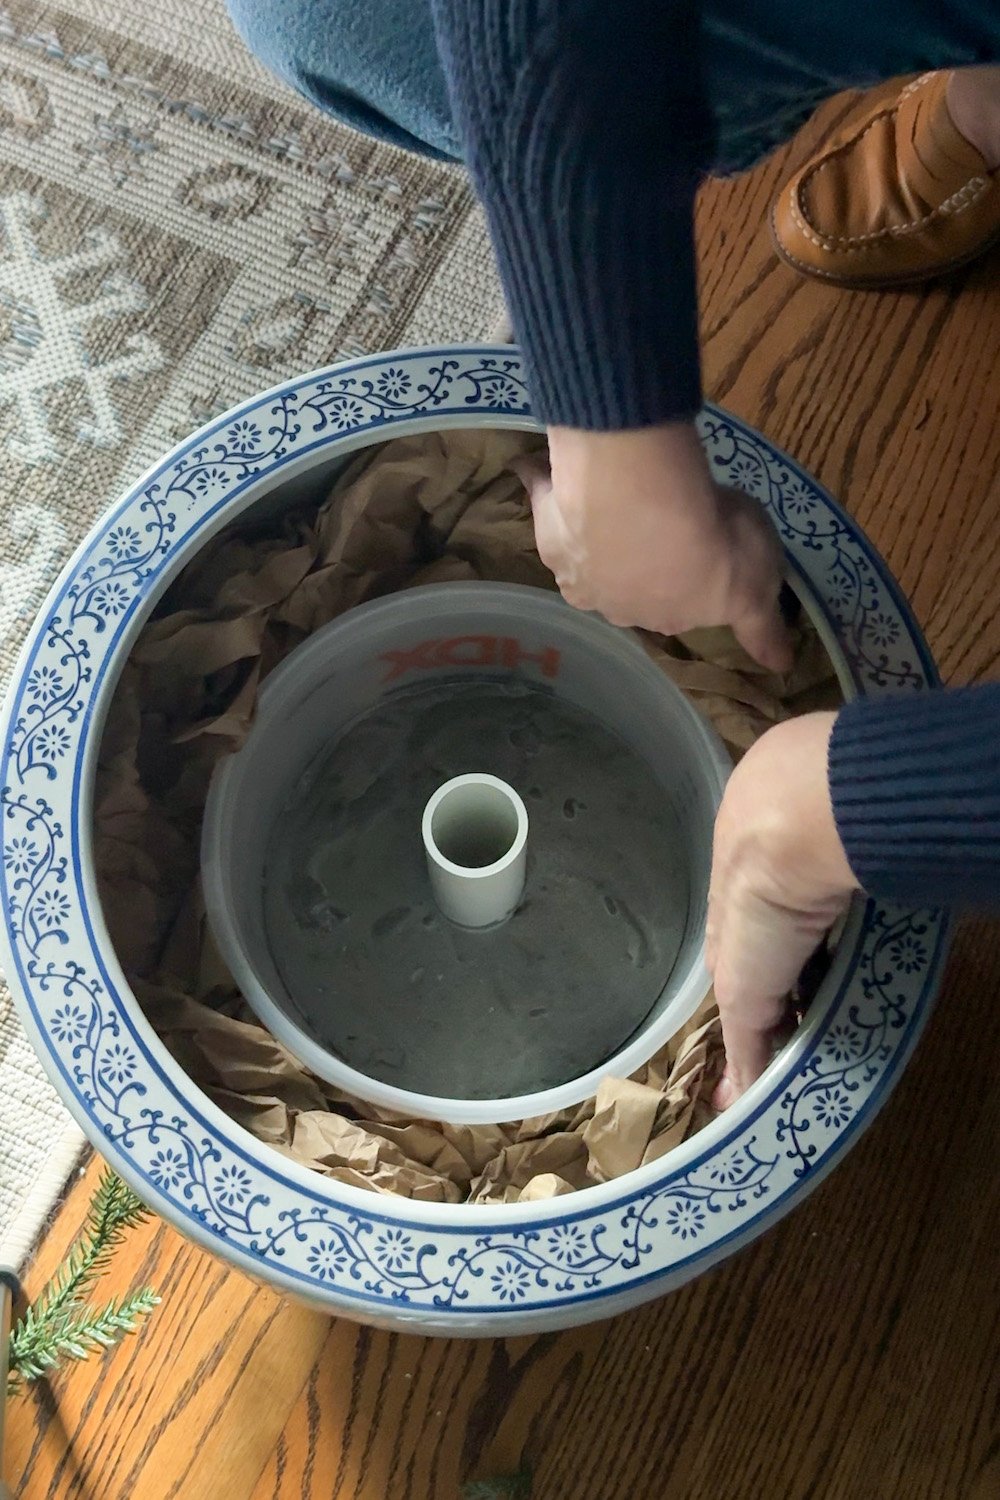
- If you still need some added security, stuff packing paper tightly around the bucket so it fits snuggly inside of the planter.
Now assemble the rest of your tree, fluff, and shape as usual.
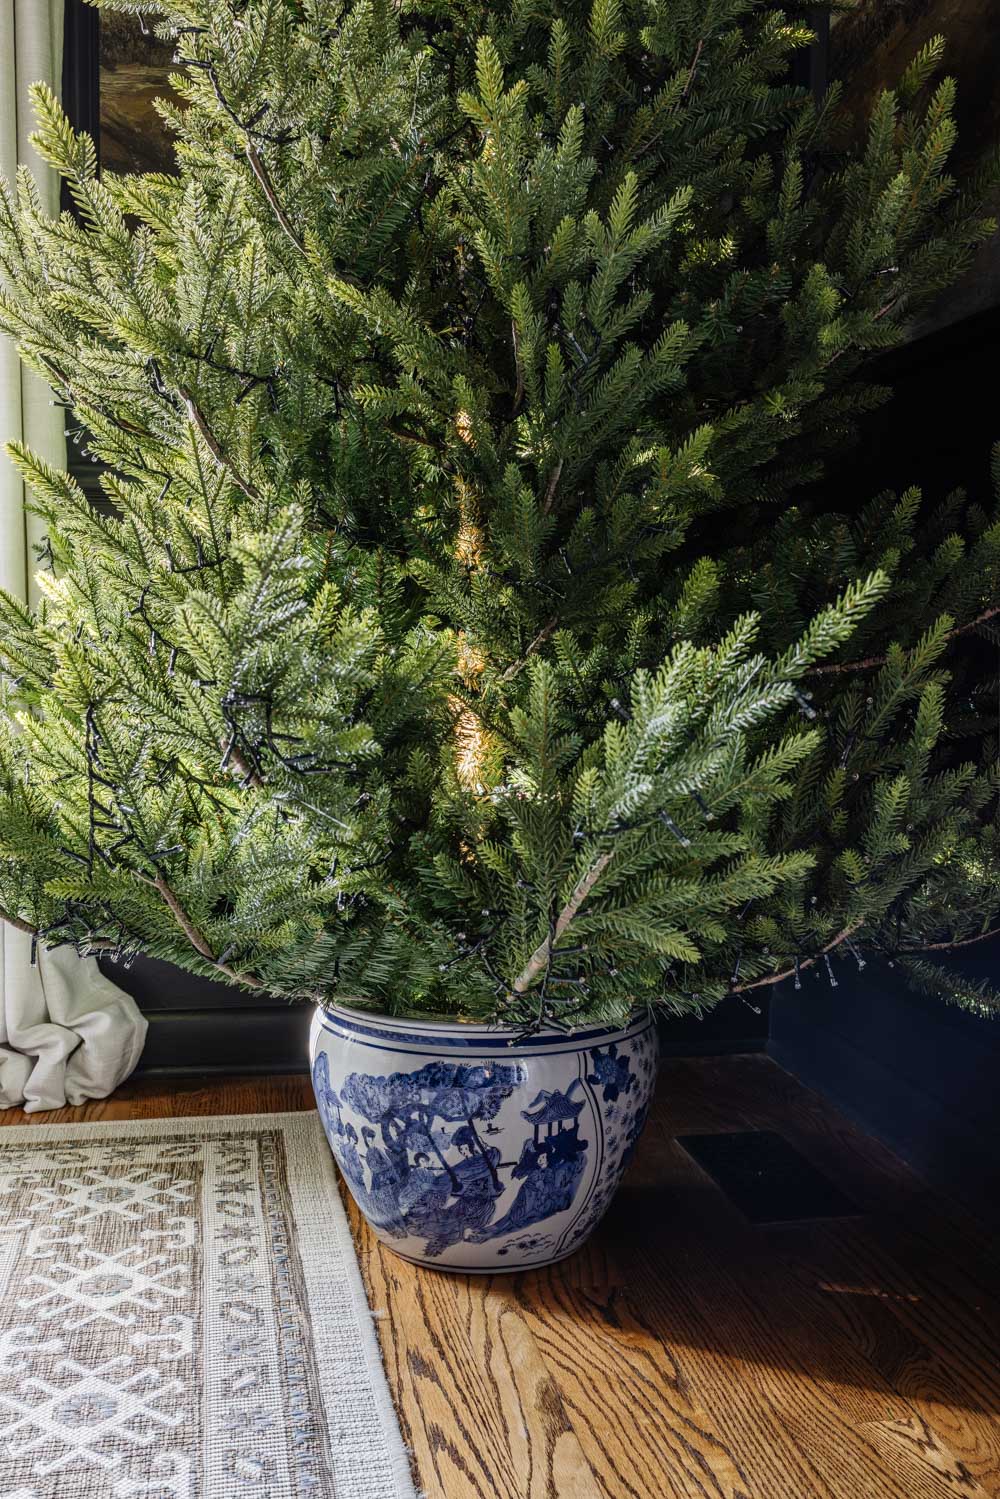
Step 5: Hide the Bucket & Style the Base
Depending on how deep your planter is, you might not even see the bucket, but if you can see the top edge, it’s easy to disguise.
Try adding:
- Spanish moss
- Wood shavings
- Burlap
- A small blanket or scrap fabric
- Fake snow
- Crinkle paper filler
This adds that cozy, layered look and makes the whole thing feel intentional rather than “DIY.”
Why This Trick Works So Well
- It looks designer. The planter becomes part of your décor rather than an eyesore.
- It’s extremely sturdy. The concrete base is HEAVY, so it’s perfect if you have kids, pets, or a tall tree.
- It works in any room. Slim trees, tabletop trees, full trees… the method is totally adjustable.
- You can reuse it every year. Swap the planter for a different look without rebuilding the base.

Frequently Asked Questions
What size planter should I use?
A good rule: pick a planter that’s roughly ⅓ the width of your tree’s bottom branch spread. The diameter of my tree’s bottom branches is 58″, so I used an 18″ wide planter as the base.
Can I use a lightweight basket?
Yes, the weight comes from the concrete in the bucket, not the basket itself.
Can I use this for real trees?
Only if the container is waterproof and you’re using a proper water reservoir. The concrete method is best for artificial trees.
What if my PVC isn’t a perfect fit?
Too loose → wrap the pole in tape.
Too tight → sand the inside of the pipe.
Easy fix.

Tree Decorating Tip
I love using this method for slimmer trees especially; they sometimes look strange in oversized tree collars, but they look amazing “potted” in a planter. It gives that Nancy-Meyers-meets-cottage-classic vibe without buying a $200 decorative base. And you can use whatever container you already have!
Plus, it frees up floor space so you have more room for presents underneath versus a tree collar.
If you’ve ever wanted a Christmas tree that looks a little more custom and a little less “fresh outta the store box,” this DIY planter stand is such an easy upgrade. It’s budget-friendly, renter-friendly, and works for practically any style whether that’s farmhouse, modern, or traditional Christmas decor.
If you try it, tag me! I LOVE seeing your creative spins on these projects!
More Christmas Tree Decorating Resources
- The Most Realistic Christmas Trees for All Budgets
- How to Make Antique Style DIY Christmas Tree Candles
- How to Put Ribbon on a Christmas Tree 3 Ways


Lauren you’ve done it again! Brilliant idea and tutorial!