How to Put Christmas Tree Ribbon Decorations on Trees
Step by step tutorials of 3 different ways to put Christmas tree ribbon decorations on a tree like a pro for feminine, waterfall, and vintage holiday decor styles.
Every year, I remember AFTER decorating our trees that I should have documented how I put on Christmas tree ribbon.
But this year, I made a point to share the full step-by-step with 3 different ways for putting ribbon on a Christmas tree since I get questions about it every single time.

It’s taken me a while to figure out the ribbon process (why is something so seemingly simple actually way harder than it looks). Honestly, I don’t know if there’s really a way to “perfect” it since I think the most beautiful tree ribbon is the perfectly imperfect applications.
But if it’s part of tree decorating that has always baffled you, here’s the simplified tutorial that you can use on your Christmas tree for your own particular decorating style this holiday season.
Psst… See all of my recommended realistic artificial Christmas trees here. You can find our dining room Christmas tree in this post that I LOVE here.
3 Ways for Putting on Christmas Tree Ribbon Decorations

Waterfall Ribbon Christmas Tree
If you prefer the clean, polished, slightly modern look with that cascading ribbon on Christmas trees effect, then the waterfall ribbon style for you.
This process works best using new, smooth and pristine wired type of ribbon. I prefer 2 1/2″ width, but you could use anywhere from 2″ to 3″ wide for this ribbon method to work best.
(I used this 2 1/2″ wide wired antique blue velvet ribbon, but it’s sold out at the moment.)
Suggested Ribbon Types

Step 1 – Cut Ribbon to 2.5′ Lengths
You don’t actually need to pull out the measuring tape and get this step completely precise, but cut your wired ribbon to lengths approximately 2 1/2 feet in length.
Try to keep the ribbon as smooth as possible without wrinkling or crumpling the wired edges.

Step 2 – Hook the End of Ribbon on a Branch
This step (and Step 3) are reasons why wired ribbon is much easier to work with on a Christmas tree than non-wired. You can bend it and shape it into any direction you need for the beautiful cascading billowy effect.
Hook one end of the tree ribbon onto a branch. I usually start on a branch near the top of the tree.
This hooked end will keep it in place as I shape the ribbon next.

Step 3 – Pinch the Middle of the Ribbon and Tuck
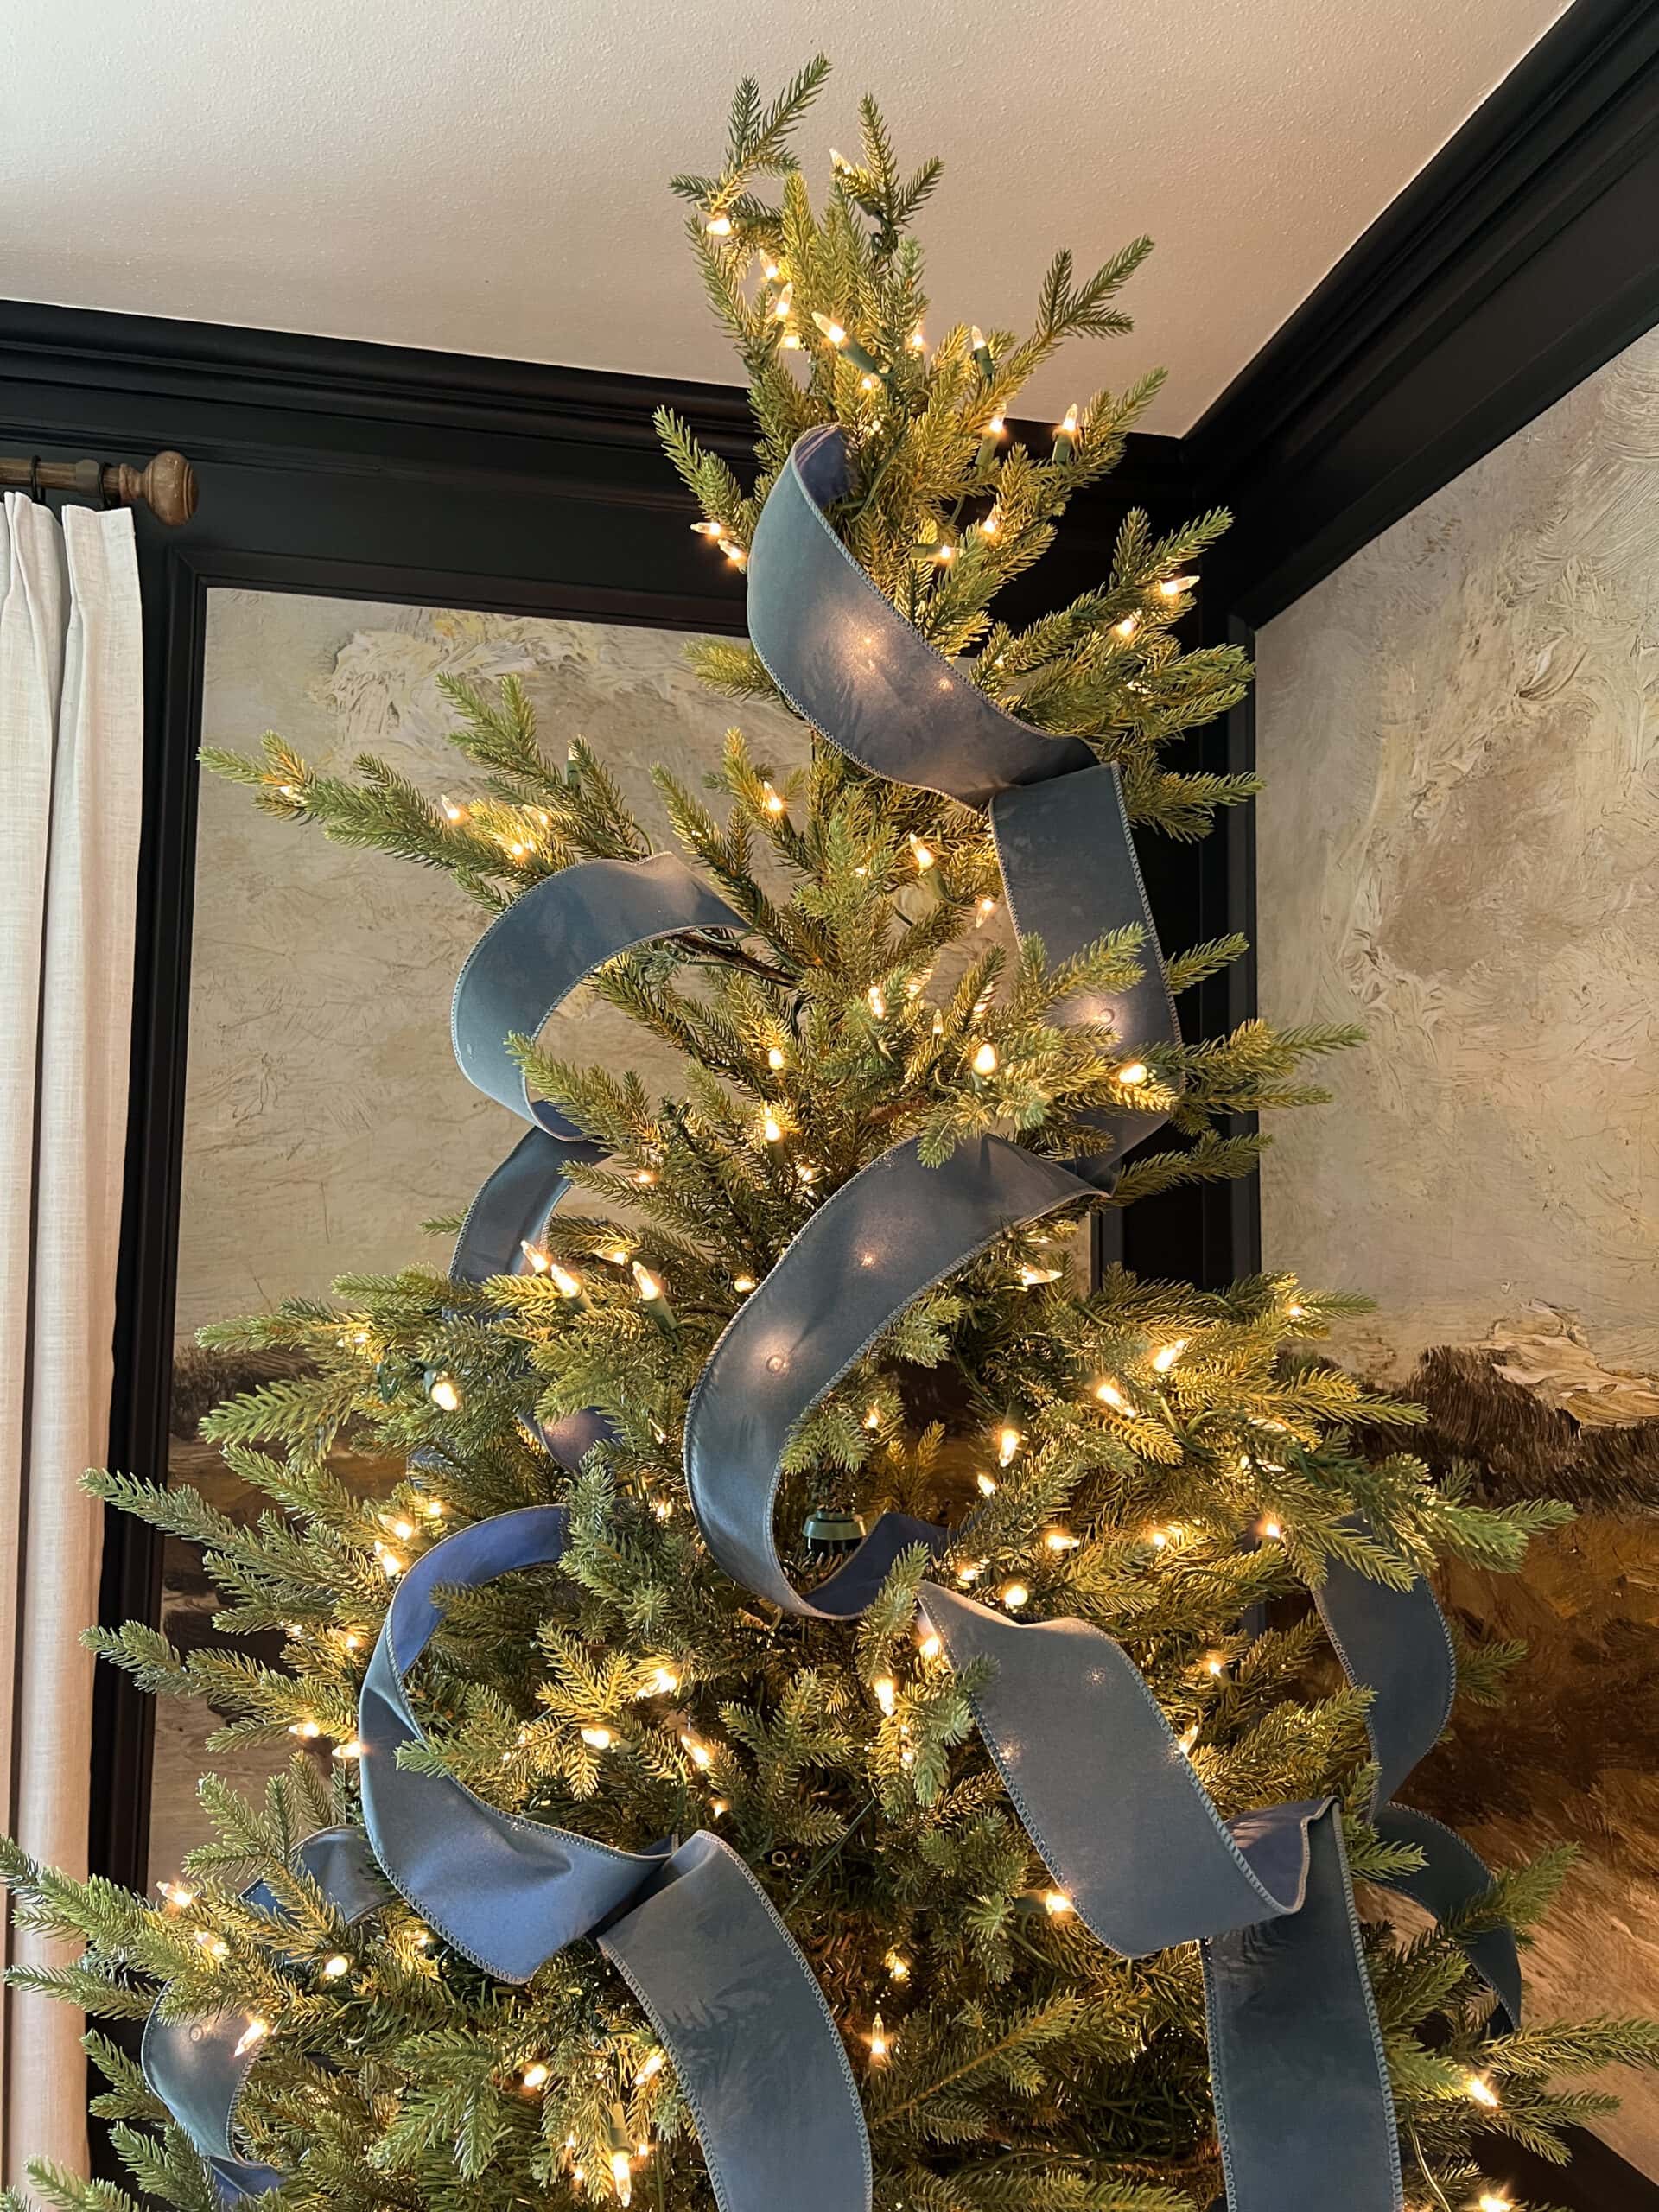
Weave the ribbon downward on the tree in a zig-zag pattern.
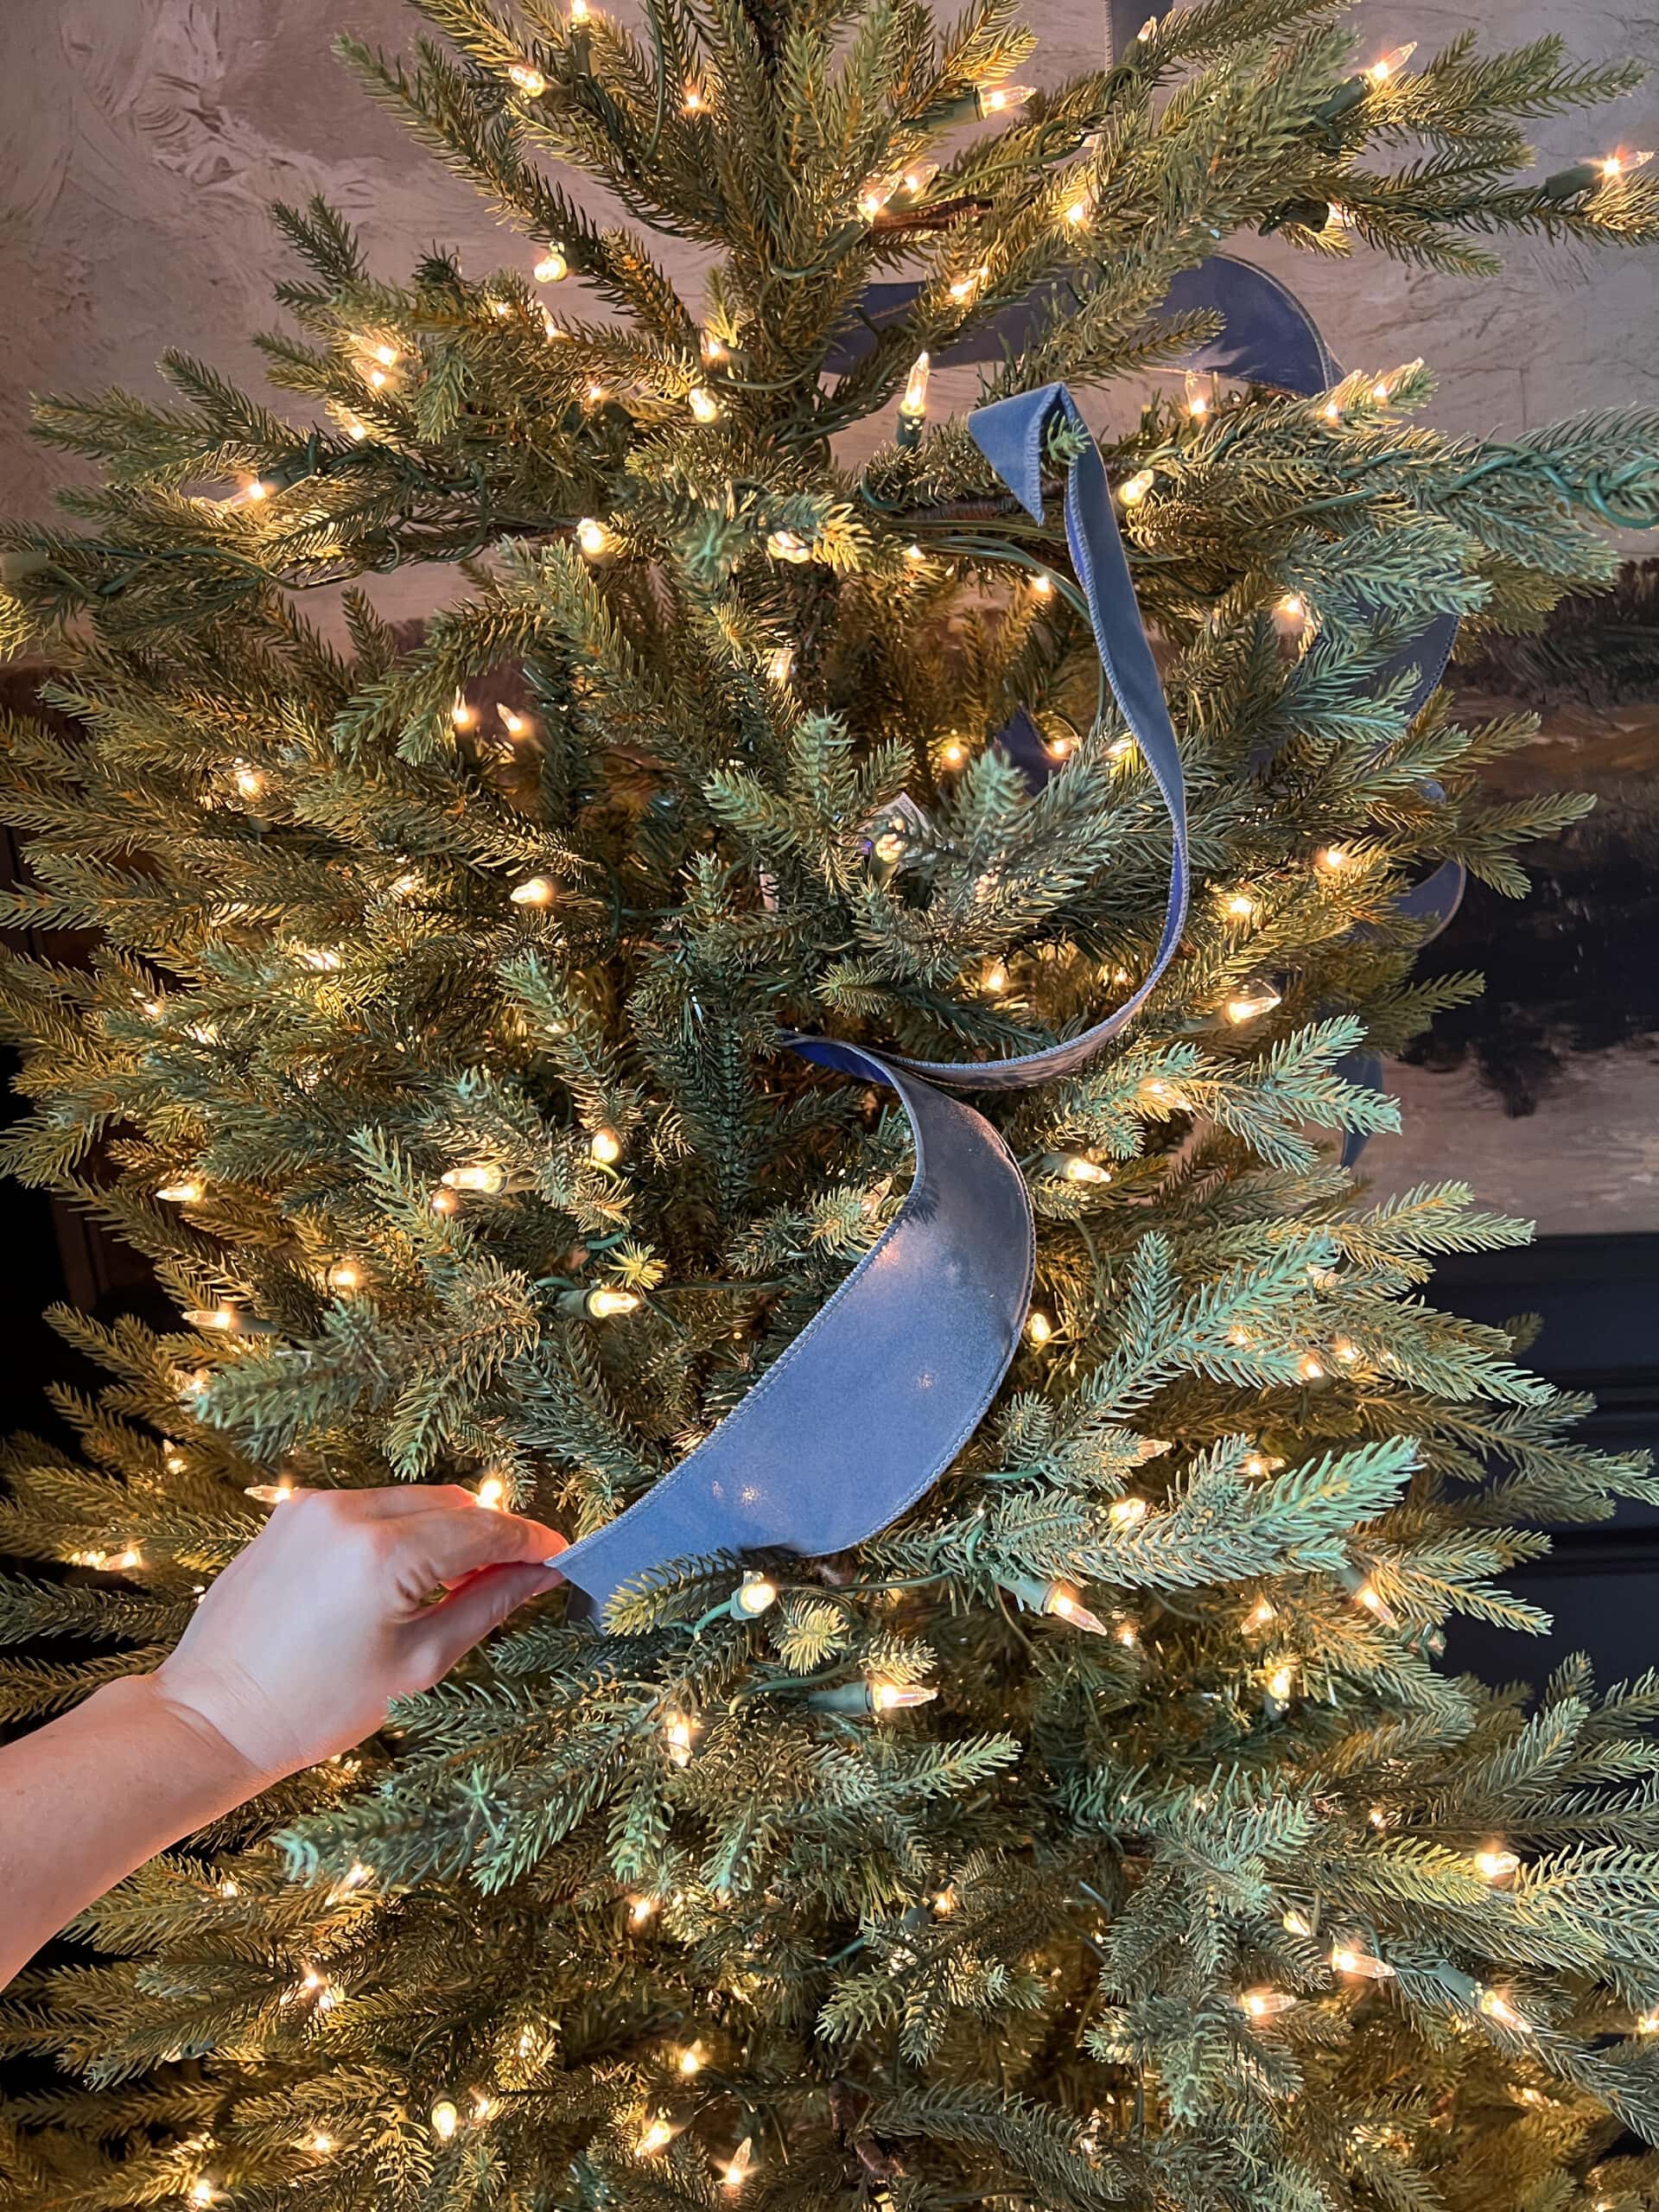
Halfway down the ribbon, bend the ribbon and pinch it (pictured below).
Tuck that pinched section between a couple of branches, leaving enough slack in the excess ribbon above to billow it out away from the upper branches.

Step 4 – Tuck the End of the Ribbon
Similarly to Step 3, tuck the very end of the 2 1/2′ ribbon length between two branches.

Step 5 – Repeat Until Fully Covered
Hook the next 2 1/2″ length of ribbon just below where you ended the previous ribbon piece in Step 4.

Step 6 – Work in a Zig-Zag Pattern
Repeat Steps 2-5 weaving the ribbon down the tree in a zig-zag pattern and repeating throughout the tree until it’s covered to your satisfaction for that waterfall ribbon Christmas tree look.
Adjust the spacing of the ribbon pieces as desired, and then your tree is ready to decorate with ornaments, picks, and other garlands.
When decorating a tree with ribbon in this style, I tend to skip any garland since it usually gets in the way and becomes too busy with the ribbon, but it’s totally up to you.
Adding ribbon first, prevents me from covering up any ornaments and helps fill gaps in the tree.


Vintage Crumpled Tree Ribbon
I love the look of worn vintage ribbon on a tree because it’s all about the imperfection. Plus, you can use old ribbon remnants and not have to worry that the ribbon looks messy.
This style is meant to be a little messy with an organic flow. I like to use more organic, vintage inspired fabric types for this style: cotton, burlap, velvet, jacquard, chiffon, etc.
The process is very similar to the waterfall ribbon Christmas tree style, but before repeating the above steps, do this first…
Suggested Ribbon Types

Would you like to save this?
Step 1 – Crumple Ribbon
Take 2 1/2′ wired ribbon lengths and ball them up in your hand. Then, stretch them back out.
The ribbon will look worn and a little more old fashioned that way.

Step 2 – Repeat the Modern Billowed Ribbon Method
From here, do the exact same steps as the modern billowed ribbon method above: hooking one end of a ribbon piece, pinching the middle and tucking it, then tuck in the end between two branches working in a zig-zag pattern down the tree.

Step 3 – Fill in With Ornaments
Add ornaments and picks once the ribbon is fully covering the tree to your taste.


Feminine Bows Tree Ribbon
If the above two Christmas tree ribbon methods are too complicated, tie bows on the ends of branches instead for a still vintage looking but more feminine style.
I love how sweet Christmas tree bows look.
(I used this 7/8″ velvet ribbon in Williamsburg Blue.)
Suggested Ribbon Types

Step 1 – Cut Non-Wired Inch Wide Ribbon Pieces
For this bow method, it’s best to use non-wired ribbon in whatever material you desire: velvet, silk, cotton, taffeta, etc.
Any width will work. 2-3″ wide ribbon will create large, bold, dramatic bows while 1″ wide and smaller will look more dainty and understated.
I like to cut my piece of ribbon at about 2 1/2′ for medium-sized bows (you can just eyeball it without being totally precise).
If you don’t want your Christmas tree bows to have tails, cut the ribbon pieces shorter around 1 1/2′ to 2′. If you want your bows to have long dramatic tails, cut ribbon lengths around 3 1/2′ or longer.

Step 2 – Tie Bows on Branches Equally Apart
Tie the ribbon lengths into bows on branches. Pay attention to your bow placement making sure they’re spaced evenly apart on branches. Add as many or as few as you would like.

I love how sweet they look! And they’re so simple to add. If you can tie a shoe, you can tie these tree ribbons.

Fully Decorated Christmas Tree
After I put on the ribbon (I decided on the crumpled vintage style for this one), Robert and Olivia had a blast taking over the ornament step adding in balls, candle lights, berry picks, golden leaf stems, dried oranges, and bells, finished with a sweet little angel topper.
I prefer turning our Christmas tree collar upside down to look more like a real basket, but this particular collar doesn’t work well using that method.

Did that help at all? Maybe you were already a Christmas tree ribbon pro though.
Are you putting up your tree soon or already have it up? I hope this at least helps you feel more prepared if you were stumped on ribbon before.
Here are more of our past Christmas trees to give you some tree decorating ideas too.
More Christmas Tree Ribbon Ideas
Bows Method

Waterfall Method

Vintage Crumpled Method


It really is the easiest way to change the look of Christmas decor color scheme every year.
We’ve done everything from the traditional red and green to blue, orange, copper, all neutrals, and mixed metallics mostly just by utilizing ribbon. Ribbon has super powers, I tell ya.
If you need Christmas decor styling ideas as you decorate your own house this season, you can see more holiday tips below.
More Christmas Decorating Tips
- How to Hang Wreaths on Windows for Christmas
- How to Change the Look of Your Christmas Decor Each Year Inexpensively
- DIY Christmas Decorations You Can Make Inexpensively
- Simple and Inexpensive Christmas Table Centerpiece
- Vintage Christmas Decor Favorites That Never Go Out of Style


