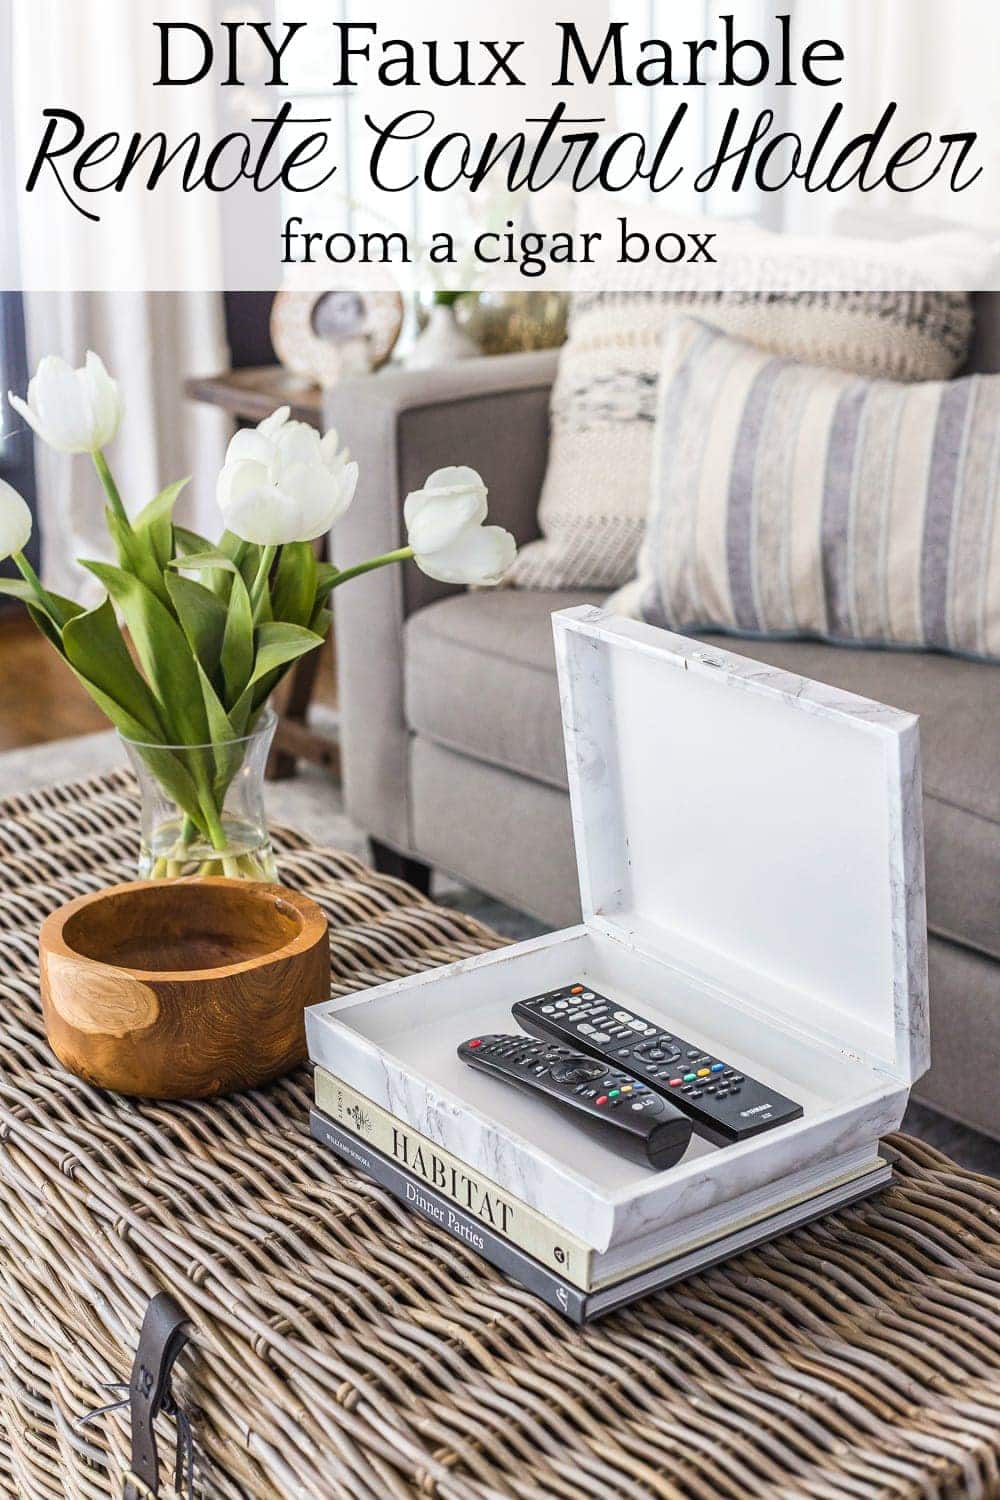
Faux Marble Remote Control Holder from a Cigar Box
Our family has been playing a fun little game lately. It’s called Hide the Remote from the Baby.
I swear you can give an infant a million and one colorful toys with all of the bells and whistles, but really, the best toys always end up being car keys, cardboard boxes, and, in our case, the remote control. Go figure.
But then I had an idea to make a handy spot to keep it out of sight and out of mind, while also making it pretty and easy for us to always find. (Hey, that rhymed!)

I always seem to stumble upon cigar boxes and jewelry boxes while out thrifting, so I knew it would be the perfect solution for a remote control holder on our coffee table.
Luckily, I still had some marble contact paper leftover from a coffee table makeover back in the day, so this one cost me all of about $4.
Related: 30 Best Home Decor Items to Buy at Thrift Stores

(Some affiliate links are provided below. Full disclosure here.)
Supplies
- Cigar box
- Marble contact paper (or whatever design contact paper you prefer – burl wood contact paper would be beautiful too)
- Pencil
- Ruler / straight edge
- Scissors
- X-acto knife
- White craft paint
- Medium craft paint brush
Related: 8 Reasons Why You Need a Pedestal Bowl in Your Home Decor Stash

Step 1 – Position Box on Paper
Roll your contact paper out first, decorative side down, and position the cigar box in the middle of the paper with enough excess paper on each side of the box to allow the height.
Step 2 – Mark Corners
Mark the corners of the box onto the paper with a pencil and trace the edges.

Step 3 – Trace Box
Draw a diagonal line at each corner. Then draw a vertical line at the corner and a horizontal line meeting up with the diagonal line (shown above).

Step 4 – Cut Flaps
Cut the lines with scissors or an X-acto knife to create a flap (shown above).
Step 5 – Repeat
Repeat cutting flaps on all corners.
Would you like to save this?

Step 6 – Peel Away Paper
Slowly peel the backing off of one side of the contact paper (about 1/3 of the way) and place the box onto the paper so it’s lined up correctly at each of the corners.
Step 7 – Place Paper on Box
Press the paper in place and peel the rest of the backing. Smooth out any air bubbles with a straight edge.
Step 8 – Wrap Box
Open the box, smooth the paper at the sides, and wrap the flaps at the corners to fully wrap the bottom of the box. Repeat the process for the top of the cigar box.
Step 9 – Trim Paper
Trim away any paper covering the latch and hinges with your X-acto knife.
Step 10 – Paint Wood
Paint the inside of the cigar box, latch, and hinges with white craft paint and you’re done!
Just wrap the top and bottom of the cigar box like separate box lids.

Isn’t it pretty?!
It’s not totally perfect but it definitely looks like real marble in person at a glance.
Related: Easy Coffee Table Decor Ideas and How to Style Them

How long do you think it’ll be before baby Regan discovers this box hides her favorite toy? I give it a day. Maybe less. I’m sure it’ll eventually end up higher out of reach than the coffee table by the end of the week. 😉
But it’s a handy little thing.
Related: How to Start Decorating a Living Room

If you want to save this post for later, you can pin it here:
More Thrifty Craft Ideas
- How to Make No Sew Cafe Curtains Using Kitchen Towels
- DIY Cordless Lamp Using a Vase
- DIY Candle Using a Thrifted Canister