
How to Add Reeding to Furniture | Shoe Storage Bench Makeover

How to add decorative fluting or reeding to furniture for extra texture on a plain surface + an entryway shoe storage bench makeover on a low budget.
Live by the motto “work what yo mama gave ya”… and “work with what your house gave ya”.
Something like that.
Our house didn’t give us a mud room, but it did give us an empty wall beside our back door. So it’s as close to an official entryway / mud room as we’re going to get for a quite a while, I guess.

Reeded Shoe Storage Bench Before & After
On the bright side, it gave us a fun furniture makeover opportunity! (You know you’re a DIYer when you see a challenge as an opportunity, right? That’s the good stuff.)
This entryway wall was severely lacking any sort of shoe storage, which we really needed because shoes end up all over our house from the second our kids get home from school.
So we found the perfect solution on Facebook Marketplace, added reeding for extra character, and now it reminds me of a bench version of this $2,600 console table!
If you have a plain dresser, console table, nightstand, or bench hanging around your house, this is such a fun DIY project to try.


Changing the feet, attaching reeded molding, and painting a taupe color did so much for this little storage bench! (I might eventually reupholster or paint the fabric on the cushion, but I’m still on the fence.)
Adding decorative reeding to furniture is a technique I’ve seen various versions of popping up everywhere all over DIY blogs using different materials, but this is the method that worked for us using supplies readily available in our area.
What is Reeding?
Reeding is a type of molding or ornamental detail with small, convex, semicylindrical shapes carved into the surface. Reeded molding is easily confused with fluting which has a similar look in a concave shape.
The tutorial in this post could also be used to create the look of fluted detailing on furniture by simply using a fluted molding instead of a reeded molding.
Reeded Storage Bench Makeover Tutorial
Supplies / Tools
- Miter saw
- Drill
- Drill bits
- Electric sander (with medium grit sanding pads)
- Fine tooth hand saw
- Speed square
- Construction adhesive
- Painters tape
- Shellac based primer (if your furniture has a red based wood stain)
- Acrylic urethane enamel paint (We used Sherwin Williams Door & Trim satin paint in Anew Gray.)
- Paint brush (I like using this triangular brush to get into the deep grooves and edges.)
- Reeded molding
- Pull knobs

How to Replace Furniture Legs
We slightly changed the shape of the bench first by swapping the mission style legs with pyramid shaped legs. We did a very similar technique to our dining room buffet a couple of years ago when we cut the bottom board off to add brushed gold furniture legs for a more elegant look.
Step 1 – Remove Screws
Some furniture pieces have legs attached with screws, so use the drill to remove those first.

Step 2 – Cut Off Legs
Use a hand saw to cut off the existing furniture legs. You could also use a circular saw, but our bench had such thick, chunky legs, we wanted to be very slow and precise with our cut.
A basic hand saw allowed us to do that so we wouldn’t make any mistakes since there were no do-overs on this bench.

Step 3 – Mark Placements for New Legs
Mark with a pencil where to place your new legs. We used a speed square as a guide to mark an X at the base so that we would know exactly where to screw them in.

There are so many different furniture leg options out there if you ever want to change the look of dressers, side tables, benches, accent chairs, or sofas quickly.
I’ve found new furniture legs for our projects on Etsy and Amazon.
These unfinished wood pyramid legs are sold out, but I’m hoping they restock.

Step 4 – Drill Holes for New Legs
Check the screws on your new legs to know the size drill bit you need for this step. Then, drill into the mark you made on Step 3 deep enough to screw in the new legs.
Apply a little construction adhesive around the screw for extra hold.

How to Add Reeded Molding to Plain Furniture
There are all kinds of different materials on the market that you could use to add decorative reeding to furniture.
I’ve seen a lot of furniture flippers use pole wrap to create a reeded style on plain dressers, cabinets, doors, tables, literally anything that could use some texture. But because of its recent explosion in popularity, pole wrap is getting harder to find and is becoming more expensive with demand.
As an alternative, we found this reeded molding while strolling the aisles of our local Lowe’s. We used 13 strips of molding on the bench at $7.98 each for a total of $109.96.

Step 1 – Measure Furniture Areas to Add Reeding
Measure the sections on your furniture piece where you plan to add reeding and decide how many molding strips you’ll need. Mark on the molding strips with a pencil where you’ll need to cut them to fit them onto the furniture sections.
We added reeding to the drawer fronts, side panels, and front panels of our bench, so we measured those accordingly.
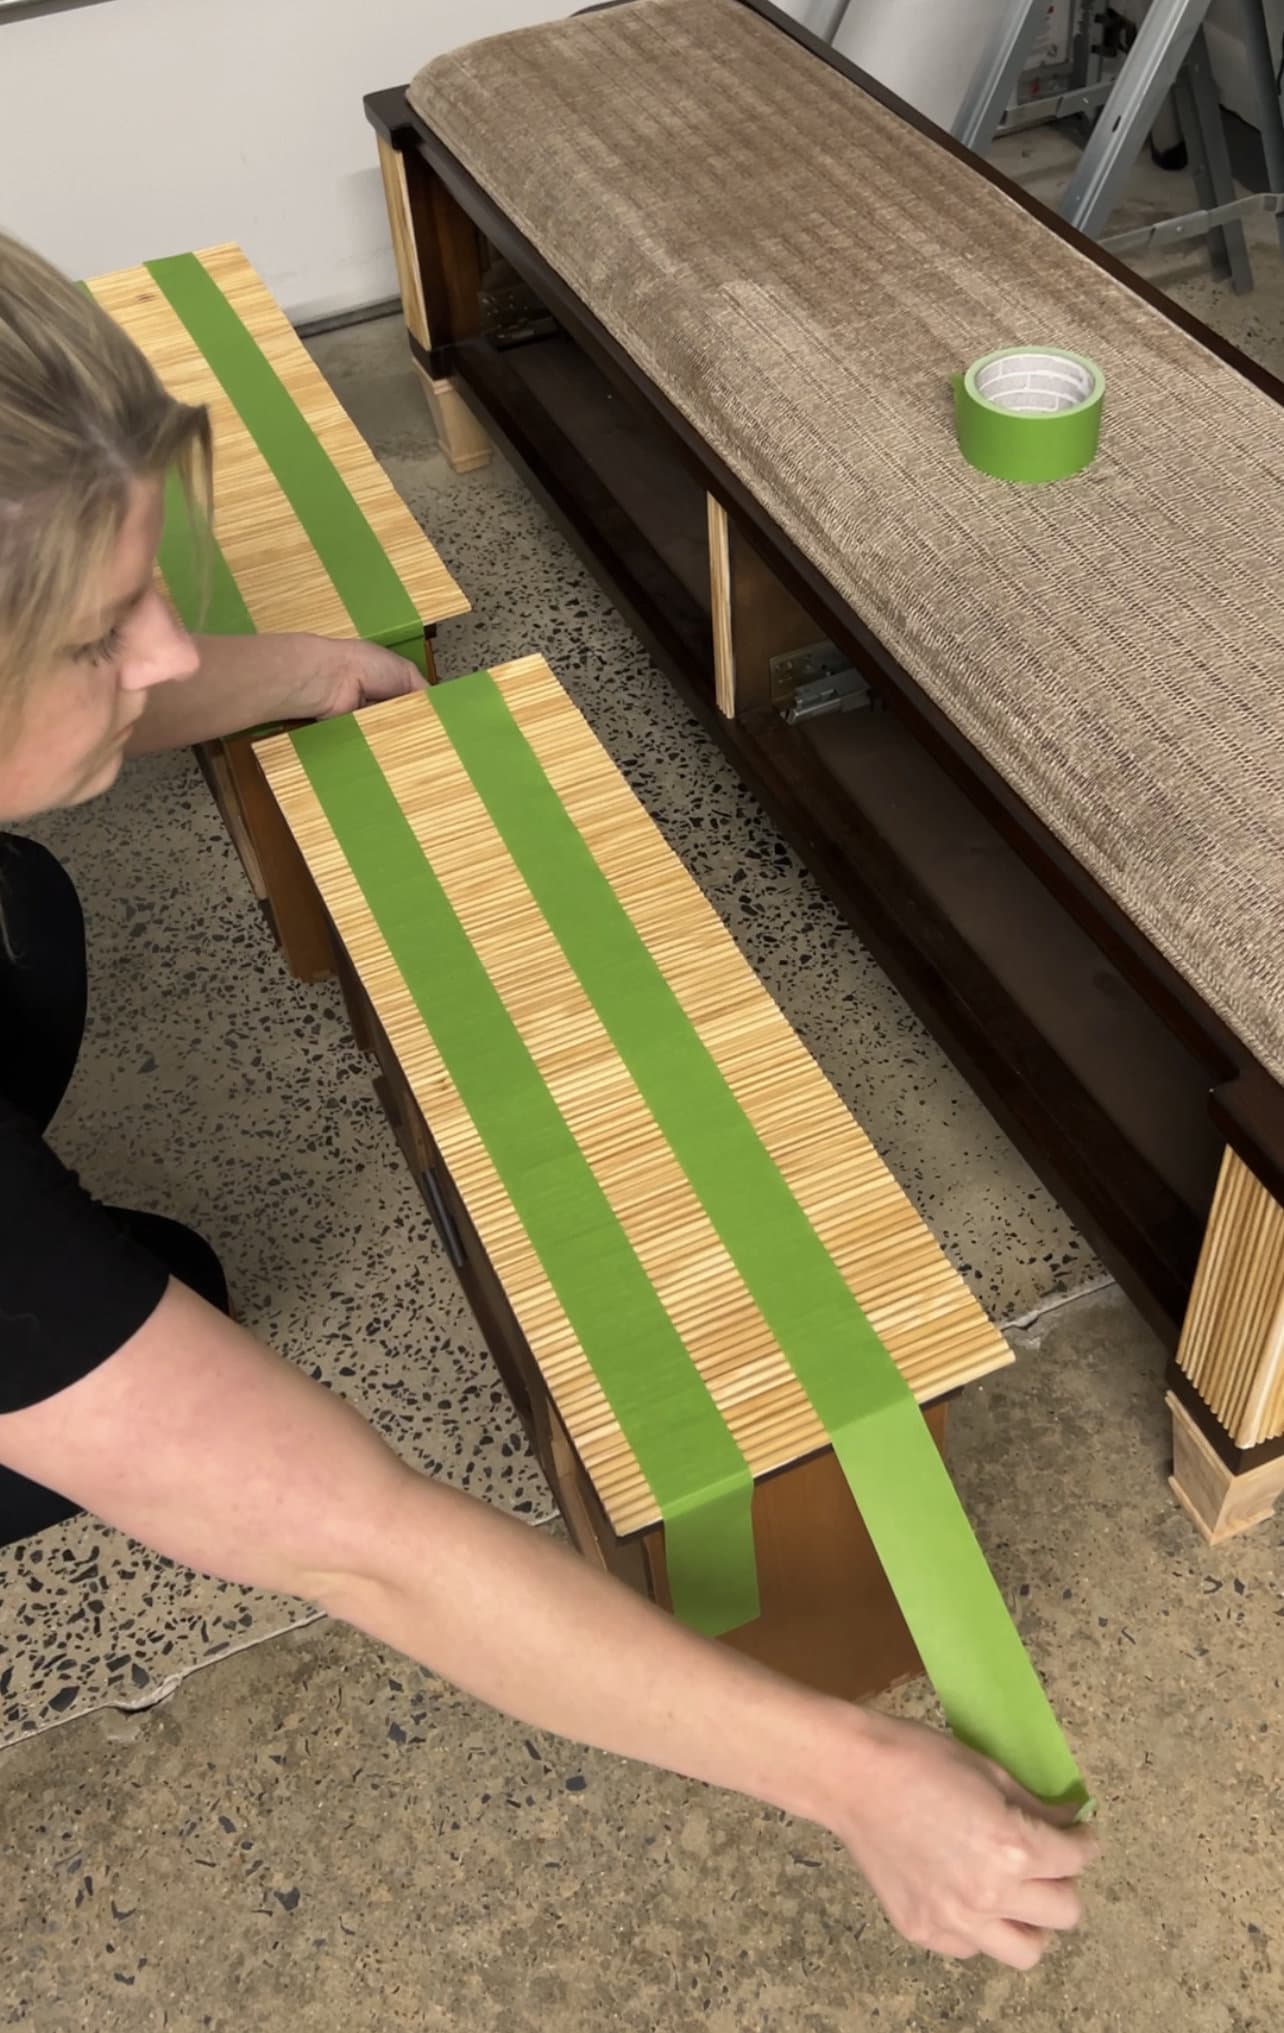
Step 2 – Tape 4 Molding Strips Side-By-Side
Use the painters tape to hold together 4 strips of molding side-by-side (shown below). Wrap the tape around every 6-8 inches. This will allow you to cut multiple strips of molding at once at the correct length you need.

Step 3 – Cut Molding
Cut the molding strips you marked in Step 2 with the miter saw until you have enough to cover your furniture piece.

Step 4 – Attach Molding With Adhesive
Begin attaching the newly cut reeded molding to the designated sections on your furniture using construction adhesive. Make sure the molding is completely perpendicular and that there are no gaps.
Use painters tape pulled tightly across the newly adhered molding to hold the pieces in place as they set overnight.
Optional: You can also use a pin nailer if you want additional support, but we’ve found construction adhesive to be completely sufficient. You also have to remember you’ll need to apply wood filler to any small holes in the reeding left from the pin nailer before priming or painting. Sanding wood filler smooth on those tiny reeded details is really difficult.
Step 5 – Sand Reeded Drawers Level
Once dry the next day, if you notice any of the reeded molding strips on the top and bottom edges of the drawer fronts look a little uneven, smooth them out with an electric sander using a medium grid sanding disc.
Test the drawers to make sure they close properly. Sand a little more, if needed, so that no molding on the drawer front scrapes anything on the furniture body.
Step 6 – Apply Primer
Apply a coat of primer to your entire furniture piece. If you are working with a cherry stained piece like I did, it’s worth using a shellac-based primer.
Even though it’s a fumey, smelly job, a shellac-based primer will prevent any red wood stain from bleeding through and potentially turning your paint pink. (I learned that one the hard way one time. It’s not fun at all to discover that little tip for yourself.)

Step 7 – Paint
Brush two thin coats of paint all over your piece. Keep an eye out to brush away any rogue drips that like to seep out between the reeded sections. Use this triangular brush and/or a small artist brush to get into the crevices.
I chose to use Sherwin Williams Door & Trim satin paint just because I happened to be at Lowe’s grabbing supplies, and I really wanted to use an acrylic urethane enamel based paint that would cure to a hard finish.
My kids are going to be crazy rough on this bench when they’re in and out of the door wrangling their shoes, so I wasn’t about to take that gamble by painting with a wimpy latex paint.
I still prefer Benjamin Moore Advance above all other heavy duty high traffic paint, but I think this will do the job. This taupe color, Sherwin Williams Anew Gray, is light enough to play against the shadows in those reeded details.

Step 8 – Add Hardware
Once the paint is dry, very slowly and carefully drill holes through the molding to add new knobs.
We just used the existing holes that were already in the drawer fronts as our guide and drilled starting from the back so that we only had to worry about drilling through the reeding.
Aren’t these vintage brass knobs so pretty?! They were only $3.20 each but look like knobs straight out of Anthropologie.

Now not only do we finally have some shoe storage but it’s CUTE shoe storage!
The next battle will be to get this family of mine to actually use it. ?
Reeded and Fluted Furniture Finds
Just for fun, I pulled together some pretty reeded and fluted furniture pieces I found for all budgets. (And also because it’s just fun to compare the store-bought versions to your own makeover once you finish a furniture flip, right?)


Entryway Sources
By the way, you can get this bird art gallery wall for free to print at home.
(Audubon prints always remind me of my mom since she used to pull them from books and frame them all over our house when I was growing up.)
- Wall color: Benjamin Moore Swiss Coffee
- Trim color: Benjamin Moore Simply White
- Door color: Benjamin Moore Wrought Iron
- Bench color: Sherwin Williams Anew Gray
- Picture frames
- Rug
- Cream pillow
- Striped pillow
- Faux linen curtain
- Curtain rod

Now that it’s done, I can’t decide if I should go back and paint the upholstered cushion (I did at least steam clean it and scrubbed with an upholstery cleaner).
But we have a couple of massive home renovation jobs coming up in the next couple of weeks around here, so I’ll have to circle back to it.
What do you say? Paint or don’t paint the cushion? If I DID paint it, what color would you do? I wonder if even a faux leather look would be cool… or a deep rust brown like this bench.
I think I just talked myself into it. ?
DIY Furniture Ideas
- Beginner’s Guide to Painting Furniture
- DIY Burl Wood IKEA Dresser Hack Using Contact Paper
- How to Clean Wood Furniture to Make It Look New
- Applique IKEA Hemnes Dresser Hack
- Best Places to Buy Furniture Hardware and Kitchen Cabinet Pulls


This turned out great! It seems like a lot of work but you have a very high-end look for a wonderful storage solution!
Thank you!
Lauren, once again, you created something so beautiful and unique. You really are inspiring!! I’m looking at every space in my home differently now. You and Robert are such a great team! I need to get my husband moving over here!! I love your humor and the way you write your posts. It’s great that you show us every step of a project and that you share your favorite sources. Every time I see a new post, I can’t wait to sit down and look at what you’ve done!!
Thank you so much, Jeannine! That means a lot to me! I’m thankful Robert enjoys doing this stuff as much as I do, but even if your husband doesn’t enjoy projects, it’s fun to try on your own too. ❤️
Wow! I love it. You’re making me regret selling my shaker style Hope chest.
Talk about looking high end!! Great job! I’ve seen the reeding at HD before and had considered using it for a project I’m considering but hadn’t seen the rounded one. I actually thought about using just dowel and cutting it down. I’m not quite there yet but this certainly adds something new.
You actually just reminded me that I have a bench similar to this but without drawers and the cushion is removable. Now I’ve got something new to sink my thoughts into..lol!
The new possibilities are exciting. ?
You are so clever! What a beautiful job you did with this piece of furniture. You have a wonderful knack for envisioning such a transformation. Thanks for sharing.