
Beginner’s Guide to Painting Furniture
All of the tips and tricks you need to know how to paint furniture the right way and make it last + secrets to finding the best secondhand furniture deals.
Seriously, why have I not written a tutorial about how to paint furniture before? There have only been something like umpteen million furniture makeovers on this blog. (Only slightly an exaggeration.)
8 years ago, I visited thrift stores and found unwanted furniture on Facebook Marketplace to paint in my garage as a stay-at-home mom in order to resell my projects for grocery money and paying a few bills for our family.
It’s the PERFECT side gig (or main gig), creative outlet, and way to beautify your home for inexpensively.

How to Paint Furniture as a Beginner
I get a lot of questions about where to start, how to prep and play around with some fun finishes. So it was high time I wrote all of my best tips in one easy-to-find place.
A beginner’s guide to painting furniture!
I pinky promise it’s not as scary as you think. And actually, once you start, you’ll probably be addicted. Fair warning.

Where to Find Secondhand Furniture to Paint
If you want some ideas about how to snag the best secondhand furniture to paint, check out these posts for insider secrets:
- How to Find the Best Deals on Facebook Marketplace
- 30 Home Decor Items You Should Always Buy While Thrift Shopping
- 12 Goodwill Shopping Secrets Revealed
- 8 Apps to Up Your Thrifting Game
- 18 Craigslist Shopping Secrets Revealed
Secondhand Furniture Shopping Sources
- Facebook Marketplace
- Craigslist
- Thrift Stores
- Consignment Shops
- Antique Stores (these are usually more marked up but you can still find good deals sometimes)
- Estate Sales (find them on EstateSales.net)
- Yard/Garage Sales (search for them using Yard Sale Treasure Map)
- Moving Sales
- Facebook Buy/Sell/Trade Groups
- OfferUp
- LetGo
- Nextdoor

Supplies You Need for Painting Furniture
Mandatory Supplies on Nearly All Furniture
- Drop cloth
- Simple Green cleaner (Or other brand of cleaner you prefer)
- Clean, dry rags
- Chemical resistant gloves
- Screwdriver (for removing old hardware)
- Wood filler
- Putty knife
- Medium and fine grit sandpaper (or liquid sander deglosser)
- Paint of your choice (I prefer waterborne alkyd based paint like Benjamin Moore Advance and urethane acrylic enamel based paints like Sherwin Williams Emerald.)
- Good quality angled paint brush (I prefer these natural bristle brushes with the flexible handle)
- Tack cloth
Optional Furniture Painting Supplies
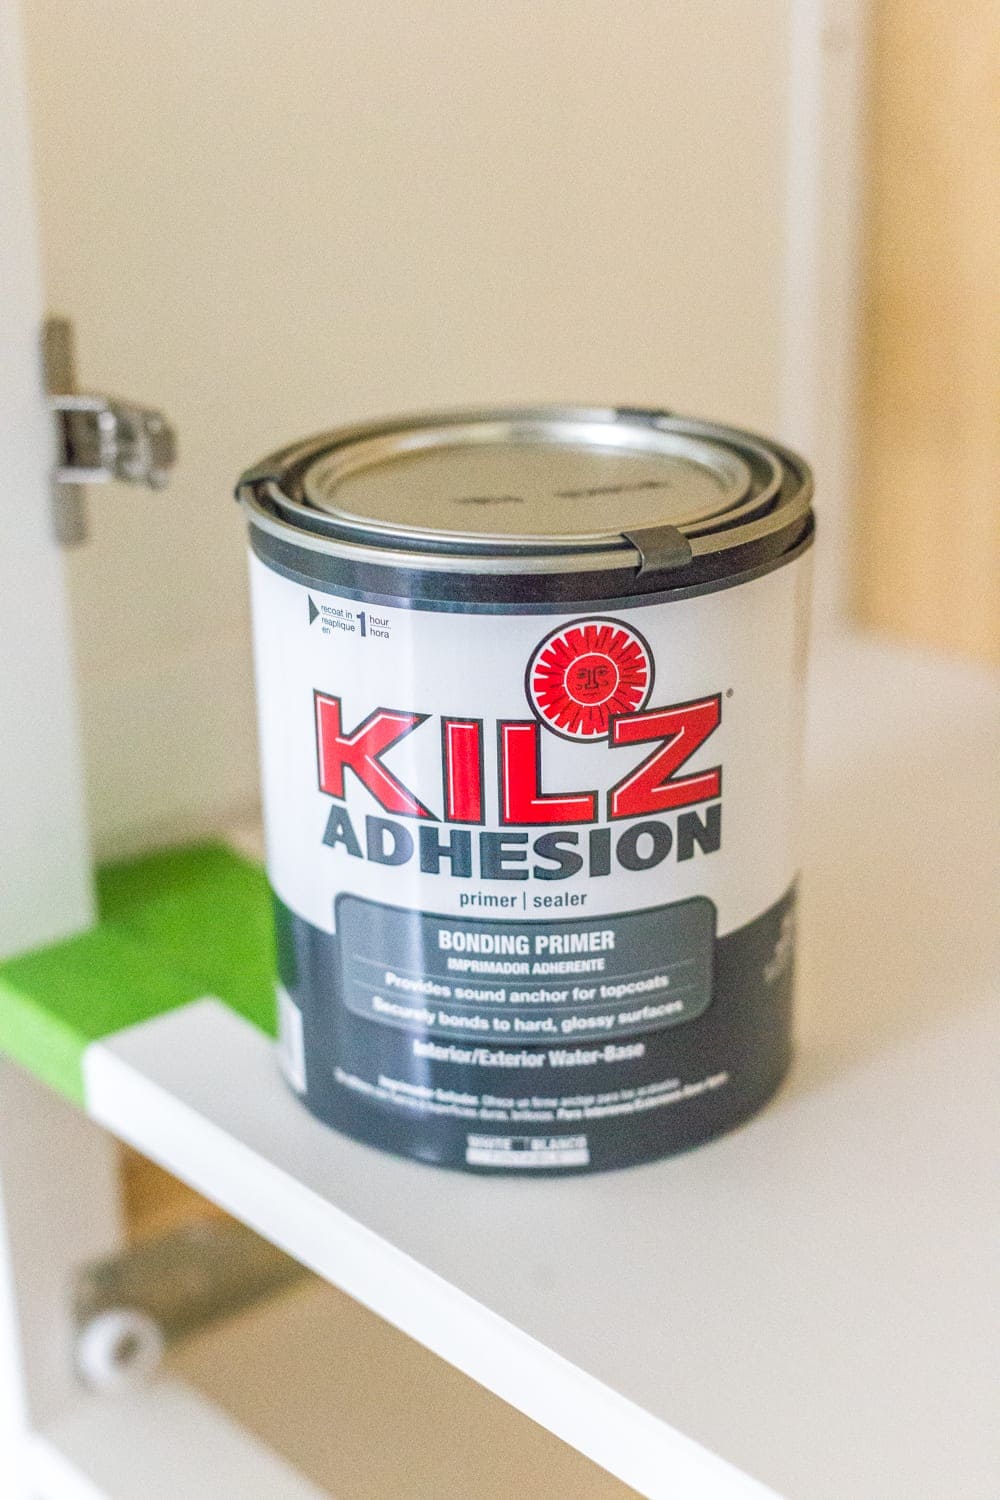
- Kilz Adhesion Primer (even paint-and-primer in one paints sometimes still need a primer)
- Spray shellac (if you’re painting a dark wood stained piece)
- Small foam roller and paint tray (great for larger smooth areas like tabletops)
- Furniture wax in the color of your choice (if you want an antique look)
- Wax brush (for applying wax with ease)
- Clear wax (if you’re working with chalk paint)
- Wire brush (if you want a chippy, extremely distressed look)
- Chip brush (if you want to dry-brush your piece)
- Artist brushes (if you are working with a piece that has lots of details)
- Fusion Crackle (if you want a cracked, distressed finish)
- Orbital sander (if you want to strip your piece)
- Polycrylic or Fusion Tough Coat (If you need to seal your stain finish. This step is not needed if you’re using Homestead House Stain & Finishing Oil.)
The Difference Between Chalk Paint / Acrylic / Alkyd Paints

When You Should Choose Chalk Paint
Choose chalk paint when you want a flat finish with the flexibility to distress, age, and weather a piece of furniture. Keep in mind because it’s often meant to be distressed, it might not be as durable on all surfaces.
- Flat sheen
- Chalk paint requires little to no prep work, BUT you do have to seal it when you’re done painting.
- Brush strokes are much more noticeable with chalk paint.

When You Should Choose Mineral Paint
Choose a mineral paint like Fusion Mineral Paint when you want a smooth, satin sheen finish without much prep work with the flexibility to distress, age, and weather a piece of furniture. Mineral paint is slightly more durable than chalk paint.
- Satin sheen
- Mineral paint requires little to no prep work, and you do not have seal it after painting unless you want to boost its durability. It’s truly “one and done” on most pieces.
- Brush strokes self-level and are usually not as noticeable as with chalk paint.

When You Should Choose Waterborne Alkyd or Urethane Acrylic Enamel Paint
Choose a waterborne alkyd paint like Benjamin Moore Advance or urethane acrylic enamel paint like Sherwin Williams Emerald when you want the absolute most durable paint finish possible. This type of paint is the most recommended for cabinets, doors, trim, and high traffic furniture pieces like dining tables or end tables. However, it often requires prep work.
- Available in any sheen (depending on brand) – flat, eggshell, satin, semi-gloss, gloss
- Waterborne alkyd and urethane acrylic enamel paints often require a primer
- Sealer not required
- Brush strokes self-level and result in the smoothest finish of all paints
Knowing what kind of paint you’re working with is the first step to determining how much prep work you need to do.

How to Prep Furniture for Paint
Prepping is the least fun part, but if you want the best, most lasting finish possible, it’s gotta happen.
1. Clean the Furniture
Because wood furniture especially often has wood oil and dusting residue on it, I like to give my pieces a quick wipe down using a clean, dry rag and Simple Green.
Recommended Furniture Cleansers
- Simple Green
- TSP (rinsing is required)
- Krud Kutter
- Murphy’s Oil Soap
Other cleaners, like TSP, can work too but require rinsing. Simple Green is just the one I personally prefer. Krud Kutter and Murphy’s Oil Soap work well too.

2. Remove Hardware and Patch
2a. After cleaning, remove all old knobs, pulls, and hardware and remove drawers and doors from hinges.

2b. If you have a badly damaged piece with peeling veneer, use your putty knife to scrape away any remaining peeling veneer.
2c. Using your putty knife again, press some wood filler into the damaged wood and let dry. At this point, add wood filler to any old knob/pull holes too, if you plan on using a different size of hardware later.

2d. Once the wood filler is dry (follow dry times listed on the back of the wood filler package), use medium grit sandpaper to sand it down to a smooth finish.

2e. (Optional – not always necessary) If you are painting a dark stained piece of furniture, spray it with shellac or brush on a coat of Fusion Concealer to prevent the old stain from bleeding.
Painting white paint over raw dark wood, especially, can cause the paint to turn pink from stain bleed. You probably don’t want a Pepto Bismol table. 😉

3. Apply a Base Primer (Optional but sometimes necessary)
On high traffic pieces, it’s best to use a primer. On laminate furniture especially, it’s best to use a shellac / oil based primer to get paint to adhere properly. I’ve found Kilz Adhesion to work well on just about any surface.
Only one coat is necessary.
3. Paint Furniture
The fun part! Well, not as fun as actually being done, but it’s where the magic happens.

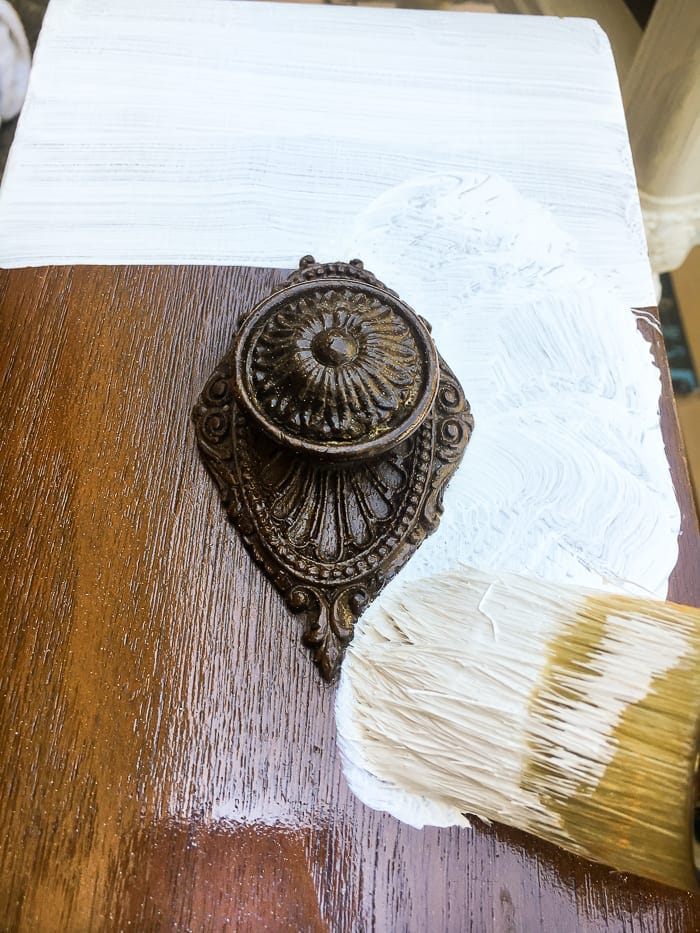
Use a 1.5″ or 2″ angled sash brush or this natural bristle brush to easily apply paint in every crevice and carefully work around details (like those non-removable wood knobs below).
Keep your brush strokes going in one direction (up and down or left and right) to maintain a smooth finish. If you want a more visual guide, this video can help.
It might take a little bit practice, but just watch to make sure you’re not dripping your paint and you’re set. Usually, two coats of paint is all I need for a solid paint job (sometimes 3 coats if I’m painting white on a very dark piece).
Let dry for at least 24 hours to ensure the paint has cured enough to handle.

TIP #1: If you want a super smooth finish, opt for Benjamin Moore Advance or Sherwin Williams Emerald. They’re self leveling (meaning the brush strokes lessen as the paint dries) and they sure to a harder, more durable finish than latex. And you don’t have to seal!
TIP #2: When painting with semi-gloss or gloss paint, warm your can of paint in a slow cooker with a little water for an even smoother finish.


4. Seal the Furniture (Optional but Sometimes Necessary)
How to Seal Chalk Paint
If using chalk paint – sealing with a coat of clear wax is strongly recommended. I use Annie Sloan Clear Wax or regular Minwax Paste Finishing Wax.
Put a small nickel sized amount on a natural bristle wax brush or a clean white sock and evenly rub a thin layer of clear wax all over the painted surface. Work in small sections until fully covered with wax.
Would you like to save this?


How to Seal Mineral Paint / Waterborne Alkyd Paint / Urethane Acrylic Paint
These types of paint are more durable than chalk paint, but for furniture pieces that receive a lot of wear and tear (like a dining table top for instance), I suggest applying 2-3 thin coats of water based polyurethane.
Water based polyurethane will not darken paint or cause a yellow hue like oil based polyurethane will but still greatly increases durability, which is why I suggest it above all other sealers.

After painting your furniture, you’re done!
Well, you can be totally finished if you want. Or you can have some extra fun with it and add character in a bunch of different ways…
How to Add Character to Furniture
Furniture Distressing
If you like the weathered look, use a couple of pieces of fine or medium grit sandpaper for this step.
I like using sandpaper rather than a sanding block because I can get into grooves and distress curved pieces that a sanding block can’t each. It tends to have a more natural distressed look with paper.

Scuff up the paint with your sandpaper, focusing on corners, edges, and details where a piece would naturally chip and wear with age.

If you want a heavily distressed finish, you can use a wire bristle brush to scuff it up even further for a chippy kind of look.

Aging with Wax After Painting Furniture
Wax is suggested more for chalk painted or mineral painted surfaces.
Waxing is the trickiest step when it comes to adding character, but the results are gorgeous and so worth it! If your piece has any carved details, it’s a definite must-do.

How to Create an Aged Antique Look with Wax
You can add Homestead House espresso or black wax or Annie Sloan dark wax or black wax after sealing to create an aged, antique look.
1. It’s best to practice on a scrap piece of wood first to get used to the process.
2. Using a wax brush, dip the bristles about 1/4 inch into your wax pot and rub it onto a 1-2 foot section of your painted furniture. (If I’m working on a dresser, I often wax only one drawer at a time.) Don’t apply wax to the entire furniture piece. Wax dries quickly and you’ll need time to buff.
3. Let the wax dry for just 2-3 minutes, then gently buff away any excess wax with a clean, dry rag. I like to wear an old, clean sock like a mitten to vigorously buff away the wax.
If you need a more visual example, here is an excellent tutorial by Marian Parsons (Miss Mustard Seed).

How to Create a Liming with Wax
Or you can use Homestead House white wax in the same way for a beachy, liming effect.

How to Dry Brush Furniture to Create Depth
If you want to add a little extra “grain” or weathering to a piece, try dry brushing.
It’s very fast, dries in no time, and requires hardly any paint to do it. If you have a piece that has a lot of raised wood grain, dry brushing it would be perfect for pulling out that texture.

- Choose a color contrasting your base color already on your piece of furniture. I love dry brushing white on a dark painted finish.
- Using a chip brush, dip the bristles about a 1/4 inch into your paint.
- Brush the bristles on a dry paper towel or clean, dry rag until it appears all of the paint has been removed from the brush.
- Then, brush your piece of furniture, keeping your stokes going in one direction. Add as much dry brushing or as little as you prefer.


Adding a Metallic Effect with Rub n Buff
Rub n Buff is the JAM for changing the color of metallic pieces like furniture knobs and hinges.
- Put a very small amount of Rub n Buff to an artist brush and brush on the waxy paste in a very thin layer where you want to add some glitz.
- If the Rub n Buff isn’t sticking well to a smooth surface, rough up the surface a little with fine grit sandpaper.
- After 1 minute, buff away any excess with a clean cloth to make it shine.
It works beautifully on hardware. Pictured below is what it looks like before buffing. Here is a breakdown of all of the Rub n Buff colors.

Adding a Crackling Effect After Painting Furniture
This finish is SO COOL to watch and makes every piece look suuuuper aged.
- Paint your piece whatever color you want peeking underneath the crackle and let dry.
- Brush a moderate layer of Fusion Crackle on top of the base color.
- Then, wait following the directions on the back of the Crackle bottle.
- Paint your top coat color of choice with a brush, or for best results that are more even, use a paint sprayer. (I prefer this paint sprayer.)

How to Strip and Re-stain Furniture
This isn’t really painting, but it’s worth mentioning. If you want to change the color of stain on a tabletop, it’s a messy but simple job.
1. Use a belt sander (strongly recommend that over a mouse sander as a belt is much faster) using coarse grit sandpaper to remove the existing layer of paint. Next, smooth out the wood surface with a medium grit. Then, finish with a fine grit.
(You can also go through the process of using a paint stripper, but it’s fumey, time-consuming, and extremely messy. I avoid it at all costs. I also don’t love the oven cleaner stripping method.)

2. Use a varnish brush or rag to apply a wood conditioner, let sit for a few minutes, and wipe away any excess just before staining.
3. Apply the stain color of your choice, let sit, and wipe away, following the directions on the back of the can.
4. Add additional coats, depending on how dark you prefer your stain. Let the stain dry at least 24 hours before sealing.

5. All stained wood should really be sealed, especially if it’s a piece that will receive lots of wear and tear like a dining table top or coffee table. Brush on 2-3 thin layers of Polycrylic (try not to pass your brush over the wet poly more than twice to prevent brush marks), let dry for 24-48 hours, and your finish is totally protected.
Add Hardware After Painting Furniture
Add some pretty knobs and pulls as the finishing touch, and you’re all done! This post has some of my favorite places to buy hardware for furniture makeovers.
This hardware template makes drilling holes for new knobs and pulls much easier.

Whew! That’s a whole lot of info, but I hope it makes the whole newbie painting thing seem not so daunting. This is all literally everything you’ll need to know to get you started.
Just dive in and do it. You’ll never know what hidden talent you may possess.
And if it doesn’t come naturally, it will with a little bit of practice. The best lessons are learned through mistakes, right? I’ve learned them through the School of Hard Knocks.
But really, isn’t it so worth it to find a $20 desk and make it look like a million bucks with just a couple of hours and a can of paint?

Have you attempted refinishing furniture before?
Do you have a favorite furniture paint color you use time and time again? Or a favorite distressing technique? Or a link to a favorite piece you’ve done if you have a blog yourself?
Share in the comments!!! It’s one of those things you never stop learning and perfecting. Find more furniture makeover ideas here.
More Furniture Painting Ideas
- How to Paint Laminate Furniture
- How to Paint Kitchen Cabinets Like a Pro
- 15 Ways to Transform Your Entire House with Just Paint
Frequently Asked Questions
Because chalk paint is often sealed with wax, that can make it difficult to paint over.
1. Remove furniture wax first by scrubbing the piece with an abrasive sponge and mineral spirits.
2. Scuff the surface with medium grit sandpaper.
3. Wipe down any residue with Simple Green or Krud Kutter.
4. Then paint as you would like.
The answer to that is totally up to you and your style, but the most widely used sheen is satin as its versatile for many styles and is durable.
You risk your paint peeling right off of the surface, and while some paints claim to be “no prep”, furniture will always be the most durable with some prep and primer.
Your best bet is to apply your paint with a paint sprayer. Follow the directions on the manufacturer label for this as some paints require thinning before sprayer application.


