
How to Organize a Bathroom Vanity in 6 Quick Steps
The must-do steps to thoroughly organize your bathroom drawers and cabinets and the best tools to keep them looking tidy.
It’s been a weird week, y’all.
In the past few days, I had a massive fail on a little craft project, Regan has been waking up every hour at night, our last wall decorating project for the master bathroom is taking way longer than I planned, a table I ordered for our breakfast nook ended up being the wrong measurements, and relentless rain has meant I can’t photograph any of it anyway.
Boo to the hoo!
BUT (don’t you always love when there’s a “but” in spite of things going wrong?) I tackled a crazy organization project that I’ve been dying to do for over a year!

Since we’ve been full steam ahead on the master bathroom anyway, I finally decided to deal with the out-of-control clutter hiding in our bathroom vanity drawers and cabinets.
I really don’t share organization projects enough with y’all, but I hope this one helps if you have a similar explosion of bathroom chaos.

Our freshly painted vanity is finally pretty on the outside, but it held a really ugly secret.
Dun dun dun…

Ughhhhhh so bad! And so embarrassing! But you won’t judge us, right?
It’s amazing how exponentially worse this vanity got after Regan was born a few months ago.
If you ever need advice on tackling your own bathroom vanity, here’s the key…
(Some affiliate links are provided below for convenience. Full disclosure here.)
Supplied Used:
- White wood grain contact paper
- Stackable basket drawer organizers
- Clear drawer organizer set
- Scissors (for cutting contact paper)
- Handheld vacuum
1. Take everything out. EVERYTHING!
Don’t try to work around things and just remove the items you want to toss. Sprawl every bottle, hairbrush, and curling iron stuffed into that vanity on your countertop.
2. Sort.
Throw away items you haven’t used in at least 6 months. If you haven’t used them lately, chances are you never will (and if it’s makeup, it’s probably expired anyway). Then, place items into piles based on how you’d like to separate them into cabinets and drawers.

3. Vacuum drawers.
A must! Especially if you have makeup residue and spills. You can just use a handheld vacuum to knock it out in a few seconds.
4. Cut and place contact paper in the bottom.
We had this old contact paper in the bottom of our cabinets that was probably 20+ years old. I ripped it out, cleaned up the gross bottom, and replaced it with this clean, white contact paper that had a pretty wood grain.

Soooo much better.

5. Place vertical storage in cabinets.
For under our sinks, I found these wire stackable basket drawers so that we could utilize more vertical space for holding hair styling tools and cleaning supplies.
6. Place drawer organizers.
I picked up these clear drawer organizers on Amazon, but I’ve even used little baskets from the dollar store in the past.
So now everything has a “home” in our vanity.
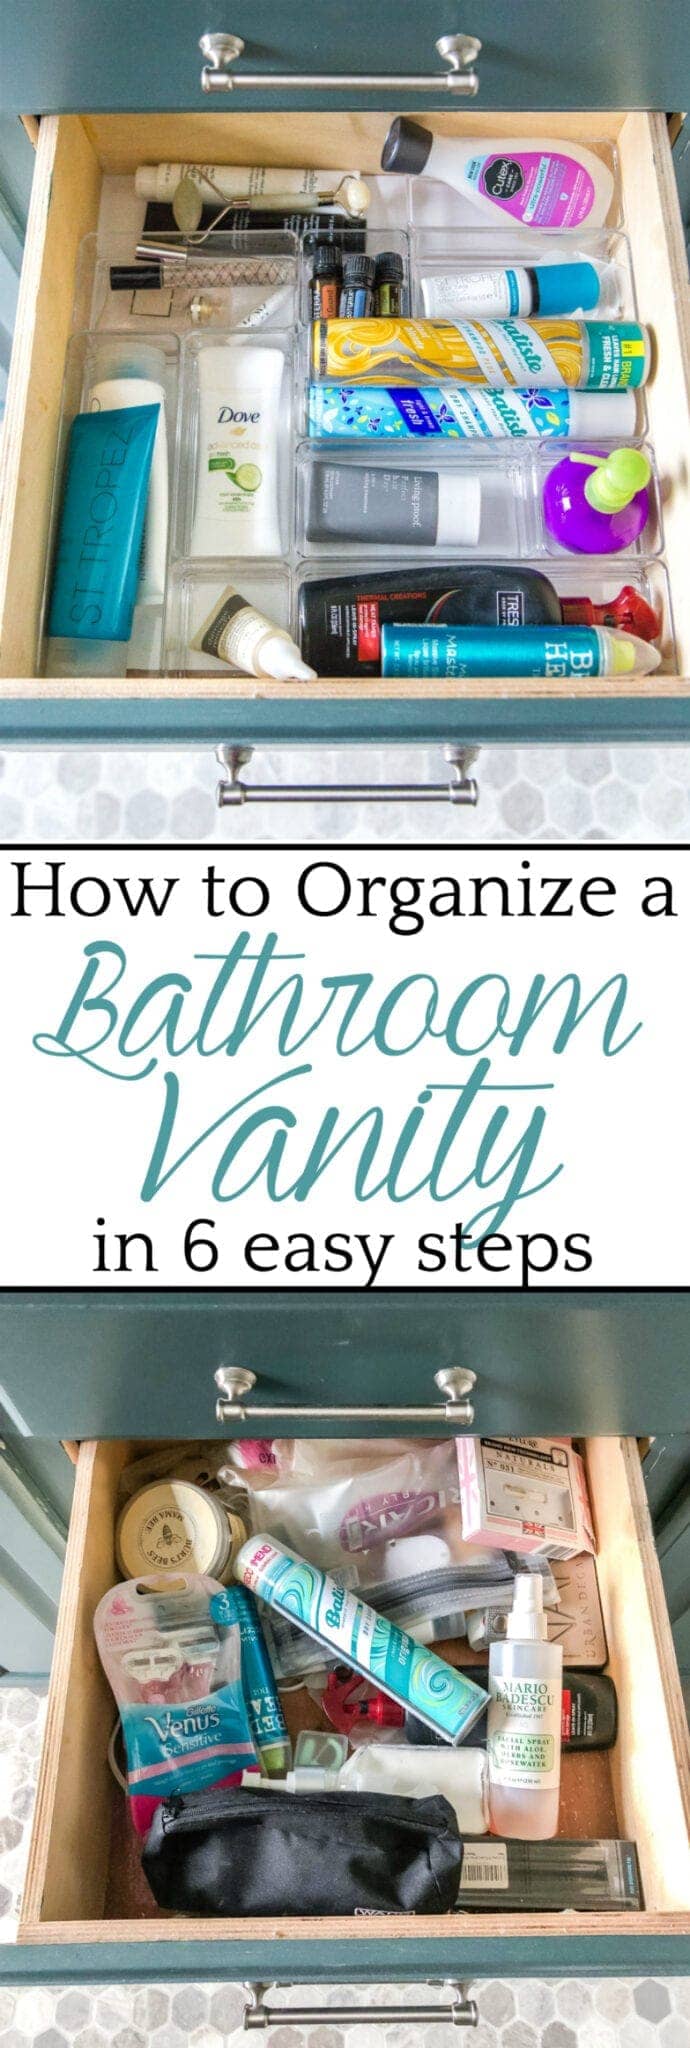
My side of the vanity now looks like this:

And my hair dryer, curling irons, and straightener are all corralled into these drawers along with my makeup bag and manicure bag.

And since Robert has exponentially fewer grooming items (ha… imagine that), I stored the bathroom cleaning supplies on his side.

The top drawer holds some of our shared items like toothpaste, floss, etc.

The next drawer is mine to hold all of my hair care and skin care items.

The third drawer is Robert’s for all of his shaving supplies and the like.

And I used the bottom drawer for holding extras and our travel toiletry bags that we can grab whenever we’re packing for trips.

I feel like I can breathe again! And getting ready is so much faster now because I can actually find things!

Now that THAT job is behind me, I’m really hoping to finally have this bathroom 100% finished once wall decor is up this weekend. Ahhhhh! Stoked!
If you want more organization help to get a jump start on spring cleaning, you can see all of my past organizing adventures here.
Are y’all going stir crazy with snow/ice/rain right now and starting to organize to pass the days until spring? If it keeps up, the rest of our house might actually get organized too. 😉
If you want to save this post for later, you can pin it here:


One big word here for ALL things organizing…CLUTTERBUG! Until you know your organizing personality you will forever be trying someone else’s version that might or might not work for any individual. See, I am a BEE and if it goes to the back under the sink I won’t remember I have whatever it is, so I need baskets and hooks out in the open..pretty but organized, and I can clearly see how many bars of soap I have..even if I put them into a bathroom closet then I need to remove the closet door! Trust me, you ladies will thank me for sharing this with you!!❤️
The contact paper works well but I have found I prefer using stick on vinyl tiles. They are easy to cut and position and are more durable. Especially under the kitchen sink with moisture and items that I slide in and out. Love the mirrors you used in the bathroom remodel.
You read my mind with this post! We only have 2 standard sink cabinets with no drawers and the things piling up have been driving me nuts. Those basket drawers are exactly what I need! Perfect timing!
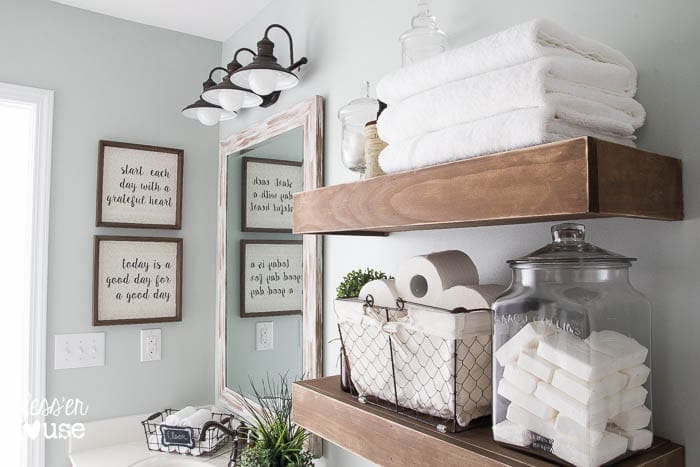
Looks wonderful! But I have to ask, do you have separate storage for towels and wash cloths? Ours are crammed under our sink…so that takes up a lot of room. Ideas?
Yes, we have a linen cabinet for our wash cloths and towels. It’s in this post: https://www.blesserhouse.com/how-to-turn-a-cabinet-into-a-hamper/ If you don’t have anywhere else to store them though, I’ve found rolling them, instead of folding, helps keep them neat and you can fit more into a smaller space.
I love the idea of the plastic dividers. This is a project I really need to do.
It helps a ton! Little plastic baskets from the dollar store work great too.