DIY Personalized Step Stools
One easy trick to personalize any piece of wood to paint names and designs on signs and furniture inexpensively.
Fact: If you don’t have your name or monogram painted or embroidered somewhere, you are not truly Southern. That’s what the folks around my town will tell you, anyway.
Also fact: If your name isn’t written on an item, it’s fair game for your little sibling to come along and steal it. That’s the rude awakening Olivia is in for when Regan gets old enough to learn the word “mine”.
So as we’ve been wrapping up the #BlesserGirlyBathroom, I planned on storing a pair of step stools under the vanity for them to reach the sinks as they grow up.
Then Olivia had the idea to make name signs beside their sinks (her plan was to make them out of cardboard and hot glue them to the countertops… bless), so I thought giving this pair of reclaimed wood step stools some personalization would be a cute way to honor her request.
And I’m sharing this one just in time for this month’s Trash to Treasure Transformation Tuesday. (You can see the other thrifty makeovers at the end of this post.)
DIY Personalized Step Stools
Supplies Used:
(Some affiliate links are provided below. Full disclosure here.)
- Wooden step stools (I used these.)
- Names printed on plain computer paper (I used Sweet Pea font.)
- Ballpoint pen
- Tape
- Acrylic craft paint in your choice of color
- Small artist brush
- Small chip brush
- Spray clear sealer
- Sander (optional)
- Coarse grit sanding pads (optional)
- Stain color of your choice w/ dry rag (optional)
The Steps:
Even though I bought this pair of step stools from an Amazon seller, they were kind of junky since they were two totally different colors and needed some work. But they were sturdy, the perfect size, and rather inexpensive, so I couldn’t complain too much. And they made for the perfect canvas that way.
1. I had to sand the old stain on the tops first with the sander to get it down to the bare wood since the stools had two different colored stains on them, and I wanted them to match.
2. Then, I just used some leftover stain I already had from refinishing the bathroom’s butcher block countertop with 1 coat of Minwax Weathered Oak and 1 coat of Minwax Special Walnut.
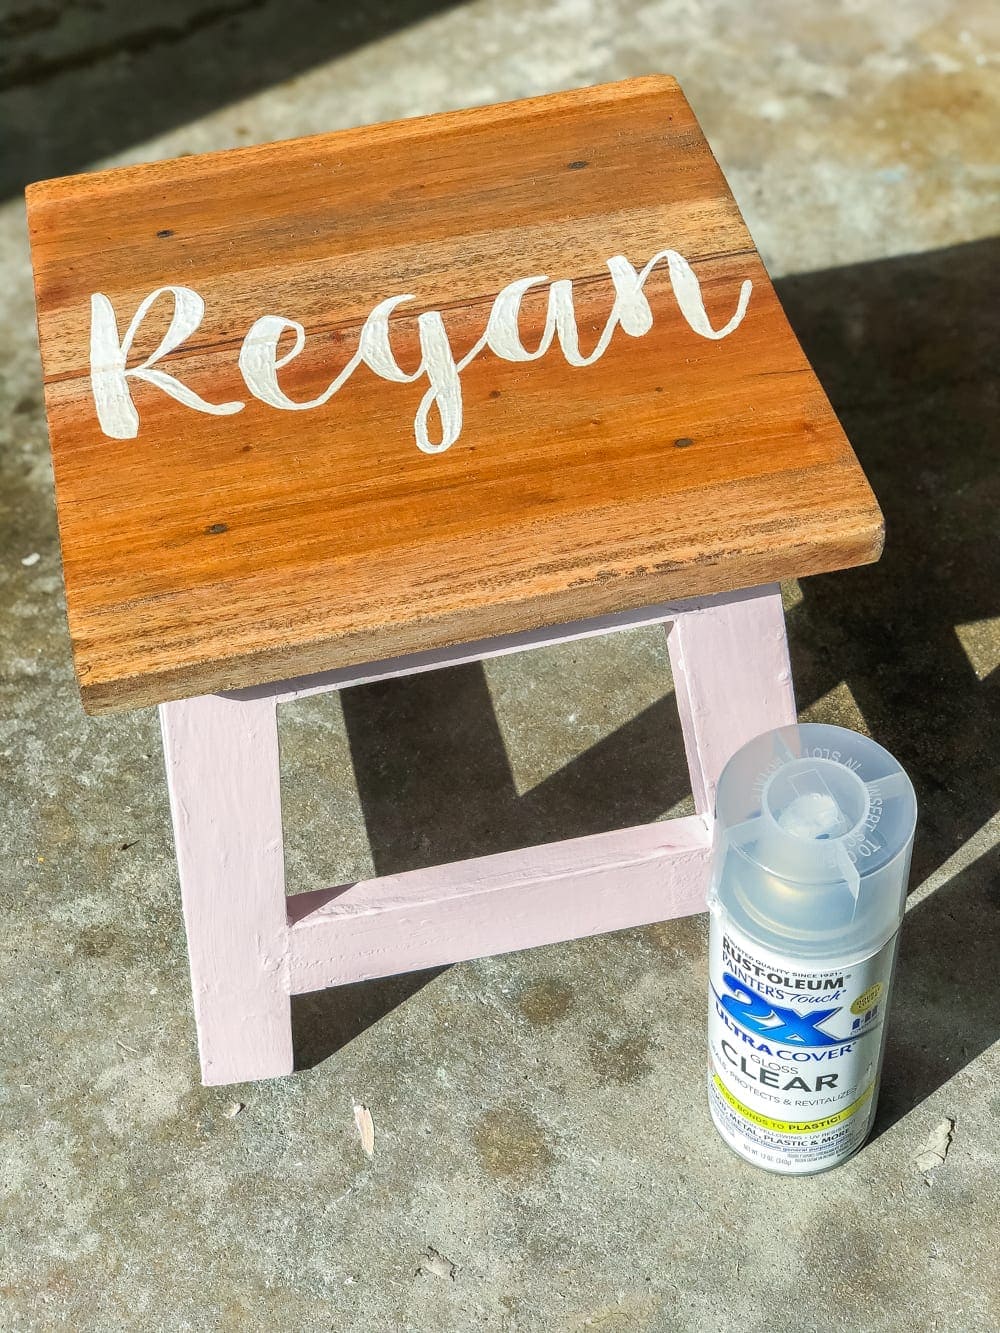
3. For the base of the stools, I brushed on a couple of coats of light pink acrylic paint to coordinate with the bathroom.
4. I’m definitely not an artist with a steady hand, so to personalize the tops of the stools, I printed the girls’ names on regular computer paper typed into a regular Word doc. (I used the font Sweet Pea, if you’re curious. You can get it for free on dafont.com, if you want to use that font in particular and don’t already have it.)
5. I trimmed the paper and taped it in place on top of the stool.
6. Then, using a ball point pen, I traced the wording, pressing really hard as I went to leave an indention in the wood underneath.
7. Using the indention in the wood as my guide, I painted on the lettering with white craft paint and a small artist brush with two coats.
Would you like to save this?
8. And to keep the paint protected, I gave it two coats of spray sealer after the paint dried.
I’ve used this tracing/painting method on DIY signs before too. It’s so easy and costs practically nothing to make.
So now the girls have sweet little personalized stools that will hopefully prevent any fights too. At least, fights in the step stool department anyway. It’ll probably be a different story with everything else in this house.
As a side note, the bathroom makeover is officially finished and it’s seriously the cutest bathroom on the planet! I’m only slightly biased over here. More on that later. We’re waiting on one tiny little piece for the shower, and then I can photograph it.
You can see the rest of the Trash to Treasure makeovers for this month below too for more thrifty ideas.
Clockwise from top left:
Artsy Chicks Rule | Confessions of a Serial DIYer | Girl in the Garage | Prodigal Pieces
And you can check out thrifty makeovers from months’ past here.
If you want to save this post for later, you can pin it here:


