
Beginner’s Guide to Painting Upholstery
Today’s edition of “Lauren just can’t leave well enough alone”: painting upholstery.
Remember that whole back and forth debating about whether or not to paint our upholstered headboard?

UPDATE: See the full master bedroom makeover reveal + source list here!
Yep. I did it. And y’all. I was straight up skeeeeeeeeeered the entire time I was tackling this project. But I conquered!
If you have ever wanted to attempt painting upholstery, I’m here to tell you, don’t even sweat it, girl. You’ve got this.
It is so super duper simple, but sometimes those are the best tutorials. The simple ones. So here ya go.
Supplies needed to paint upholstery:
- Chalk paint (This king-sized headboard required exactly 1 quart of Annie Sloan Chalk Paint to give you an idea of how much you’ll need.)
- A large cup or small pail (I like to use this one because I can grip the handle really well in one hand as I move around to work on a piece.)
- Painter’s tape, if needed (We’re big fans of Frog Tape around here.)
- An excellent quality paint brush (I used this 3 inch angle brush.)
- Fine grit sandpaper (I used 320 grit.)
- Drop cloth
- Annie Sloan clear soft wax or any clear wax you prefer (optional)
- And of course your upholstered piece of furniture
Here’s my victim. We bought this bed from Ashley Furniture a little over two years ago, and even though it’s a beautiful piece as is, it was kind of driving me crazy that the brown fabric didn’t really work with all of the blue/gray tones in the rest of the room.
In pictures, it wasn’t too bad. In person, it wasn’t jibing well.

I taped off the wood frame of the bed with the painter’s tape, which thankfully blocked all of the paint from seeping under.

Then, I mixed 3 parts paint to 1 part water in a paint pail. I used Annie Sloan Chalk Paint in Paris Grey. And um… I was out of paint stirs so I used wooden take-out chopsticks. Ha!

I put a canvas drop cloth down on our bed because that could be a really terrible situation to have on your mattress later.
After mixing the paint with water, start brushing it on your upholstery, and pay attention to the pattern of your brush strokes. I painted straight up and down the entire time. Continue to stir your paint as you work.
Y’all. I wanted to cry after this first coat.

Most of the time I take on projects and don’t always tell Robert, so he never knows what kind of DIY drama he’s walking into every day when he comes home from work.
I was rehearsing what I was going to say to him after coat #1. “Yeah, so… I destroyed our bed. Kay? Bye!”
But after the first coat dried, I put on a second one and it made me feel much better. Whew!


It was still a little bit on the splotchy side, so I put on one more coat for a total of 3 coats of paint/water.
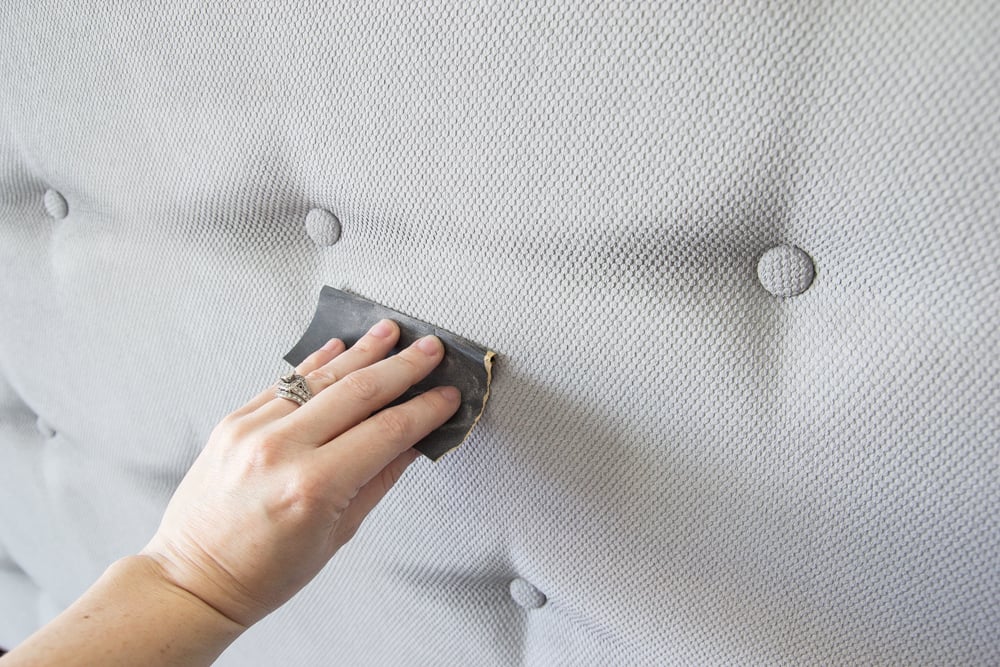
When the third coat was dry, the fabric did feel a lot like it just had paint on it. It was pretty stiff.
But once I sanded down the entire thing with the fine grit sandpaper, it had a velvety texture and felt similar to the original fabric.
It is entirely up to you whether or not you want to apply clear wax after sanding. I looked up several different methods, and some wax and some don’t. I’d say for something like a chair or sofa, you definitely want that extra layer of protection. But since this is just a headboard that doesn’t have people sitting on it or anything, I did without.

I’m soooo happy with how it turned out. Oh, and Pat the Deer approves.

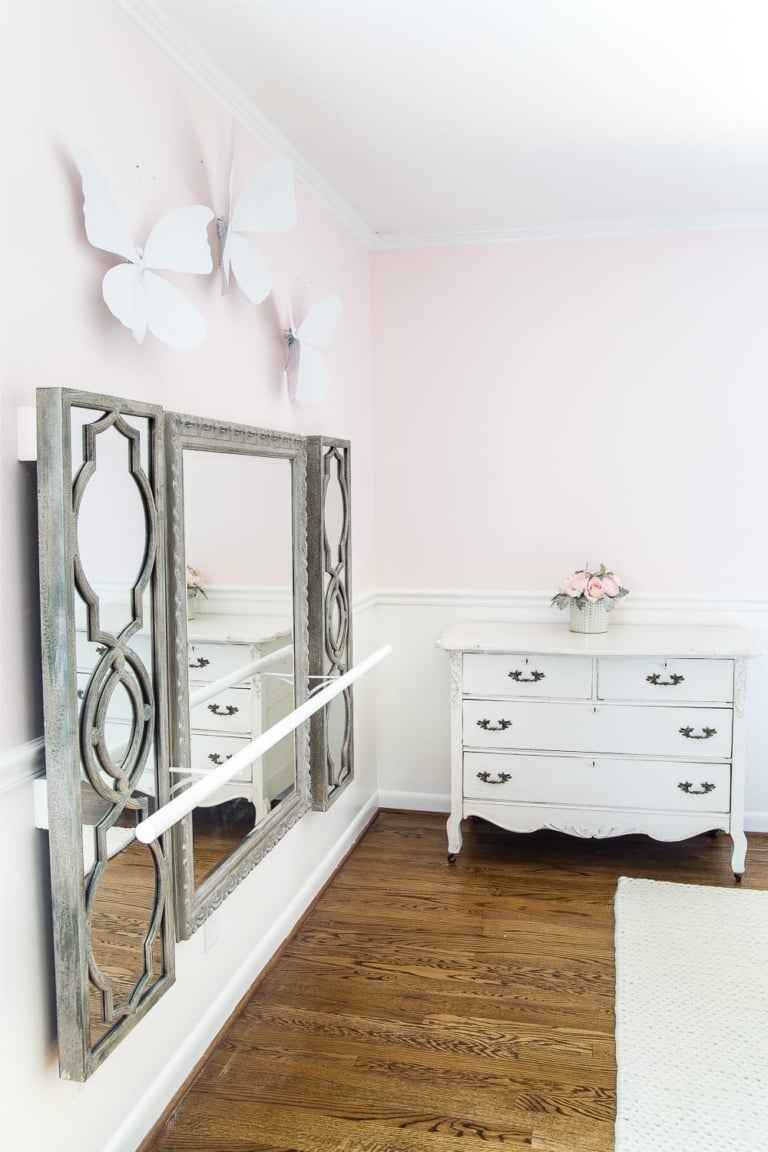
So now we have this action going on:

The gray definitely coordinates much better with our nightstands and rug now. I still walk into this room and get surprised by it.
You can check out more about all of the projects and makeovers that went into our master bedroom here:
- Master Bedroom Design Plan
- How to Get Designer Paint Colors on the Cheap
- DIY Planked Board and Batten Focal Wall
- Quick and Easy Dresser Makeover
- 3 Tricks to Upgrade Plain Windows
- Choosing the Perfect Blue Vintage Rug
- DIY Metal Industrial Initial Sign
If you ever want to take on an upholstery painting project down the road, you can pin this post for future reference:

In other bedroom makeover news, our doors arrived, which you’ll probably be seeing more of next week. So Operation Sliding Barn Doors is on the horizon. Yippee to the ki yay! (‘Bout time.)
Oh, and you might be noticing some minor changes around here on this site soon. I’m working to make things more user-friendly for you guys like amping up the site’s loading speed and getting rid of some obnoxious ads. In a day or two, I’ll be adding a full home resource page to round up paint colors and decor items I’m frequently asked about so everything is in one place and easy to access.
If you’re a fellow blogger, I added a Blogging Resources page to the menu bar if you’re ever curious about any of the tools I use on the regular to keep this little blog motor running.
I always appreciate getting feedback from y’all, so tell me in the comments what you’d like to see around here or what changes you think should happen to make things easier for you. I love hearing from you guys!

Follow:
Facebook | Pinterest | Instagram | Twitter | Google+
Affiliate links are provided in this post. For more information, see my full disclosure here.


This is just beautiful Lauren. I love how the color just pulls everything together. It is so serene. I have a chair and ottoman I think I may tackle. Something I would like to know how to do is how to paint rugs. I have an area rug that I bought at a garage sale. It is in perfect condition but the wrong color. Would the same method work on a rug?
Thanks so much……love your stuff! May the Lord bless your day!
Mary
Thank you so much, Mary! You are so sweet! I have never painted a rug before, but I have seen other DIYers who have. Here are some ideas I found on Pinterest: https://www.pinterest.com/pin/138696863500655449/
Looks beautiful! I’m considering doing the same with a sofa bed that has an outdated tan and red geometric pattern but is in very good condition (its actually quite comfortable for sleeping!). Do you have any insights on how an upholstery fabric with a design might look after being painted, and coverage over red?
Go for it! This was my first attempt at painting upholstery really, but from other tutorials I’ve seen, the pattern will still show through. Here’s a good source that might help: https://www.pinterest.com/pin/35677022023875454/
I have to say at first I was a skeptic, but wow, amazing job looks great!
Thank you, Sandra! I was a little skeptical when I started it too. This one was on a wing and a prayer. 😉
Came out beautiful Lauren, the entire room is gorgeous! K
Thank you, Karen!
Love this post,what a great and daring diy and I can totally relate to going ahead with a project without hubby knowing. Looks awesome!
Haha! What hubby doesn’t know, won’t hurt him when it comes to DIY. 😉