
DIY IKEA Closet Hack Makeover With Billy Bookcases

A step-by-step tutorial and budget breakdown for using IKEA Billy bookcases to customize his & her bedroom closets, plus how they have held up after 4 years.

IKEA saves the day yet again for another brilliant, inexpensive storage hack, only this time in bedroom closets.
We have used IKEA furniture for built-in bookcases, built-in cabinets, home office storage, and pantry storage over the years, but our DIY IKEA closet hacks officially top them all.
There are so many amazing DIY IKEA PAX closet system ideas out there, but sadly the PAX system’s dimensions wouldn’t work in our tiny bedroom closet space. Using Billy bookcases was the perfect alternative solution to create our dream closet!
Update: We built these closet built-ins 4 years ago and they’re still holding up perfectly! We wouldn’t change a thing about them.

Why an IKEA PAX System Might Not Work For You
The more we tried to make the PAX units fit into our tiny closets, the more we realized we would be wasting more space than if we just attempted a different route. So we hauled our sad little truck filled with PAX unit boxes back to the store to exchange for this bookcase solution instead.
If you have a small closet where you want to create a built-in look but can’t make IKEA PAX wardrobes fit, this custom closet alternative using bookcases is a great way to create smart storage solutions and utilize as much space as possible.
For several years, we lived with these half-broken wire shelves with barely usable pieces, knowing they desperately needed a little help. There was no smart way to store smaller items in the top of the unit and all different sizes of shoes were just thrown on the floor.
This makeover tutorial is the best way to achieve the custom look and smart function in your entire closet for even cheaper than the PAX system!
How to Make a Custom IKEA Closet With Billy Bookcases
Supplies for a Reach-In Closet
- 1 – 31 1/2″ x 79 1/2″ Billy bookcase
- 1 – 15 3/4″ x 79 1/2″ Billy bookcase
- 1 – 31 1/2″ Billy extension
- 1 – 15 3/4″ Billy extension
- 8 – Skuggis hooks
- 2 – Pullout tie organizer racks
- 5 packs of Bumerang hangers
- 3 adjustable closet rods
- 1 – 1×4 MDF strip
- Finishing nailer
- Table saw (Any saw that can cut in a straight line will do 😉 )
- Caulk
- Paint color matched to IKEA white in satin finish
Total cost: $324 (not including the power tools we already owned)
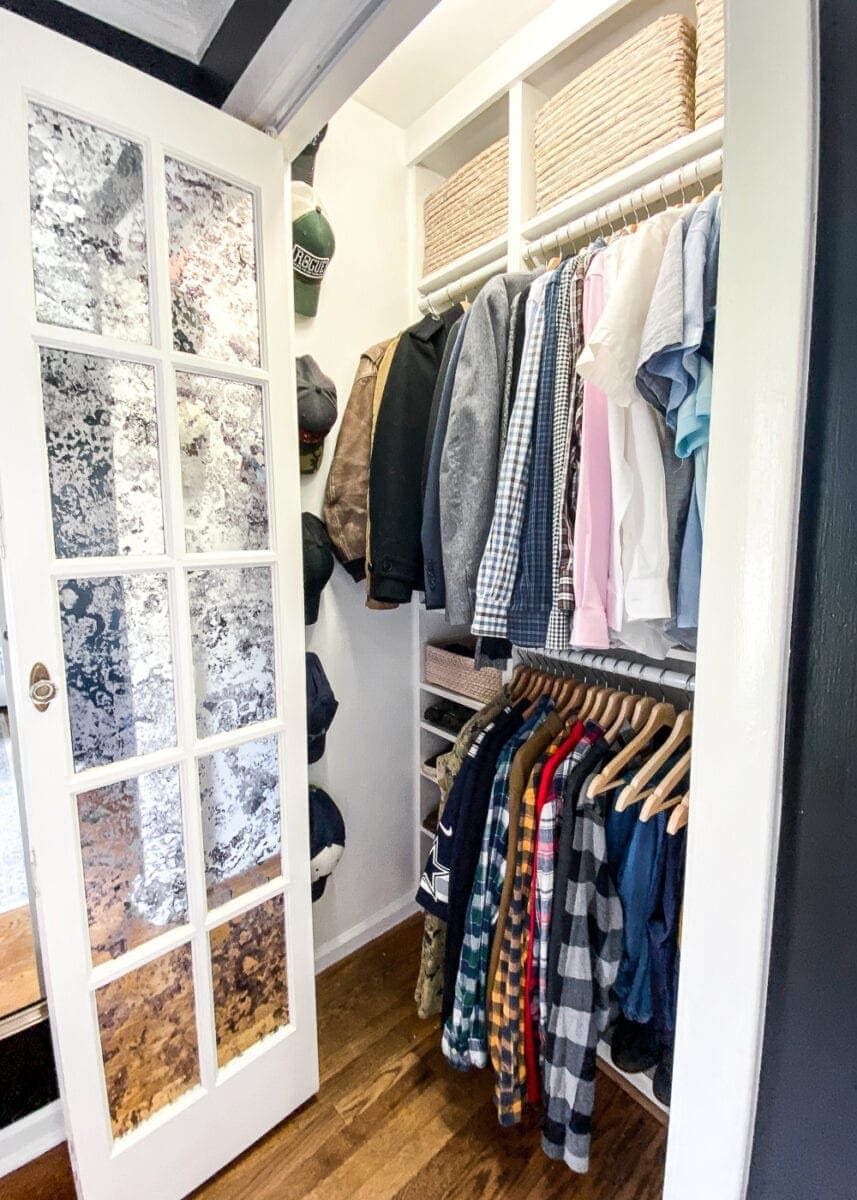
This was the before situation in Robert’s closet…

Steps for a Reach-In Closet
Step 1 – Empty Closet and Patch Nail Holes
First thing: Remove all of the old shelving from the whole closet, patch holes with spackle, and paint the walls.
Painting walls isn’t absolutely necessary, but it will look so much better with a fresh coat of paint. It will help eliminate any old musty smells too.
Related: Get the free Ultimate Closet Clean Out Cheat Sheet
Step 2 – Assemble Bookcases
We assembled the two Billy bookcases following IKEA instructions and placed them side by side in the closet. The bookcases were SO snug that we were just millimeters shy of the two not fitting in the closet together. Cheers for no wasted space!

Step 3 – Add Extenders and Anchor
For the next step, we added Billy extenders on top of the bookcases to use all of the space up to the ceiling height and anchored the bookcases to the wall.
Step 4 – Attach Trim Pieces
To close the small 1 inch gap between the top of the bookcases and the ceiling, we trimmed it all out with the 1×4 MDF strip, cutting trim boards with a circular saw and attaching it like crown molding with a brad nailer gun.

Step 5 – Caulk, Wood Fill, and Paint
We caulked all of the cracks, applied wood filler to nails holes (sanding smooth once dry), and painted over the caulk with the IKEA white paint color once the caulk was dry to make it all look like one seamless built-in closet.
Those final touches create a clean look.
(I’ve discovered that Sherwin Williams’ white base paint is a perfect match to white IKEA furniture. We got away with only painting over the caulk and feathering in paint over the wood filler. You don’t need to apply paint to the entire unit.)

Step 6 – Add Shelves and Small Storage Accessories
To finish, we placed the plastic brackets at the heights we wanted for shoe shelves. Then, we screwed in accessories like the closet rods, IKEA Skuggis wall hooks on the closet wall, tie organizer racks, and wooden Bumerang hangers.
Depending on your needs and available space, you can add other IKEA products like jewelry racks, small accessory dividers, or a pull-out denim bar. If you have room on the floor, it’s a good idea to add laundry baskets too.
Side note: We added baskets from the Container Store later to fit extra storage on the upper shelves and in the cubbies. The end result packed so much storage function inside this little closet!

Supplies for a Small Walk-In Closet
- 2 – 31 1/2″ x 79 1/2″ Billy bookcases
- 2 – 31 1/2″ Billy extensions
- 1 – 19 5/8″ x 22 7/8″ x 92 7/8″ Pax wardrobe frame
- 2 – 19 5/8″ Komplement drawers
- 2 – 19 5/8″ Komplement shelves
- 1 – Komplement pull-out multi-use hanger
- 4 – Skuggis hooks
- 4 – 1×4 MDF strips
- 4 adjustable closet rods
- 5 packs of Bumerang hangers
- 3 inch L brackets
- Finishing nailer
- Table saw (really any saw that can cut in a straight line will do 😉 )
- Caulk
- Paint color matched to IKEA white in satin finish
Total cost: $464.50
Here is my (very) small walk-in closet before. It barely even counts as a walk-in honestly.

(Don’t ask why on earth I had a bouquet of flowers up on my top shelf. I have no idea.)
Steps for a Small Walk-In Closet
Step 1 – Empty Closet and Patch Nail Holes
After doing all of the prep work of wire shelf removal, spackling, and painting in my closet too, we built the 1 IKEA Pax unit we could fit and moved it into the back recession of my closet.
(Mine is an L shape but it’s extremely tight and would barely be considered a walk-in, so the Pax frame made the most sense in my closet’s back niche for hanging long dresses.)

Step 2 – Assemble Bookcases to Fit
We built the 2 Billy bookcases and placed them side-by-side with a 12″ large gap in between them.
Step 3 – Add Extenders and Anchor
Then, we added the Billy extenders on top of the bookcases to use all of the space to the ceiling. Next, we anchored the bookcases and Pax frame with the back of the units nailed into studs in the walls.

Step 4 – Built Shoe Shelves Out of Large Gaps
To make a skinny shoe shelf out of the 12″ gap between the two Billy bookcases, we used some of the Billy shelves to cut with the table saw and frame out like its own bookcase using 2″ L brackets.
If you don’t own a table saw, a circular saw or miter saw will work too.

Step 5 – Attach Shoe Shelves
We cut more Billy shelves to create shoe shelves in the skinny bookcase we made from the 12″ gap, attaching the shelves to the two Billy bookcases with the nail gun.
Step 6 – Trim Gaps
To close the small 1 inch gap between the top of the bookcases and the ceiling, we trimmed it all out with the 1×4 MDF strip. And we did the same to the Pax frame on the top and sides to make it flush with the walls.

Step 7 – Caulk, Wood Fill, and Paint
Then, we caulked all of the cracks, filled nail holes with wood filler (sanding once dry), and painted over the caulk with the IKEA white paint color once the caulk was dry to make it all look like one seamless built-in closet.

Step 8 – Add Small Storage Accessories
The rest was just screwing in accessories like the closet rods, Komplement drawers/shelves, Skuggis wall hooks, and wooden Bumerang hangers.
We later added two different types of baskets as that was our solution for not having any drawers so that we can store out-of-season clothes and accessories in them.
Truthfully, we don’t miss having drawers at all, and I do still have a couple of drawers in my closet with the one Pax frame we were able to use.

Finished IKEA Billy Bookcase Closet
I am SO excited to see how this has all come together and this Plan B with the Billy bookcases has worked out perfectly to help us maximize even more space than what we had originally planned and with what we had before using the wire shelves.
This DIY was so simple. The hardest part was actually sorting through my mountain of clothes to place them all nicely in the finished closet.
Side note: How cute are these DIY mirrored French bifold closet doors we customized?

Bedroom Closet Organizing Tips
Once you’re finished building your closet, here are some smart organizing tips to take your bedroom closet to the next level.
- Keep clothing color coded by sorting pieces in rainbow order
- Group clothing by type and season
- Turn around hangers as you fill the closet. Turn the hanger the right way once you wear an item. At the end of a year, donate what hasn’t been worn.
- Store most used items at eye level.
- Use matching hangers.
- Utilize shelf dividers.
- Use multi hangers to take advantage of vertical space.
- Add lighting. (We love these wireless motion sensor LED lights.)

More DIY IKEA Hack Ideas
If you want more ways for using IKEA furniture as storage, here are some creative ideas.
30 Genius DIY IKEA Closet Ideas


Follow this step-by-step to build a DIY IKEA closet system with Billy bookcases.
- Empty Closet and Patch Nail Holes
First thing: Remove all of the old shelving from the whole closet, patch holes with spackle, and paint the walls.
Painting walls isn’t absolutely necessary, but it will look so much better with a fresh coat of paint. It will help eliminate any old musty smells too. - Assemble Bookcases
We assembled the two Billy bookcases following IKEA instructions and placed them side by side in the closet. The bookcases were SO snug that we were just millimeters shy of the two not fitting in the closet together. Cheers for no wasted space!
- Add Extenders and Anchor
For the next step, we added Billy extenders on top of the bookcases to use all of the space up to the ceiling height and anchored the bookcases to the wall.
- Attach Trim Pieces
To close the small 1 inch gap between the top of the bookcases and the ceiling, we trimmed it all out with the 1×4 MDF strip, cutting trim boards with a circular saw and attaching it like crown molding with a brad nailer gun.
- Caulk, Wood Fill, and Paint
We caulked all of the cracks, applied wood filler to nails holes (sanding smooth once dry), and painted over the caulk with the IKEA white paint color once the caulk was dry to make it all look like one seamless built-in closet.
- Add Shelves and Small Storage Accessories
To finish, we placed the plastic brackets at the heights we wanted for shoe shelves. Then, we screwed in accessories like the closet rods, IKEA Skuggis wall hooks on the closet wall, tie organizer racks, and wooden Bumerang hangers. Depending on your needs and available space, you can add other IKEA products like jewelry racks, small accessory dividers, or a pull-out denim bar.


I think your ideas and implementation are fantastic! How inspiring!
Seems to me you could get even more space by getting rid of the closet door & having a tasteful cloth “door” you could slide back & forth.
I think it would look rather awkward I feel the way they have completed the task has made it look professional if they put a piece of cloth it would look cheaply done
I dunno. I have to see the finished project. It still seems like you both have very little hanging rod space. Maybe it’s just me, but I need more hanging space. I hang all my pants on long clip hangers vs folding them in half. And I have lots of dresses, so I guess that’s why closets need to be personalized and custom if possible.
I do realize those are very small closets though. I’m glad it works well for you. Although I’d certainly go with the small black velvet hangers vs. those big bulky wooden ones. We’ve done closets in homes before using them, and the homeowners are amazed at how much more space they end up with! Just a thought…. 🙂
I too feel I needed to see the finished project…clothes and all. As far as your dresses and hanging pants go, you can remove or adjust shelves to fit your needs. I wished I had saw this hack before we tried to custom build shelves in my daughters closet. We did a fair job, but this would have been much easier and less cutting and trying to figure things out. What I did notice is that these book shelves are only 11″ deep. We made our daughters closet shelves 12″ deep. One more inch back the hanger is almost touching the back wall. I guess we could pull the bookcase forward an 1″ and forgo the back panel. The expensive shelving systems I’ve seen don’t have a panel in the back anyways. It could work if you don’t mind the 1″ gap in the back;.
You could always add trim around that gap to hide it
What paint(brand, sheen, oil/latex) and color do you use to match Ikea cabinets? Everything looks amazing!!!
We used Sherwin Williams Pro Classic in satin in Sherwin William’s standard white base. I’m not 100% sure their base matches all of IKEA’s white furniture, so to be safe, you could take just a shelf into SW to them color match it. Thank you!!
Hi Lauren
I love all your clever organizational, decorating and inspirational ideas. I will hopefully be tackling closets soon and I love the idea of using the IKEA Billy bookcases. The pax system is very nice but pricey. Question where will you hang full length clothing (e.g. dresses). ?
Thanks, Cindy! It’s so hard to photograph and to see but my closet is an L shape, and in the very back corner, we managed to fit one skinny Pax unit that’s long enough for dresses. I might go back and edit this post to add a diagram sketch of my closet’s shape since I realize that’s hard to envision. It’s a tight squeeze in there.