
Weathered Oak Dining Table Makeover
A thrifted banged up dining table gets a quick and simple weathered oak finish for a high-end designer look. This tutorial shows you how.
There are some mornings when I wake up and my brain says, “You need to paint something today.” Even before my first cup of coffee. I mean… my body isn’t usually as energetic as my brain at 8 a.m., but once it wakes up too, there’s no stopping that need to beautify something.
After a huge list of obligations keeping me from the DIY scene for the past few weeks, I was just itching to get my hands on a piece of furniture. And the first thing I thought of was our dining room table.

DIY Restoration Hardware Wood Finish
We bought this little guy from Craigslist two years ago shortly after we first moved in, and I always knew I wanted to do something to it… I just couldn’t figure out what. It originally came from Pottery Barn that we scored for $250.
The wood was mostly pretty to begin with, but it had seen better days. Whenever I get stuck in a creative rut, I look around on the high-end home furniture and decor sites to see if I can mimic their looks in my own inexpensive way.
And then one day, I came across this table at Restoration Hardware. All it cost was an easy breezy $1500. Ha! Nope. Not happening. But I finally had the style I’d been looking for.
Supplies
(Affiliate links are provided below for convenience. For more info, see my full disclosure here.)
- Mouse Sander (I use this trusty sander ALL the time.)
- Course grit sanding sheets
- Safety glasses
- Sanding respirator mask
- Minwax Weathered Oak stain
- Minwax Polycrylic Matte
- 2 foam brushes (to apply stain and polycrylic)
- Several dry, lint-free rags
- Annie Sloan Chalk Paint in Pure White
- 1 angled paint brush (This one is my favorite for any and every furniture painting project.)
Steps
I avoid varnish stripper like the plague, thanks to a couple of really horrible disasters, so I decided to sand the layer of varnish and stain off of the table top instead.
At this point, I’d been sanding for over an hour.

And after three hours it looked like this. Thanks for the arm workout, little sander.

FYI, our dining room had a layer of sanding dust after it was all over, but it was nothing a vacuum and duster couldn’t fix. (This is what happens when I get impatient and can’t wait for Robert to get home from work to help me move furniture.)
Then, the fun part!
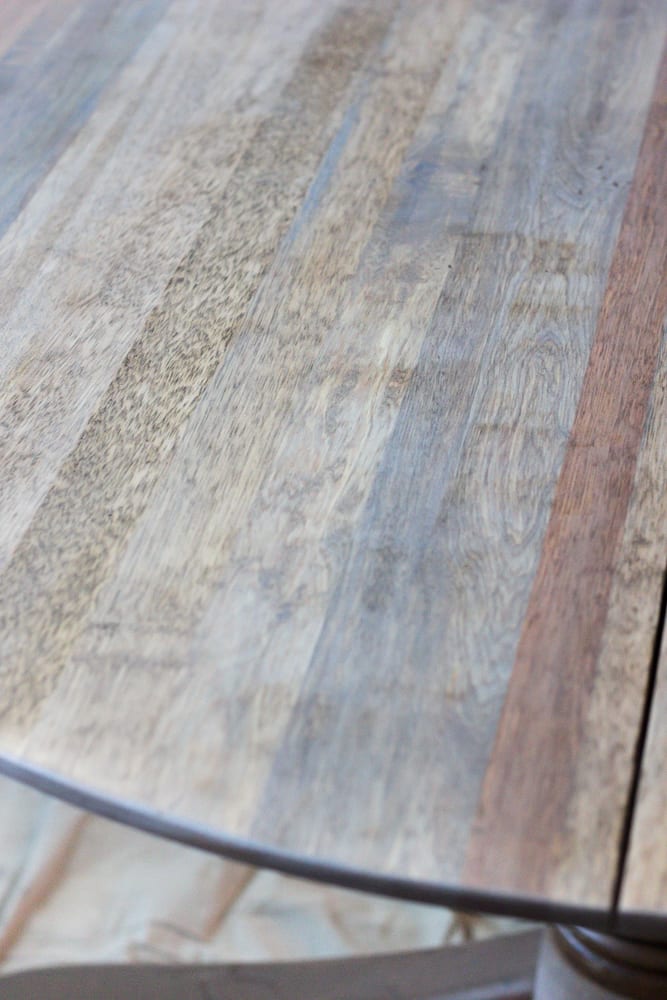
I’d used this beautiful weathered oak stain on Olivia’s vintage schoolhouse desk a few weeks ago and fell in love, and I was so excited to turn out even better on this table. This is definitely not a dark stain, but I low how it enhances the wood and shows off its natural character.

I worked in quadrants by brushing on the stain with a foam brush on one quarter of the tabletop, waiting a minute, and wiping back using a clean rag. Then, I’d move on to the next section.
The right side of the table in this shot is just stained/wiped, the top of the left side had just been brushed with stain, and the bottom of the left side is still bare wood, to give you an idea.

The stain lightens a good bit once it is dry too.
I heart all of the pretty, subtle light brown and gray wood tones this stain brings out.
I applied two coats of the stain, following the directions on the back of the can.
Then, the next day, I added three thin coats of polycrylic to keep it all pretty. We’re not all that rough on this table since we only use it on occasion, but if you ever makeover a table that takes a lot of frequent wear and tear, polyurethane might be your better bet.

I ended up painting the base with two coats in the ASCP Pure White too. I debated distressing the white a little bit, but I left it alone since we already have a lot of other distressed pieces around it.

Now, our dining room is feeling much more finished. And every single thing in this room was a DIY project (all listed at the bottom of this post), except for this jute and denim rug I just picked up. I kind of love that it has a casual vibe to keep the rest of the more formal furniture in here from feeling too stuffy.
It hopefully distracts from the fact that we have carpet in here too, which I’m not a big fan of for a dining space.

Hold on a sec… can we just ooh and ahh over how far this room has come in two years?

My photography has gotten a smidge better too, but we won’t even go there. 😉
I think I’m ready to stain everything with weathered oak now. Who’s with me on this?

If you want to check out the sources of any of the other DIY projects in our dining room, here are all of my previous tutorials/sources:
- DIY Rope Chandelier
- DIY No-Sew Upholstered Dining Chairs
- French Provincial China Cabinet Makeover
- DIY Craftsman Window Trim
- Ticking Stripe Curtains
- Jute and Denim Rug (I searched everywhere and Amazon sold it the absolute cheapest.)
- Large Windowpane Lantern
- Shutters (Free from junking in my in-laws’ barn)
- Dishes/silver (Inherited from my great-grandmother)
The grand total for this dining room, so far, is $925! Trading Spaces would approve. Sigh… I miss that show so much.

More DIY Ways to Create the Look of Weathered Wood
- Best Deck Stain Color for a Neutral Driftwood Look
- DIY Faux Driftwood Outdoor Dining Table Makeover
- Painted Weathered Wood Bed Makeover
I’ve thought about one day putting floor-to-ceiling board and batten in here, but we currently have a bigger job on our plate… like that still empty playroom that’s mocking me right now.
Now that we’re getting into the fall/winter when we have more holidayish gatherings, we’ll be so glad our dining table is looking spiffy. And thankfully the creativity-craving beast in my brain is fed for now.
What are y’all staining/painting/tweaking these days? Got a creative brain of your own that you have to feed every once in a while? Spill!
And if you want to save this post to try out later, you can pin it here:


Love the table. I’m wanting to restain my honey coloured pine dining table. Just wondering if you sanded between staining and/or before vanishing. I have a friend who restained and varnished her table and wasn’t happy with the result because it isn’t smooth. She sanded really well but after staining the table felt a little rough. Any ideas? Thanks, Katherine
Thanks, Katherine! So to answer your question, I did not sand between staining coats but I DID sand between each polycrylic coat per the instructions on the back of the can. You have to apply a very thin coat of polycrylic with a good bristle brush or foam brush to get it smooth and even and sand with fine grit (220) between each coat once it’s dry. Also, you should try to avoid overbrushing as it dries really quickly and can get uneven that way too. It could just be that she applied her coats unevenly or too thick. In the beginning, as I was learning how to stain, I waited way too long before wiping the excess stain too. Usually 1-2 minutes is all it needs. Sometimes I even wipe immediately on the first coat after applying since some stains react differently than others to the wood and seep in faster. It does take a little bit of practice. So if your friend is extremely unhappy, even though it’ll probably be more effort than she wants, she can always take the coarse grit sander to it and refinish with thin coats to get it right. I’ve messed up on it before too. It’s not at all fun but worth it.
I’ve been waiting for someone to inspire me to paint my kitchen island with white chalk paint and stain the top. You have done just that! Your table is beautiful.
One last thing I must say. . . Oooh Aaaaaaahhhhhh.
Yay! So glad it could help, Judy! Thank you for the love. 🙂
Oh yes!!! I did not know it could look so grayish if it was oak!!!! You really know how to budget plus diy!!! Reminds me a bit of me when I was young? Today I felt radical finally dumping every single item anyone has shoved under the guest bathroom sink and I just ignored it….well I was injured when the last moved out so I do give an excuse. But it was my workout and purging!! Oh and from a cupboard. I found new sponge curlers!!! Recycle. I think I like your time on a project results a whole lot better!!!!! Sigh!!! Gorgeous
Oh gosh, Gwen. You just reminded me I reeeeaaaally need to do the under bathroom sink organizing too. That might have to be a post in the near future. Want to just come over and do that for me? Haha! 😉 Thanks for the love on our table!
The new top takes this table to a new level, so great.
Thanks, Heather! We’re really loving it. Just noticed you’re from Ole Miss! I saw in an article yesterday that there is some major home decor competition going on in the dorms there. 😉
Oooh, aaaaahh!! It came out amazing! I have some of that colored stain and this weekend I was redoing an old antique chair and just touched a spot with it and it seemed too light, so I went a little darker. Now seeing how it dries with such a beautiful grayish color, I so wish I would’ve stuck with it!! But the chair still came out nice. Thanks for showing this color, now I know what I’ll use next time for sure!
I have a question about staining tho, I’m fairly new to all of this refurbishing, recovering, sewing and just everything in general. I had to go on Disability Retirement 6 years ago at the age of 43 and I loved my job! But…on my good days, I was finding myself crazy bored and didn’t want to go all Looney Tune crazy from it, lol. Anyway, when you put your stain on, how do you do it? With a brush, a foam brush or a cloth?
Thanks so much and keep doing what you do~I love and look forward to your posts every day!
Blessings,
Candy