
The Trick to Paint Laminate IKEA Furniture
A 3 step tutorial for painting laminate IKEA furniture to prevent peeling and scuffs and to make your painted finish last for a custom look.
This is one of those the-more-you-know kind of moments. The post that preaches do-what-I-say-and-not-what-I-do after learning it from the school of hard knocks.
If you’ve hung around this blog for a while, you’re probably fully aware that we have a straight up Stage 5 clinger infatuation with IKEA.
Like these built-in bookcases:

And this dresser:

And this massive shelving system:

And this plate rack:

You get the picture.
I frolic through the mouse maze of build-it-yourself furniture and make corny puns at all of the Swedish names I can’t pronounce. Good times.
But besides putting your inner-child’s past LEGO building skills to work to put together a basic dresser, there’s one thing they don’t warn you about… painting it.
We’re currently working on a pretty big kitchen project that involves an IKEA cabinet to implement pantry storage that we so desperately need. (More on that later.)
Would you like to save this?
And I realized I’m asked quite a bit from some of y’all how to paint IKEA furniture without it peeling off of the laminate finish. So DUN DA DA DUUUUUUN (sung in my best super hero voice)… here we are to save the daaaaaaay!
How to Paint Laminate IKEA Furniture:
Supplies:
(Some affiliate links are provided below. Full disclosure here.)
- Liquid Deglosser
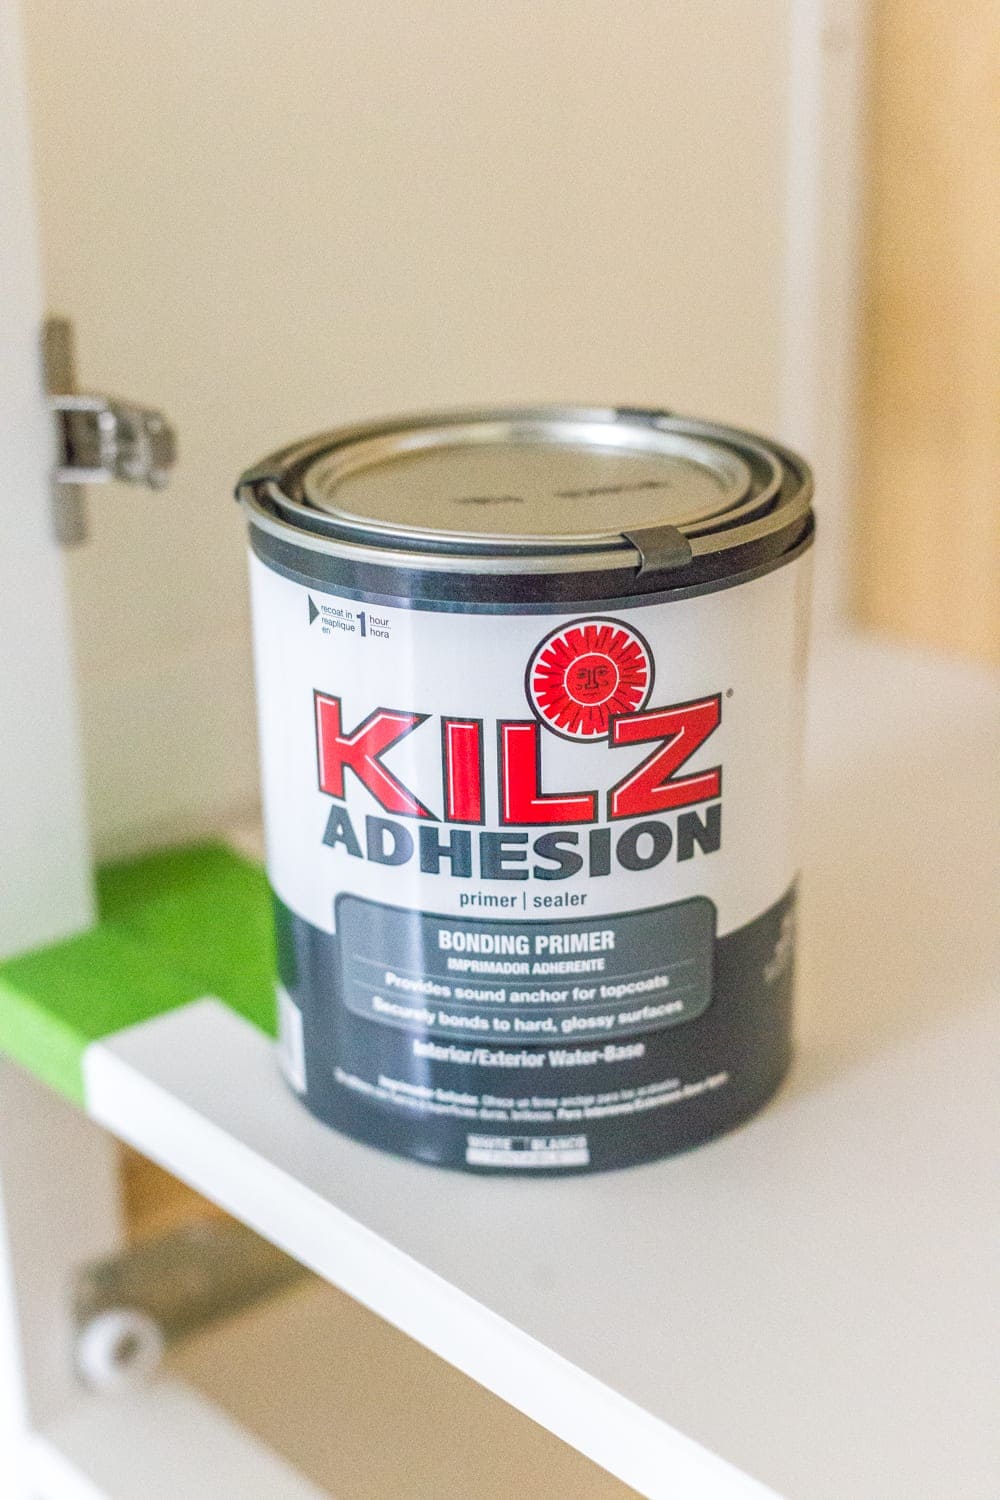
- Kilz Adhesion primer
- Benjamin Moore Advance paint (or your preferred brand of enamel-based paint formulated for cabinets/trim)
- A clean, dry rag
- Paint brush and/or mini roller (or a paint sprayer if you want a super smooth, professional looking finish)
The Steps:
1. It’s best to paint all of the pieces before assembly, but that’s up to you really, since it will prolong drying time. Wipe down your pieces with liquid deglosser on a clean rag first and let air dry for about 10-15 minutes.

2. Using your application method (paint, roller, or sprayer) apply a coat of Kilz Adhesion primer. If you are painting your pieces prior to assembly, flip your pieces to the other side and repeat.
3. Once the primer coat is dry, paint/roll/spray your enamel-based paint onto the primed surfaces. Depending on your color choice, you might need to apply a second coat.

That’s it! I know it’s a total pain to go through the prep steps, but it’s so totally worth it. And I only know this because we’ve skipped the prep work before on some of our previous IKEA makeovers and lived to regret it.

I cannot WAIT to show y’all this kitchen wall pantry cabinet once it’s all finished because it’s looking sooooo good over here. See that little bit of green I’ve started painting on? Eeeeek! Dying already!
But until then, I hope this helps!
If you want to save this post to reference later, you can pin it here:


